Select a block of text, or enter text creation mode, to display the Text toolbar. When you are creating a balloon, a modified version of the toolbar is displayed, which contains only those options that can be used for balloon text.

Use the toolbar options to edit the style of the selected text:
 — Choose the font from the drop-down list.
Height — Enter a value, or select from the drop-down list, to specify the height of the characters.
If you change the height of a whole block of text, the line spacing of the text block adjusts. If you change the height of just a few characters in a block of text, then only the spacing of the lines containing that text adjust.
 — Make text appear in bold.
 — Make text italic.
 — Underline text.
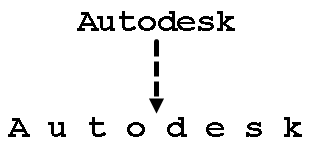
Pitch — Enter a value to specify the spacing between individual characters. Pitch is a multiple of the character height.
For example, the pitch of the following text has been increased from 0 to 1. The characters move further apart:

Spacing — Enter a value to specify the spacing between lines in a block of text. Spacing is a multiple of the character height.
Angle — Enter a value to specify the angle of the text, measured from the horizontal.
Counter (Balloons only) — Use the drop-down list to assign a counter label to each balloon.
 — Select an option from the drop-down list to specify the text justification:
-
 — Left justification
-
 — Centre justification
-
 — Right justification
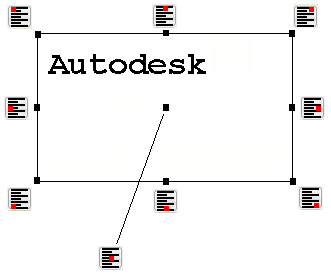
 — Select an option from the drop-down list to specify the origin of the block of text.
The origin anchors the text block to the text position. Text is created relative to that anchor.
When you enter new lines of text, the text block moves such that the origin and text position always coincide.
There are nine origin positions:

 — Filter your selection, so that only text can be selected.
 (Balloons only) — Create a balloon with a leader.

 — If text contains a number, use these options to decrease or increase the decimal places by 1.
Character — Add special characters.
 — Use text substitution strings to represent commonly used pieces of text, such as model names, when inserting text into a model.
Select this option to display the Text Substitutions dialog, and add text substitution strings in the same way as adding a general property to a drawing template.
You can also use substitution strings that are specified by the File Properties dialog.