To create a block of text:
- Click Annotation tab > Text panel, and choose from:
- Horizontal
- Vertical
The cursor changes to show that you are in text creation mode, and the Text toolbar is displayed.
You can use the options on the toolbar to specify the default style of the text created.
- For example, select Vertical.
- Click a position in the graphics window where you want the text to lie.
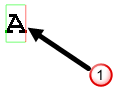
An insertion point appears in the shape of a bar cursor. This is the position where PowerShape will create the text. If you have selected vertical text, then the insertion point is horizontal.
- Type in the text.
The individual characters are horizontal, as shown below:

- Select Annotation tab > Text panel > Horizontal to switch to creating horizontal text.
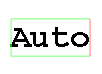
- Type in the text.
As you type each character, it is displayed on the screen and a rubber-banded box starts to form around the text. The insertion point moves to the end of the character
 .
.
 Note: When the rubber-banded box is displayed around the text block, you are in text insertion mode and can type in new text.
As you enter more characters, the rubber-banded box enlarges to enclose the new characters.
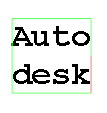
- To create a new line of text, press
Enter.
The rubber-banded box extends to enclose the second line too and the insertion point moves to the start of the next line.
 Note: The bottom left corner of the rubber-banded box remains at the position you enter in Step 5.
 - Continue typing.
 Note: At any time during the creation, you can change the style of the text using the Text toolbar.
You can also change the default settings for text using the Options dialog. For further details, see Changing the default settings for text.
- To exit text creation mode, click
 on the Quick Access toolbar.
For further details, see Editing text. If you click again, you can start creating a new block of text.