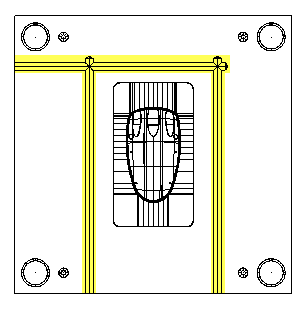
You can use the Cooling wizard to create cooling channels in your mold. Cooling channels allow for circulation of a coolant through your mold, ensuring uniform and rapid cooling. Example cooling channels are highlighted in the mold below:

To start the Cooling Wizard:
- Make sure the Z axis of the current workspace runs vertically through the mold plates.
- Click Wizard tab > Mode panel > Toolmaker On/Off to run Toolmaker.
- Click Wizard tab > Create Molds panel > Cooling. The first page of the
Cooling Wizard is displayed.
Note: You can re-run the Cooling Wizard; any existing cooling holes in the selected mold components are re-read into the wizard. You can then modify them and they will be updated when the wizard closes. The layout wireframe will be re-created for the existing holes and new holes can be created.
- Select the items for cooling using the Select mold items page of the wizard.
- Set the default hole size using the Set default hole sizes page of the wizard.
- Sketch the desired flow of the coolant using the Sketch flow page of the wizard.
- Check the holes using the Error checking page.
- Define the layout piece lines and error curves to be saved using the Save options page of the wizard.