The Ink 'n Paint material creates cartoon effects. Rather than the three-dimensional, realistic effect most other materials provide, Ink 'n Paint provides flat shading with “inked” borders.
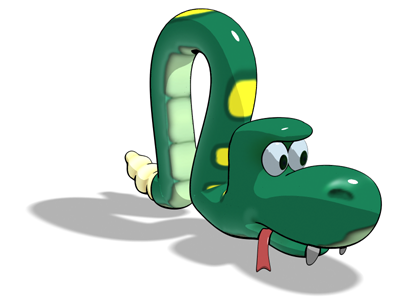
Snake rendered with ink 'n paint
Because Ink 'n Paint is a material, you can create a scene that combines 3D-shaded objects with flat-shaded cartoon objects.
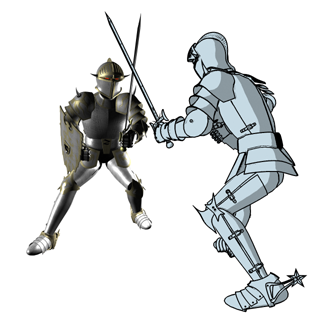
Rendering that combines realistic shading with cartoon shading
In the Ink 'n Paint material, ink and paint are two separate components, with customizable settings.
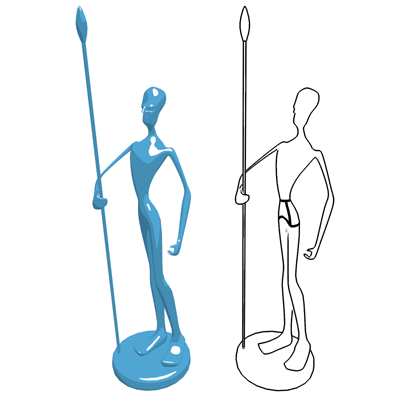
Left: The paint component only
Right: The ink component only
Using Ink 'n Paint
You can use Ink 'n Paint on multiple objects, but in general, it tends to work best if you do the following:
- Collect the objects for cartoon rendering into a single surface model such as an Editable Mesh.
- Assign different
material ID values to portions of the model you want to color differently.
Typically, you would do this at the Element sub-object level, although you can certainly apply different material IDs to faces and polygons as well.
- Create a
Multi/Sub-Object material. In it, create a sub-material for each of the colors in the model. Make each sub-material an Ink 'n Paint material, then assign colors and maps using each sub-material's Paint controls.
If necessary, adjust the Ink controls as well.
Troubleshooting
Here are some commonly encountered problems, and potential solutions:
- Internal ink lines are missing.
The Overlap bias is probably too high. Decrease it. If Underlap is on, this might also have too high a bias.
Another possible reason is that you have a self-intersecting object, or an object built by attaching smaller objects, thus creating intersecting faces. In this case, set up the objects to use the Mat ID or SmGroup ink components. If elements already have differing material IDs, try turning off Only Adjacent Faces.
- Ink looks sloppy on sloping parts of the object.
The Overlap or Underlap bias might be too low. Try increasing it.
- Ink looks sloppy between interpenetrating objects.
Find out which ink component is the sloppy one and adjust its bias control.
- Ink lines disappear or are too narrow when Variable Width is on.
Turn on Clamp. You can also try to see if reducing the lighting level helps. Or, you can try turning off Variable Width, then assigning a Falloff map to the Ink Width component.
Interface
Basic Material Extensions rollout

- 2-Sided
-
Makes the material 2-sided. Applies the material to both sides of selected faces.
- Face Map
-
Applies the material to the faces of the geometry. If the material uses maps, it requires no mapping coordinates. The maps are applied automatically to each facet of the object.
- Faceted
-
Renders each face of a surface as if it were flat.
- Fog BG when not painting
-
When the Paint is disabled (that is, the Lighted toggle is off), the painted areas of the material are the same color as the background. This toggle, when on, lets the background in paint areas be affected by fog between the camera and the object. Default=off.
- Opaque alpha
-
When on, the alpha channel is opaque even when the Ink and Paint components are disabled. Default=off.
- Bump
-
When on, enables the Bump map. Use the numeric setting to control the bump amount and the map button to assign a Bump map.
- Displacement
-
When on, enables the Displacement map. Use the numeric setting to control the displacement amount and the map button to assign a Displacement map.
Paint Controls rollout
Paint is the main color of the material, and has three components. This section describes the components first and then their common controls.

- Lighted
-
The fill color for the lighted areas of objects. Default=light blue.
Turning off this component makes the object invisible, except for the ink. Default=on.
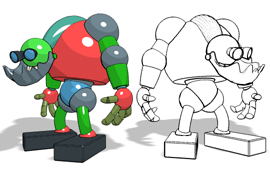
Left: A lighted character
Right: Lighted and Highlight both turned off to render only the ink
-
Paint Levels The number of shades of color that are rendered, from light to dark. Lower values make objects look flatter. Range=1 to 255. Default=2.
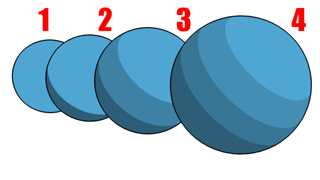
Increasing the value of Levels increases the number of shades of the basic color seen in the lighted area.
-
Paint Levels The number of shades of color that are rendered, from light to dark. Lower values make objects look flatter. Range=1 to 255. Default=2.
- Shaded
-
The first numeric setting is the percent of the Lighted color that appears on the unlighted side of objects. Default=70.0.
Turning off this component displays a color swatch, which you can use to assign a distinct color to shaded areas. Default=on.

Increasing the value of Shaded increases the saturation of the shaded area. You can also use Shaded to assign a distinct color for shading.
- Highlight
-
The color of the specular highlight. Default=white.
When this component is off, there is no specular highlight. Default=off.
Tip: A specular highlight can destroy the illusion of 2D. Use this component sparingly.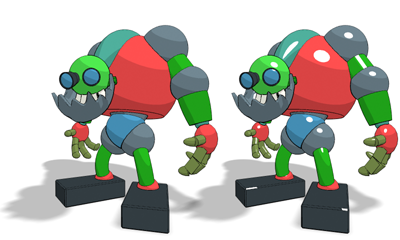
Left: No highlights
Right: Highlight on
-
Glossiness The size of the specular highlight. The greater the Glossiness, the smaller the highlight. Default=50.0.
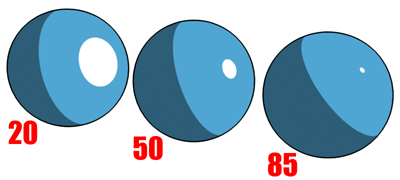
Increasing glossiness decreases the size of the highlight.
Color component controls:
These are the controls that are duplicated for each of the paint components. Each has an on/off toggle, a main control, and then on the right, a set of map controls.
- Check box The checkbox at the left of the rollout enables or disables that particular component. In the case of Shaded, it toggles between a percentage value (of the Lighted color) or a distinct Shaded color.
- Color swatch or spinner The main control for each component. Click a color swatch to display a Color Selector and set the color of the component. In the case of Shaded, this control can also be a percentage spinner.

-
Map spinner The spinner to the right of the main control is the percentage of the map to use. At values less than 100.0, the map is blended with the assigned color. Default=100.0.
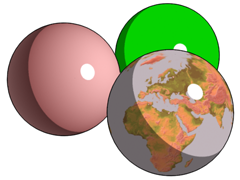
Mapping the Lighted component:
Right rear: The original, unmapped material
Left: Lighted component with a Falloff map applied
Right front: Lighted component with a Bitmap map applied
- Map checkbox The checkbox between the spinner and the button enables or disables the map. Default=off until a map is assigned, then on.
-
Map button Click to assign a map to this component.
While a map is assigned and enabled, at 100 percent it completely overrides the main color component. At lower percentages, the map is blended with the color.
-
Glossiness The size of the specular highlight. The greater the Glossiness, the smaller the highlight. Default=50.0.
Ink Controls rollout
Ink is the linework, the outlines, in the material.
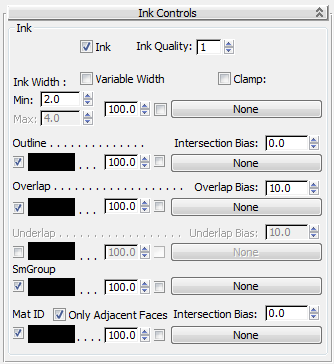
Except for Ink Width, each of the ink components has an on/off toggle and a color swatch. Click the color swatch to display a Color Selector and change the ink component's color. Each ink component, Ink Width included, also has a set of map controls.
- Ink
-
When on, the rendering is “inked.” When off, no ink lines appear. Default=on.

Left: Rendering with ink
Right: Ink turned off
- Ink Quality
-
Affects the shape of the brush and the number of samples it uses. When Quality equals 1, the brush is a “+” shape, and samples are taken over an area of 5 pixels. When Quality equals 2, the brush is octagonal and the samples are taken over an area of 9 to 15 pixels. When Quality equals 3, the brush is nearly circular, and samples are taken over an area of 30 pixels. Range=1 to 3. Default=1.
Tip: For most models, increasing the Quality value introduces only a very subtle change, and can take considerably longer to render. Do so only when a sub-object's ink shows too many artifacts in the finished rendering, using the default Ink Quality. (Don't rely on the ActiveShade preview, which tends to be aliased.) - Ink Width
-
The width of the ink, in pixels. This is specified by the spinner labeled Min (minimum) unless Variable Width is on. When Variable Width is on, the Max (maximum) spinner is also enabled, and the ink width can vary between the minimum and maximum values. Default: Min=2.0, Max=4.0.
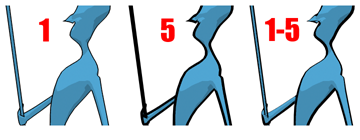
Left: One-pixel ink width
Middle: Five-pixel ink width
Right: Ink width varies from one to five pixels.
- Variable Width
-
When on, the ink width can vary between the minimum and maximum Ink Width values. Ink with Variable Width looks a bit more streamlined than ink with a constant width. Default=off.
The thickness of ink can be mapped.
Left: Thickness mapped with a gradient map
Right: Thickness mapped with a noise map
- Clamp
-
When Variable Width is on, sometimes the scene lighting causes some ink lines to become so thin they nearly disappear. If this happens, turn on Clamp, which forces the ink width to always remain between the Min and Max values, regardless of the lighting. Default=off.
- Outline
-
The ink where the outer edges of the object appear against the background or in front of a different object. Default=on.
Left: Rendering the outline only
Right: Rendering only the overlap and underlap
- Intersection Bias Use this to adjust artifacts that might appear when two objects intersect each other. In effect, this moves the inked object closer to the rendering point of view, or farther away, so Ink 'n Paint can decide which object is in front. Positive values push the object away from the point of view, negative values pull it closer. Default=0.0.
- Overlap
-
The ink used when a portion of an object overlaps itself. Default=on.
- Overlap Bias Use this to adjust artifacts that might appear in ink that traces the overlap. It says how far the overlap has to be in front of the rear surface for Overlap ink to turn on. Positive values push the object away from the point of view, negative values pull it closer. Default=10.0.
- Underlap
-
Similar to Overlap, but applies ink to the farther surface rather than the nearer one. Default=off.
- Underlap Bias Use this to adjust artifacts that might appear in ink that traces the underlap. It says how far the underlap has to be behind the front surface for Underlap ink to turn on. Positive values push the object away from the point of view, negative values pull it closer. Default=0.0.
- SmGroup
-
The ink drawn between the boundaries of smoothing groups. In other words, it inks the edges of the object that have not been smoothed. Default=on.
- Mat ID
-
The ink drawn between different material ID values. Default=on.
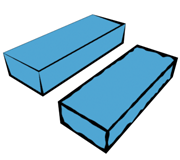
Tip: If two Ink 'n Paint materials overlap in the viewport, and both have Mat ID on, you will often get a doubly thick ink line where they overlap. To correct this, turn off the Mat ID component for one of these materials.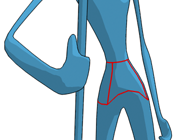
Inking the edges between sub-materials
- Only Adjacent Faces When on, inks the material ID edge between adjacent faces, but not between one object and another. When off, inks the material ID edge between two objects or other non-adjacent faces. Default=on.
- Intersection Bias When Only Adjacent Faces is turned off, use this to adjust any artifacts that appear at the boundary between two objects with different material IDs. Default=0.0.

- Map controls
-
There are map controls for each of the ink components: Width, Outline, Overlap, Underlap, SmGroup, and Mat ID. These work the same as they do for the material's paint components, as described preceding.

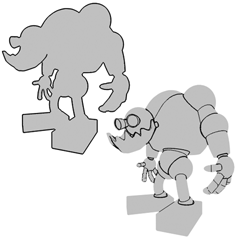
Using maps with the Outline and Overlap components to simulate the look of drawing on paper