Use this procedure to specify the default text format and placement for table columns and their contents. You can also specify the default symbol used in matrix schedules and for true/false values in regular schedules.
If necessary, you can override these settings for individual columns and table titles.
Note: Most schedule table styles provided by AutoCAD Architecture 2023 toolset have overrides applied to their titles and column headers. You can access these settings on the Layout tab in the Schedule Table Style Properties dialog box.
- Click
 .
. 
The Style Manager is displayed with the current drawing expanded in the tree view.
- Expand Documentation Objects, and expand Schedule Table Styles.
- Select the schedule table style that you want to change.
- Click the Default Format tab.
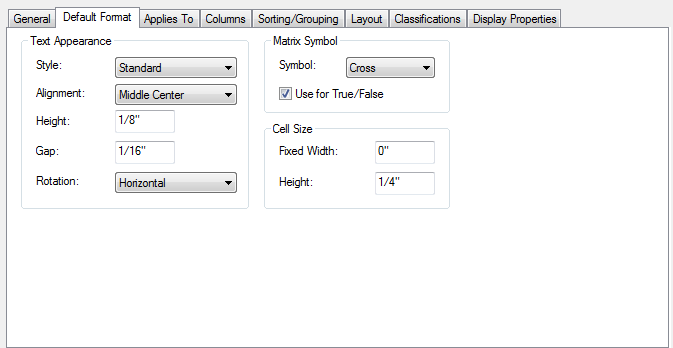
- For Text Appearance, specify the following:
- For Style, select an AutoCAD text style already defined in the drawing. To use a font other than those available from the drop-down list, you must first define an AutoCAD text style that uses the font.
- For Alignment, select positioning for the text.
- For Height, enter the text height that you want. Height is normally specified as the size you want to use when plotting the drawing containing the schedule.
- For Gap, enter the space between the text and the schedule table lines that you want. Gap is normally specified as the size you want to use when plotting the drawing containing the schedule table.
- For Rotation, select the desired orientation for text within cells. For the table title and group titles, Rotation also controls the orientation of these cells relative to the rest of the table.
- For Style, select an AutoCAD
- Select a symbol (Check, Dot, Cross, or Slash) for use in matrix columns and, optionally, for true/false values.
- Select or clear Use for True/False to control whether matrix symbols or the text in the property data format is used for true/false values.
- Enter a fixed width for all columns, or enter 0.0 if you want columns to adjust to fit the data within them.
Fixed Width is normally specified as the size you want to use when plotting the drawing containing the schedule table.
Note: Cell Size Height is a read-only field. Its value is calculated from the Height and Gap values. - Click OK.