Inspection Results reference
The Inspection Results window displays detailed information from imported machine-generated results files or recorded manual inspections.

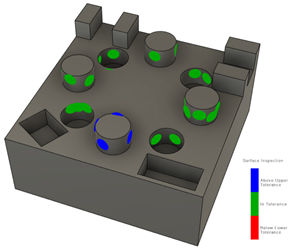
Inspect Surface
The colors of the surface inspection results show whether points are in or out of tolerance.

By default, Fusion uses the following color conventions:
 Blue means above the upper tolerance, indicating that not enough material has been removed.
 Green means in tolerance.
 Red means below the lower tolerance, indicating that too much material has been removed.
The window includes the following information:
- Nominal XYZ: The theoretical position of the point.
- Projected XYZ: The calculated position of the point based on where the probe touched the part's surface
- Contact XYZ: The actual position of the point where the probe touched the part's surface.
- Offset: The surface offset specified in the Inspect dialog.
- Delta XYZ: The difference in X, Y, and Z from the nominal position, or the projected position (if using projection), to the contact position.
- Deviation: The calculated variation in the nominal position, or projected position (if using projection), from the contact position.
- Error: The amount by which the value of the point's position exceeds the specified tolerance.
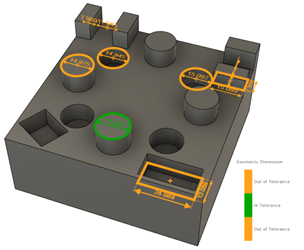
Probe WCS and Probe Geometry
Inspection results from Probe Geometry and Probe WCS show the geometric dimensions and positions of critical features, including:
- Holes (circular and rectangular)
- Bosses (circular and rectangular)
- Walls
- Channels
- Corners
- Angled planes
The colors show whether the geometric dimensions of features are in or out of tolerance.

Fusion uses the following color convention:
 Green means in tolerance.
 Orange means out of tolerance, either above the upper tolerance or below the lower tolerance.
The window includes the following information:
- Type: Currently limited to Diameter, Distance, and Center.
- Nominal: The theoretical dimension and position of the feature.
- Measured: The actual dimension and position of the feature.
- Deviation: The calculated variation between the nominal and measured values.
- Error: The amount by which the deviation exceeds the specified tolerance.
- Result: The status of the feature
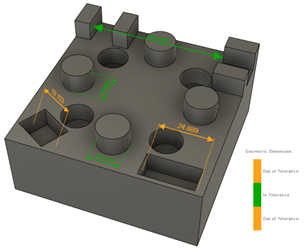
Manual Inspection
The colors of the geometric dimensions of features show whether they are in or out of tolerance.

Fusion uses the following color convention:
 Green means in tolerance.
 Orange means out of tolerance, either above the upper tolerance or below the lower tolerance.
The window includes the following information:
- Type: The type of inspection carried out.
- Nominal: The theoretical dimension of the feature.
- Measured: The actual dimension of the feature.
- Deviation: The calculated variation between the nominal and measured values.
- Error: The amount by which the deviation exceeds the specified tolerance.
- Result: The status of the feature.