Import the results from an inspection
Import a machine-generated results file to view and analyze inspection results for surface inspection (Inspect Surface) or geometric dimensions (Probe WCS and Probe Geometry).
On the Manufacture workspace toolbar, click Inspection > Actions > Import Inspection Results
 .
.The Import Inspection Results dialog opens.
Next to Results File, click Select to pick a machine-generated results file.
The Results File dialog opens.
Find and select the file you want to import, then click Select.
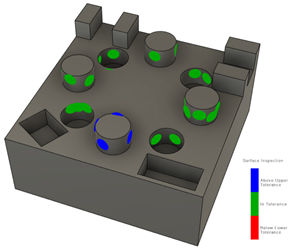
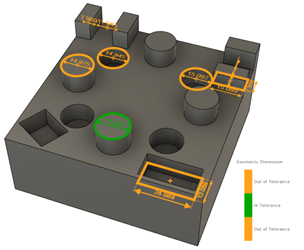
Fusion uses the information in the results file to automatically find the bodies that were used to generate the probing operations and displays the results on the canvas, along with a legend explaining the colors.

Example of surface inspection results.

Example of geometric dimension results.
(Optional) If the results file contains multiple sets of inspection results (marked by START) and you want to import them all instead of just the last one, select the Import All Results checkbox.
If you are importing results for a surface inspection:
By default, the deviation is calculated using projection to improve accuracy. If you do not want to use projection, deselect the Projection checkbox.
If using projection, and you want to prevent the results from being displayed on the bodies that Fusion automatically found, deselect the Include Inspected Bodies checkbox, then click other bodies on the canvas.
Click OK.
In the Browser, under the Results node, a folder is added containing the inspection results data. Within the folder are individual result nodes for each operation.

If you import a results file containing a mix of surface inspection and geometric dimension data, the results are grouped together under the same folder.
Tip: Right-click a node and select Show Results to view the data in an Inspection Results window.