Activity 5: Create parts list, balloons and title block
In this activity, you:
- Insert a parts list.
- Create annotative balloons.
- Populate the title block.
Prerequisites
- Activity 4 is complete.
A parts list is a table that catalogs the components of the design. It itemizes all components in the drawing and includes the item number, the quantity, the part number, the description, and the material.
A balloon identifies a component included in the parts list by labeling it in the drawing.
Steps to Insert a Parts List and Add Balloons
Insert a Parts List.
In the Tables toolbar, click Parts List.
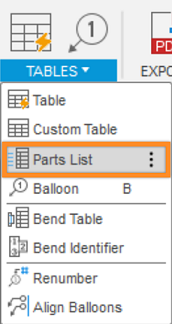
The Parts List command is located under the Tables drop-down list.
Make sure the Type in the dialog is set to Parts List.
Select the base view as a reference for the Parts List.
Click the top right corner of the drawing boarder to place the Parts List there.
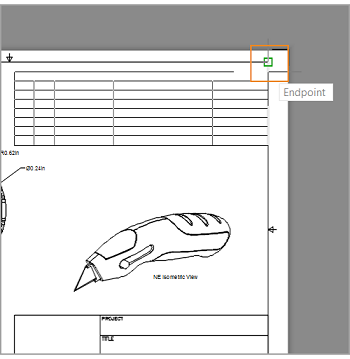
Placing the parts list.
Note: The Parts List automatically populates, taking information from the Design.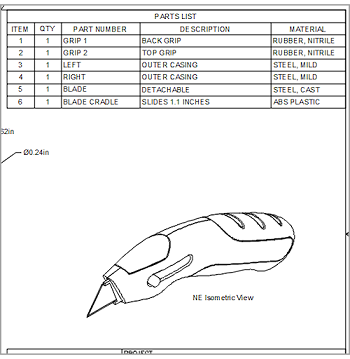
A placed parts list.
If the Parts List extends over any of your drawing views, move the views to eliminate the overlap.
Create Annotative Balloons.
In the Tables toolbar, click Balloon.
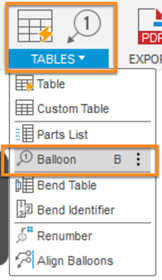
The Balloon command is located under the Tables drop-down list.
On the NE isometric view, select an edge of a component.
Click to place the balloon.
Continue selecting components until all items in the Parts List are numbered on the NE Isometric View.
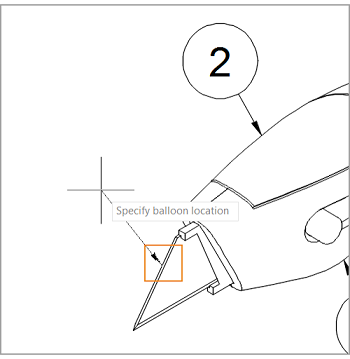
Placing a balloon.
When finished, press
Esc.
About the Parts List
A component's part number and description can be modified in the Properties dialog within the Model workspace. Access this dialog by right-clicking a component in the browser and choosing Properties from the context menu.
If you change the name or properties of a component in the Model workspace, the changes will be applied to the drawing once you associate the drawing with the saved model (see Activity 7: Associatively Update the Drawing).
Note: The parts list table is not editable or customizable.
Steps for Populating the Title Block
Click the title block to select it.
Right-click the selected title block.
Select Edit Title Block.
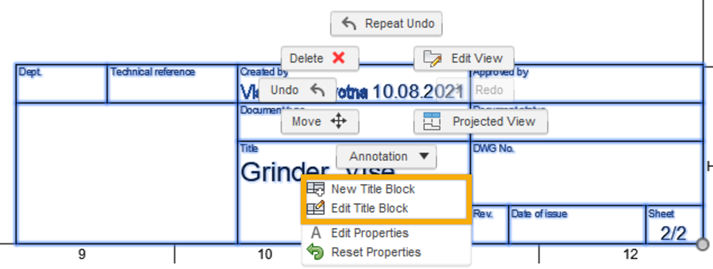
The edit title block menu.
In the New Title Block dialog, click OK.
In the title block editor environment change the following attributes:
- Double-click the blue PROJECT, in the Attribute dialog, change the Attribute to Custom and type: Fusion Training.
- Double-click the blue TITLE_1, in the Attribute dialog, change the Attribute to Custom and type: Utility Knife.
- Double-click the blue TITLE_2, in the Attribute dialog, change the Attribute to Custom and type: Drawing.
- Double-click the blue SIZE, in the Attribute dialog, change the Attribute to Custom and type: B.
- Double-click the blue DWG_NO, in the Attribute dialog, change the Attribute to Custom and type:FT-08.01.
- Double-click the blue SCALE, in the Attribute dialog, change the Attribute to Custom and type: 1:2.
Click Finish Edit.
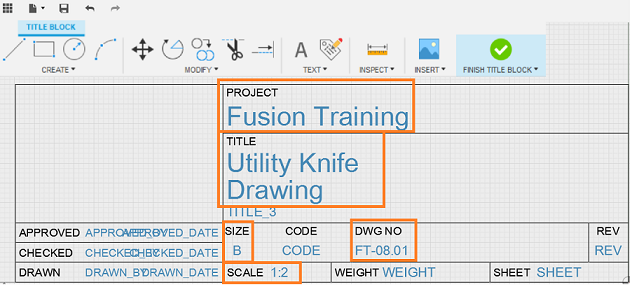
The title block editor environment.
Activity 5 summary
In this activity, you:
- Inserted a parts list.
- Created annotative balloons.
- Populated the title block.