Activity 5: Generate and explore outcomes
In this activity, you generate and review outcomes.
To get familiar with the outcome exploring tools, watch the Exploring outcomes video.
Prerequisites
- This activity requires tokens. If you don't want to spend tokens, you can use the predefined sample files from the Data Panel: Generative Design Samples.
- The previous activity has been completed.
- The copy of the GE Bracket is open in the Generative Design workspace.
Steps
Start generating outcomes.
Note: This step requires tokens to complete. If you don't want to spend tokens, skip this step and use the predefined sample file from the Data Panel: Generative Design Samples > Ready to Explore > Explore_GE Bracket.- On the Define tab, click Generate > Generate
 .
.
Tip: In the Browser, you can also show the Generate dialog by right-clicking a study and clicking Generate. - In the Generate dialog, verify that Study 1 - Structural Component is selected and the Status is Ready.
- Click Generate 1 Study.
The Job Status dialog opens. - If necessary, to dismiss the “Thumbnails for your outcomes will appear…” message, click OK.
- In the Job Status dialog, click Close.
The Explore contextual environment opens, where you can see thumbnails for the outcomes.
Tip: Generating outcomes may take some time. You can show the progress any time. In the top-right corner, on the Application bar, click the Job Status icon and select View Job Status. While still working, the application shows the Processing icon
  . When done, the status of the outcomes for the study shows as Converged
  or Completed
  .
. - On the Explore tab, click Finish Explore > Finish Explore
 .
.
- On the Define tab, click Generate > Generate
Once the outcomes have been generated, explore thumbnails of the generative results and filter them to show only outcomes that meet requirements.
- On the Define tab, click Explore > Explore Generative Results
 .
.
The Explore contextual environment opens. - To sort the outcomes from the lightest to the heaviest, in the Thumbnail View, from the Sort By list, select Mass.
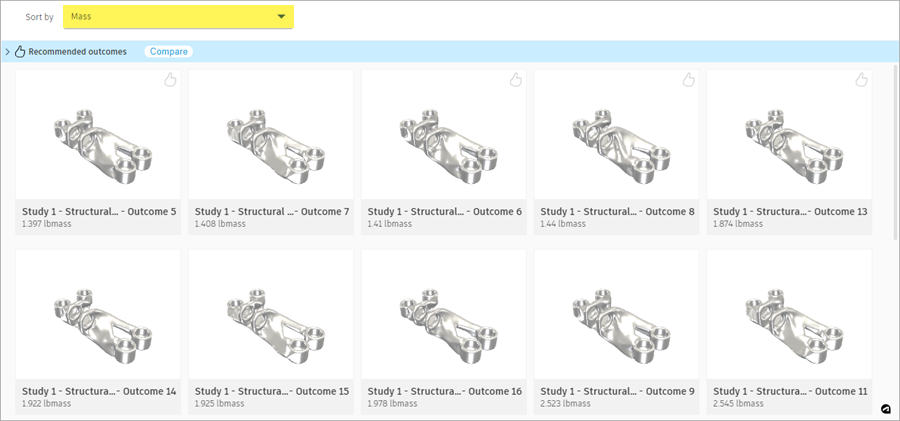
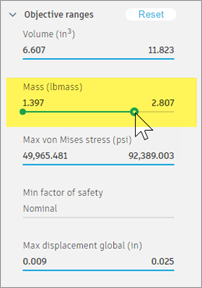
Tip: If an outcome name is truncated, place the mouse pointer over the name to show the full name. - To show outcomes in a new range, in the Outcome Filters area, under Objective Ranges, on the Mass (lbmass) slider, drag the right endpoint to 2.800, or as close to 2.800 as possible.
- On the Define tab, click Explore > Explore Generative Results
Review iterations for one of the outcome.
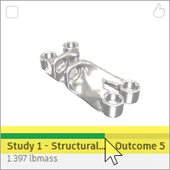
- Place the mouse pointer over the first thumbnail.
- To view the history of iterations for outcomes, below the thumbnail, move the mouse pointer over the blue Iterations bar.
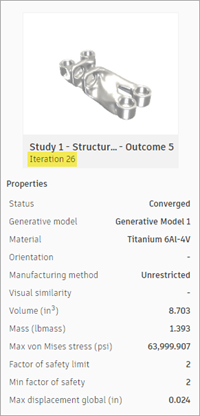
Review the stresses and properties for the first outcome.
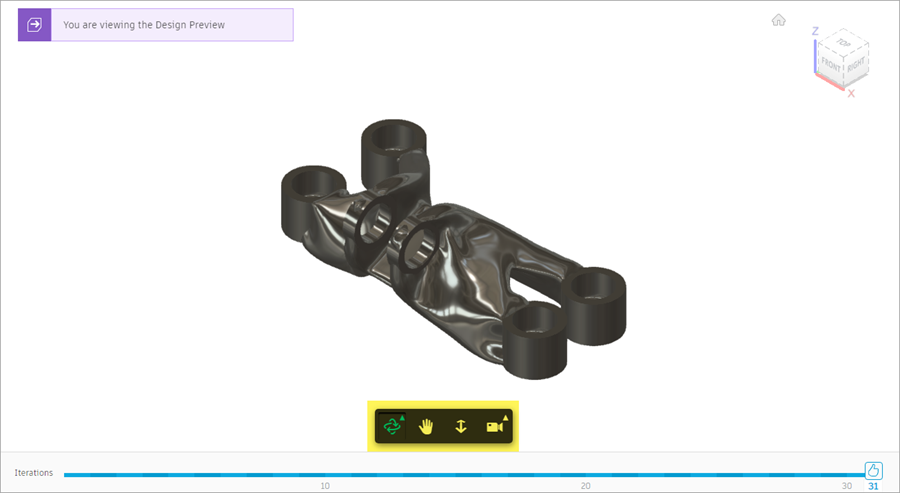
- To open the Outcome View, click the first thumbnail.
- To examine the outcome details, below the design, on the Outcome View toolbar, use Orbit, Pan, and Zoom.
- To show the stress distribution on the outcome’s surface, on the Outcome View tab, click Display > Stress View
 .
.
Tip: Place the mouse pointer over the Stress Reference legend to show more range information. - Below the Outcome View, in the blue Iterations bar, drag the iteration dot to one of the previous ones, e.g. Iteration 26.
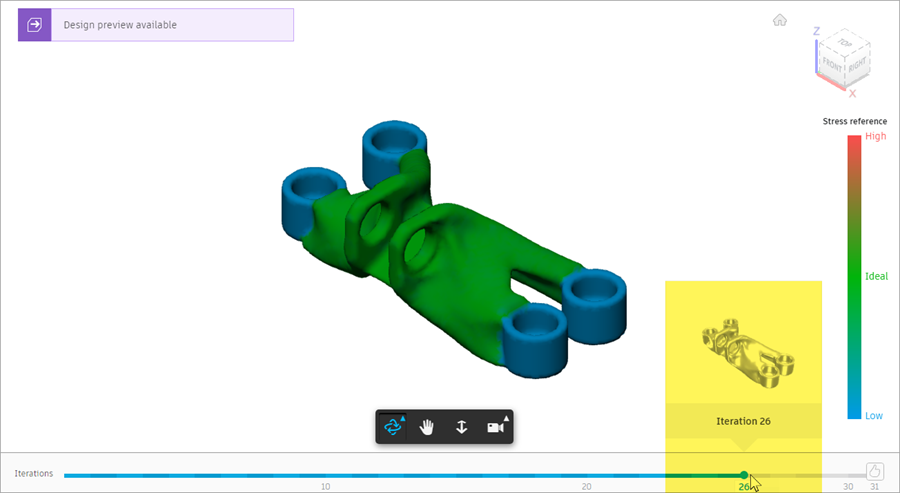
- In the Properties panel, below the thumbnail, the selected number of iterations is displayed.
Create a design from the selected iteration and open it.
Note: You can use the predefined sample file from the Data Panel: Generative Design Samples > Outcomes > Outcome1_GE Bracket.- On the Outcome View tab, click Create > Design from Outcome
 .
.
In the upper-left corner of the Outcome View, an indicator shows that the design is being prepared.
This takes some time. - In the Job Status dialog, click Close.
- When the design is ready, in the upper-left corner of the Outcome View, click the indicator.

- In the Design Ready dialog, click Open Design.
The design opens in a new Untitled tab.
In the Browser, notice that both the outcome and iteration number that was used to generate the design is shown.
Tip: You can save the design under a new name or create a new generative study to test different values. You can also export the resulting geometry for use in other CAD applications. - To return to the GE Bracket model, in the Document Tab Bar, click the My GE Bracket Quick Start Tutorial tab.
- If necessary, return to the Thumbnails View.
- On the Outcome View tab, click Create > Design from Outcome
Activity 5 summary
In this activity, you generated and reviewed outcomes, and opened a new design from the selected iteration.