Invite people to a hub (Fusion Manage Extension)
This content applies only if you have the Fusion Manage Extension. If you don't have the extension, follow these instructions instead.
Follow these steps as a hub administrator to invite members of your organization to a hub.
At the top left of the Fusion window, make sure you are working in the correct hub.
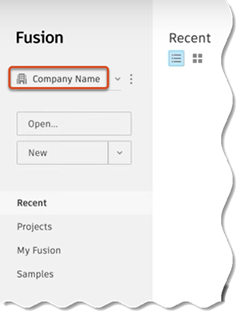
Beside the hub name, click More
 .
.From the drop-down menu, select Members and roles.
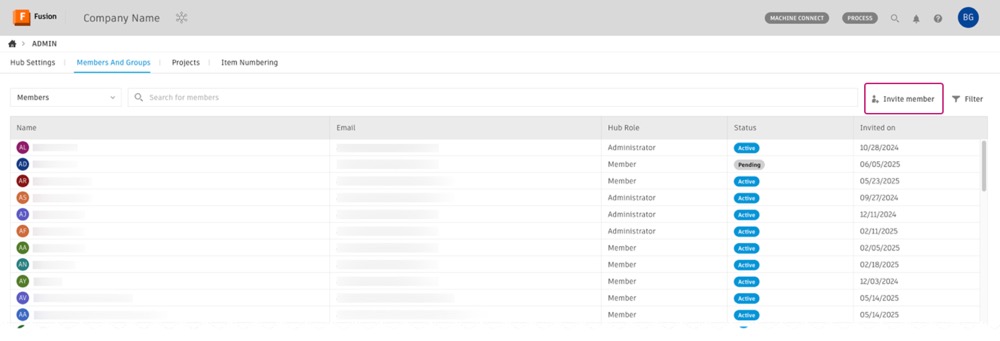
The Members and Groups tab opens in the Fusion web client. If this is your first time opening the Fusion web client, you will see some introductory messages, which you can read and dismiss. You should see your name listed as an administrator here.
Note: A hub used to be called a “team” in the Fusion environment. The word “hub” is still being incorporated into all aspects of the Fusion interface in place of “team.”In the Members and Groups tab, click Invite member.
In the dialog that opens, enter the email addresses of people you want to invite, separating multiple entries with commas.
Click Invite to send the invitations.
Recently invited members will appear in the members list with the status Pending. You'll also be able to see the date they were invited and what their role is. Members will need to have the role of Member (or higher) to be able to create and save designs in Fusion.
You can now start assigning Fusion licenses to the people you have invited.
For more information on setting up Fusion hubs, see this Autodesk blog post.