Currently, Print Studio supports these 3D printers:
- Autodesk® Ember™
- Dremel® Idea Builder 3D20
- Dremel® Idea Builder 3D40*
- Makerbot® Replicator® 2
- New Matter MOD-t
- Printrbot Play
- Printrbot Plus
- Printrbot Simple
- Type A Machines® Series 1**
- Ultimaker B.V. Ultimaker 2
*To use your Dremel® Idea Builder 3D40 with Print Studio on Windows 8 or Windows 10, you may need to install a printer driver manually. For more information, search the Dremel Knowledge Base for “Print Studio”.
**Network printing is not supported for Type A Machines® Series 1 printers using OctoPrint firmware version 1.0 or higher.
Add a printer
- Open the
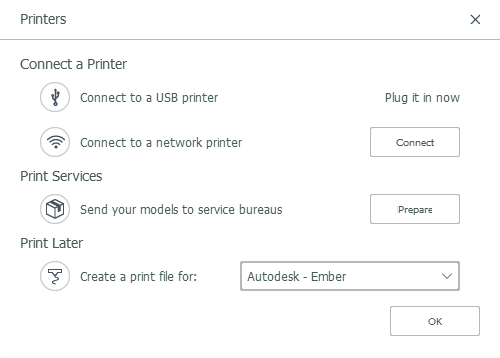
Printers dialog box.
- After installing and starting
Print Studio the first time, if no USB printer is connected to the computer, you're prompted to select a printing option in the
Printers dialog box.
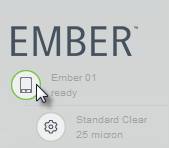
- If you have configured a printer already, in the upper-left corner, click the printer type icon.
- After installing and starting
Print Studio the first time, if no USB printer is connected to the computer, you're prompted to select a printing option in the
Printers dialog box.
- In the
Printers dialog box, select the desired printing option.
- To connect to a USB printer, plug a 3D printer into your computer.
- To connect to a network printer, click
Connect. The
Add Printer web page opens.
Select a Printer Type and provide a recognizable Nickname for the printer.
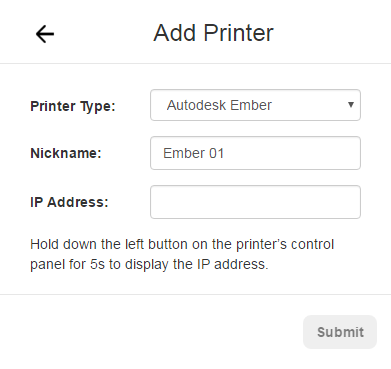
Enter the printer's IP Address and click Submit.
- To print later to another printer supported by
Print Studio, from the
Select Printer Type drop-down list, select a printer.
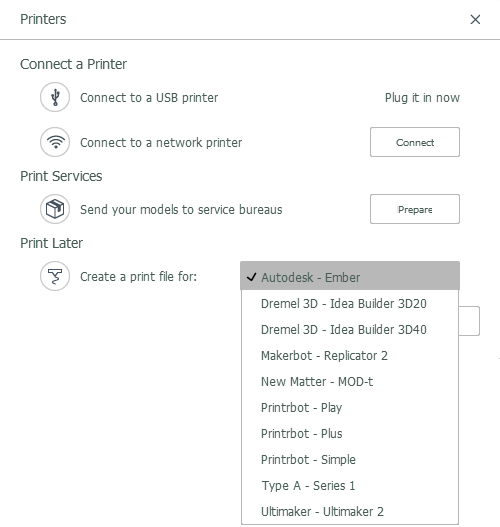
Now you can export the prepared model as a printable file to be printed later on the selected, supported printer.
Manage printers
Once you've added a printer, you can change its Nickname or disconnect it.
- In the upper-left corner, click the printer type icon.

The Printers dialog box opens.
- Above the list of connected printers, click the Edit icon.

The Manage Printers web page opens.
- For the desired printer, use one of the following methods.
- To change a printer nickname, click the Edit icon
 , modify the
Nickname, and click
Submit.
Note: The New Matter MOD-t and Printrbot printers have more settings available in the Manage Printers web page.
 - To disconnect a printer, click the Remove icon.

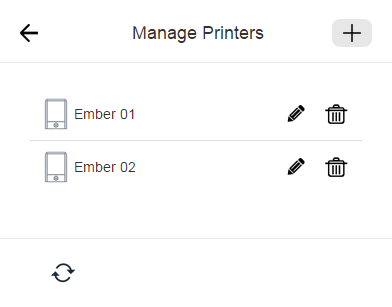 Tip: You can also use the Manage Printers web page to add a network printer.
 - To change a printer nickname, click the Edit icon
Select a different connected printer
If you have access to several connected printers, you can switch between them.
- In the upper-left corner, click the printer type icon.

The Printers dialog box opens.
- From the
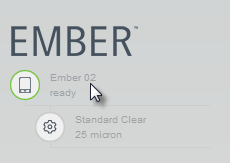
Select a Connected Printer list, on the left side, click the name of the desired printer.
Important: Only clicking the printer's name selects it. Clicking the status button on the right does not select the printer. It only opens the Status web page for that printer.

- Click
OK.
The selected printer is now indicated.
Select a different preset print profile
Each printer has preset print profiles containing recommended settings that you can use to get printing quickly. Preset print profiles are created listed for various output quality, such as good, better, or best. The thinner the layer thickness, typically the more detailed the print output. These preset print profiles can't be modified. To do that, create a custom print profile.
- In the upper-left corner, click the
Settings icon.

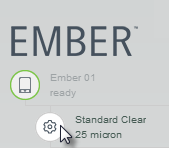
The Settings dialog box opens.
- From the
Select Print Profile drop-down list, select the desired preset print profile.
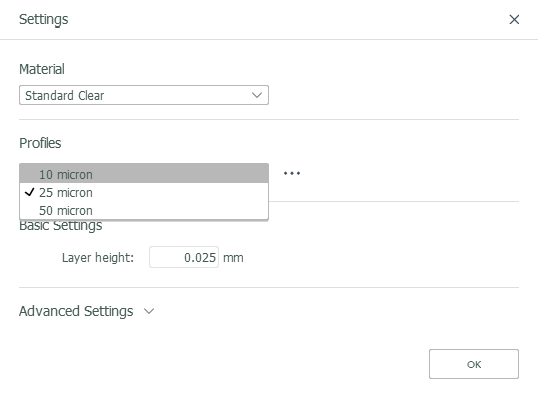
- If desired, you can review the profile's presets by clicking Advanced Settings.
- Click OK.
Create a custom print profile
You can modify the settings of an existing preset to create a custom print profile. If you save the scene as a 3PS file, your custom print profile is saved with all the models. You can now share the scene and the settings together.
- In the upper-left corner, click the
Settings icon.


The Settings dialog box opens.
- To the right of the
Profiles drop-down list, click the
Manage Profile icon.

- Select
Duplicate Profile.
A copy of the preset print profile is made.
Tip: Changing any Advanced Settings for a preset print profile creates a copy of the preset automatically.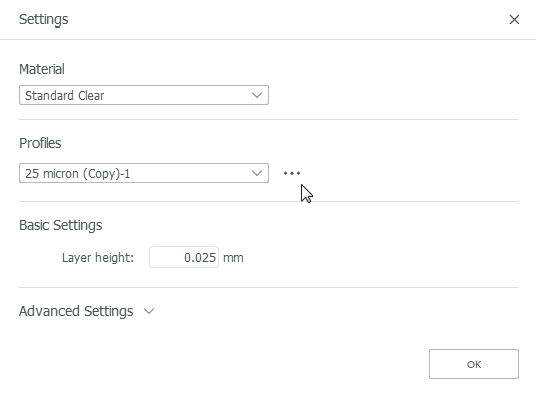
If desired, select the title of the copied print profile and type a more appropriate name.
- Click
Advanced Settings and change the values for the desired settings.
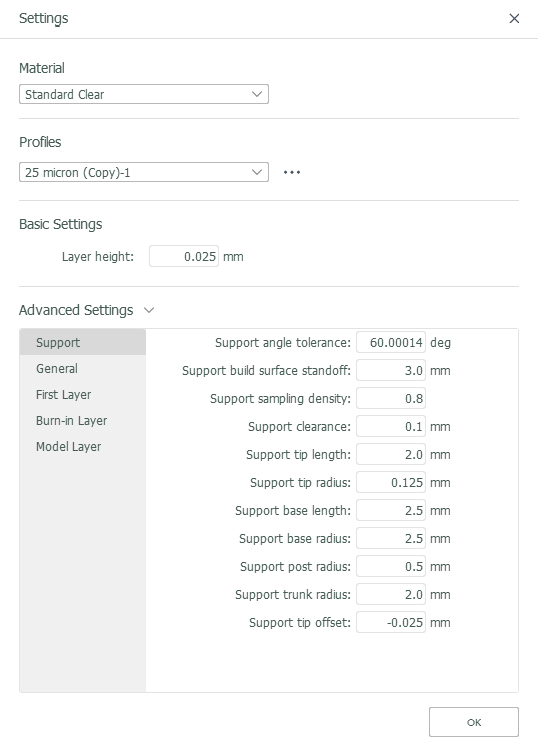
- Click Save.
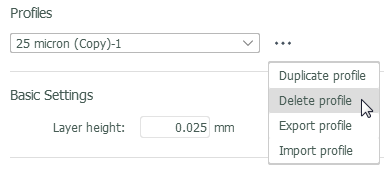
Make as many custom print profiles as you want until you find the preferred settings. Then you can remove unwanted profiles by clicking the
Manage Profile icon
 and selecting
Delete Profile.
 and selecting
Delete Profile. The default print profiles can't be change changed or deleted.
Export and import custom print profiles
Once you have found the preferred settings for a specific printer, you can export the print profile to share with others. You can also import print profiles shared with you.
- In the upper-left corner, click the
Settings icon.


The Settings dialog box opens.
- To the right of the
Profiles drop-down list, click the
Manage Profile icon.

- Use one of the following methods.
- To export a print profile, select Export Profile. Then name and save the file.
- To import a print profile, select Import Profile. Locate, select, and open the print profile. The imported file becomes the current print profile.