Selection Options
![]()
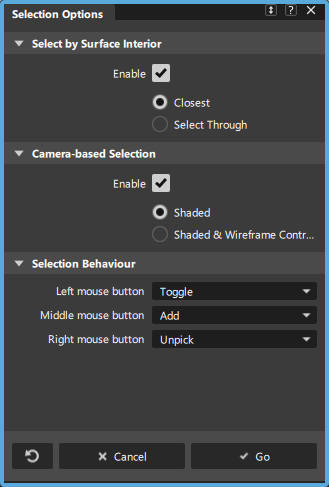
Lets you choose selection modes that determine which objects and components to select when using pick tools. You can also assign different behaviors to the mouse buttons.
The Selection Options settings can be saved and placed on a shelf, or assigned to a hot key (using Preferences > Interface > Hotkeys/Menu Editor). You can also use the toggle (![]() /
/![]() )in the top-right corner of the viewport to turn Camera-based selection on and off
)in the top-right corner of the viewport to turn Camera-based selection on and off
Related videos
Selection Options settings
Select by Surface Interior
When this option is enabled, surfaces and shells can be selected by clicking inside the wireframe. This option is off by default. You can use Select by Surface in one of these modes:
Closest
On mouse down, the object under the cursor that is closest to the camera is selected. This is the default setting.
If any edge or curve is under the cursor, that edge selection takes priority over the selection of an object’s interior. When multiple edges are selected, the pick chooser appears.
Select Through
On mouse down the objects under the cursor selection are evaluated for location relative to the camera. If there are multiple surfaces or shells selected, the pick chooser appears and lists the objects in order from the camera.
If any edge or curve is under the cursor, that edge selection takes priority over the selection of an object’s interior. When multiple edges are selected, the pick chooser appears.
Select by Surface Interior behavior is the same for shaded geometry. If the edge of an obscured surface or shell is selected, x-ray highlighting is turned on for that object to show that it is picked.
Shift key to select a surface or shell by clicking inside the wireframe. This is to avoid inadvertently selecting an object while moving.Camera-based Selection
When enabled, you can only select components with a clear line-of-sight to the camera. Components obscured by shaded geometry or by non shaded objects with their control cages turned on cannot be selected. This ensures that you don’t accidentally select components you can’t see.
You can choose between Shaded and Shaded & Wireframe Controls mode:
Shaded
When on, shaded geometry limits your component selection to the what the camera sees. Geometry shading includes Diagnostic Shade, Box mode, Hardware Shade, and hidden lines.
Use this option when you are working with shaded geometry.
Shaded & Wireframe Controls
When on, shaded geometry and non-shaded objects with their control cage turn on (Cv/Hull) limit component selection to what the camera sees.
Use this option if you work with shaded and unshaded and still want the benefits of limited selection based on the camera view.
For more information, see How to select only unobstructed components.
Selection behavior
Left mouse button / Middle mouse button / Right mouse button
Use the drop-down menus to assign one of the following selection modes to each mouse button.
Toggle – Picking an unselected object selects it. Picking a selected object deselects it. This is the default for the  .
.
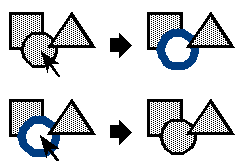
Add – Picking an unselected object selects it. Picking an already selected object has no effect. In other words, this mode can only add to the selection list, never remove from it. This is the default for the  .
.
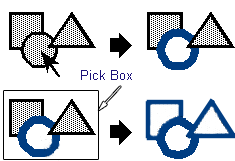
This mode is useful for composing a collection of objects to be used for a variety of operations including grouping, assigning materials and transforming.
Unpick – Picking a selected object deselects it. Picking a deselected object has no effect. In other words, this mode can only remove from the selection list, never add to it. This is the default for the  .
.
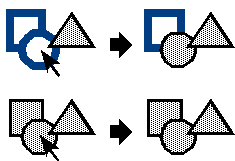
Pick – Only the objects you pick are selected. Everything else is deselected. Clicking in empty space deselects everything.
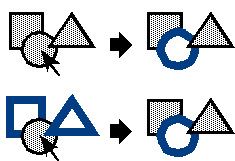
This mode is useful when picking controls for direct manipulation as we only want one control to be picked at a time.
How to select only unobstructed components
By default, box-select picks all components in the selection area. This can be a problem when viewing the canvas in shaded mode since your selection may include components hidden from your view. You can use Camera-based selection to only select components with a clear line-of-sight to the camera. This ensures that you don’t accidentally select components you can’t see.
In the Selection Options window, turn on Enable under Camera-based selection. Tip: You can assign a hotkey to toggle Camera-based selection on and off. See Hotkeys/Menu Editor.
Choose a Camera-based selection mode:
- Shaded - Shaded geometry limits your component selection to the what the camera sees.
Use this mode when working predominantly with shaded objects.
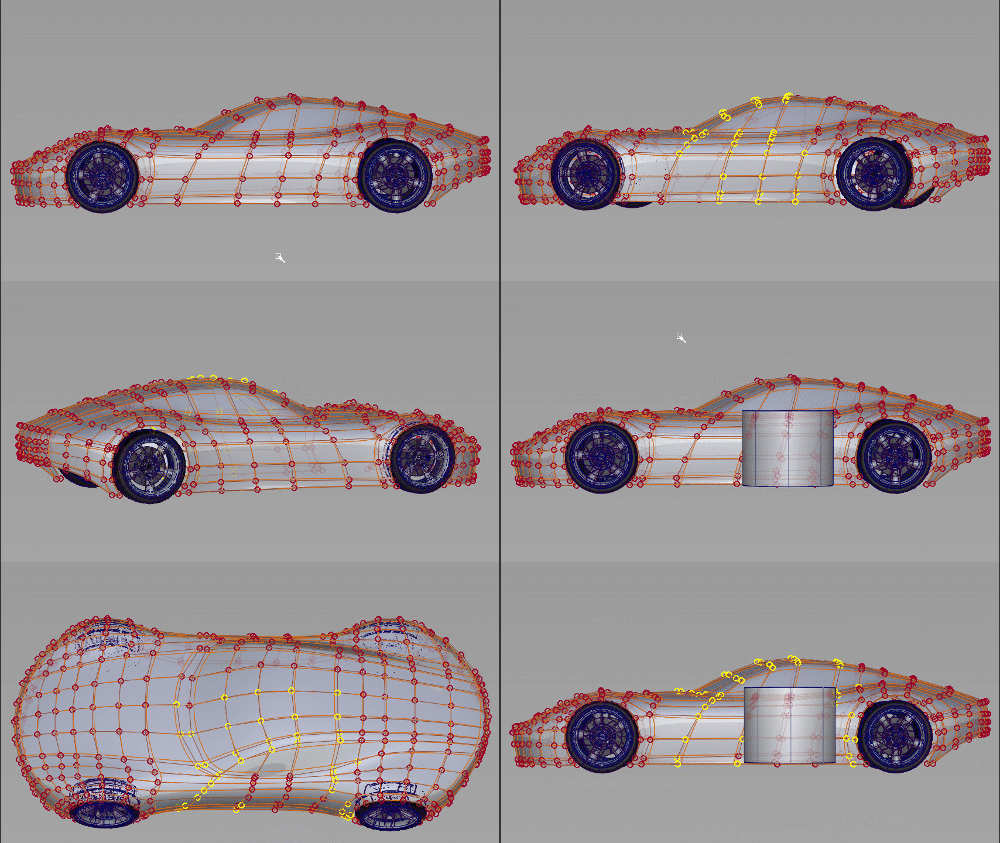 Note: When picking surfaces (Pick Surface) or objects (Pick > Object), shaded geometry limits your selection to the camera view.
- Shaded & Wireframe Controls- Shaded geometry and non-shaded objects with their control cage turn on (Cv/Hull) limit component selection to what the camera sees.
Use this option if you work with shaded and unshaded geometry and still want the benefits of limited selection based on the camera view.
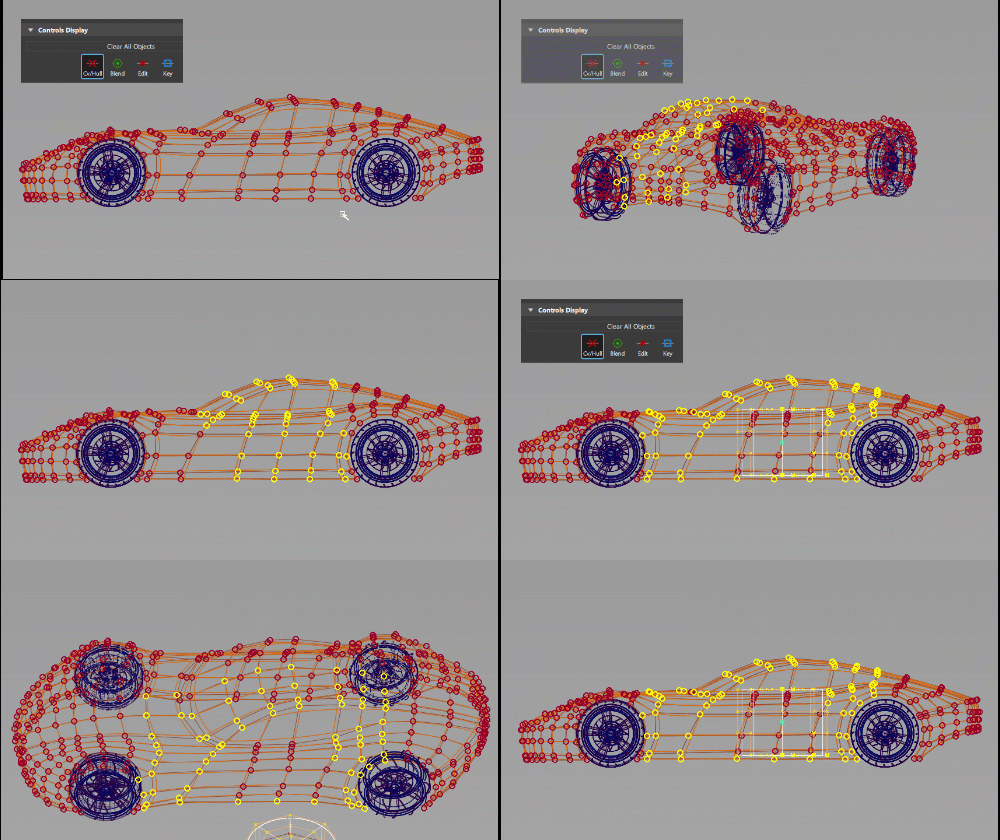 Note: When picking surfaces (Pick Surface) or objects (Pick > Object), non-shaded objects with their control cage turn on do not occlude your selection, while shaded geometry does.
