
Project Inventory
After publishing your project to Assemble, Project Inventory displays links to all project models and saved views.
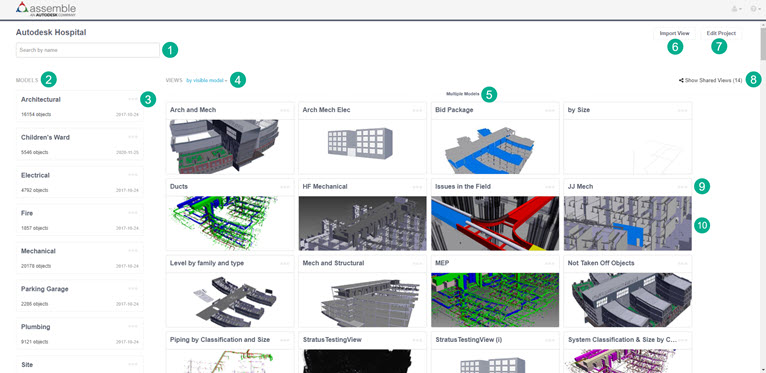
Search Box. Enter the name of a view or model to narrow the list of Views on the Project Inventory Page.
Model. The default model views make it easy to navigate directly to the contents of the most current version of a model at any time. Most Assemble customers start their work with a Model View and then create Saved Views particular to their workflow or based on the specific information they want to see every time they return to a project.
Model Settings. Select
 to open the Model Settings dialog where you can rename a model, delete a model and delete a version.
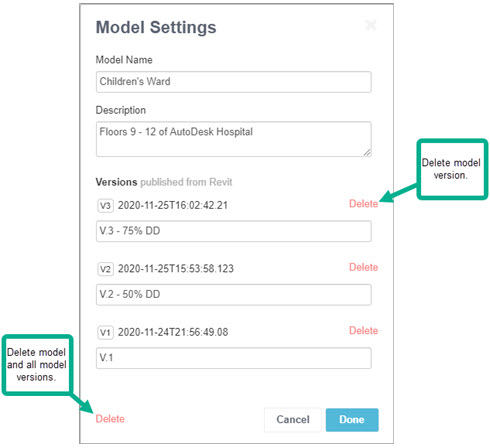
Views. Lets you display all visible models or all models by their name, in alphabetical order. The option to sort views is visible only when at least one view is present.
View headings. Indicates the model(s) used to create the view(s). Views with multiple models are organized first under the Multiple Model heading. Headings for all other views are specific to their model, listed in alphabetical order.
Import Views. Lets you add views created in another project to the current project so that you can access trusted inventory more efficiently.
Edit Project. Lets you change the settings for the project. Learn more about project settings
Show Shared Views. Select this link to show or hide shared model views.
View Settings. Select
to open the Model Settings dialog where you can rename a model, delete a model and delete a version.View cards. Provides quick access to a desired custom view. Views are user defined inventories of objects created from a single model or multiple models. Many customers use Assemble to create views of schedules, bid packages, WBS, activity IDs or by work installed. Learn more about creating saved views.