
Project Settings
To change project settings, add new members to a project, manage data trees and manage Assemble projects, select Edit Project in the top, right corner of your project page.
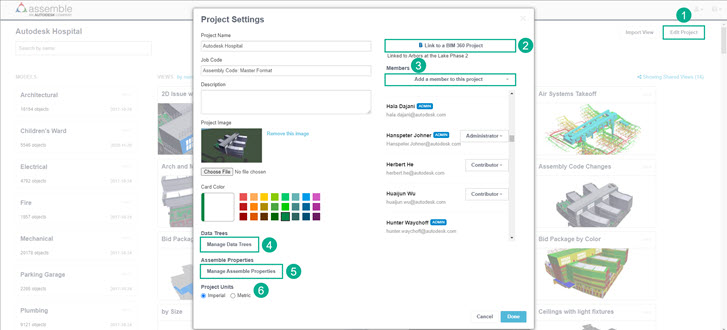
A description of some project settings offerings are as follows:
Edit Project. Select this link from your project page to open the Project Settings dialog.
Link to a BIM 360 Project. Lets you link BIM 360 documents to objects within the Assemble model. It also lets you create issues and take snapshots to push into BIM 360.
Members. Click Add a member to this project to add a new member to the project and to assign them one of three permission levels: Administrator, Contributor and Read Only. Learn more about user permissions.
Note: Before you can add a new member to a project, make sure the member is first added to the account level.Manage Data Trees. This offering lets you create data trees that can contain large amounts of information. The information is made available to your team members as selection items in dropdown lists. You'll find data trees are also useful for code standardization and for time management, as team members no longer have to type to select an item.
Manage Assemble Properties. Lets you manually create Assemble projects. From here, you can Import from a Project, Create Property or Create Group at the project level.
Project Units. Select from Imperial or Metric. Your desired option will apply to all units of measure for your project and are universal for all members of your project. Project Units can be changed at any time. To learn more about Project Units, click here.