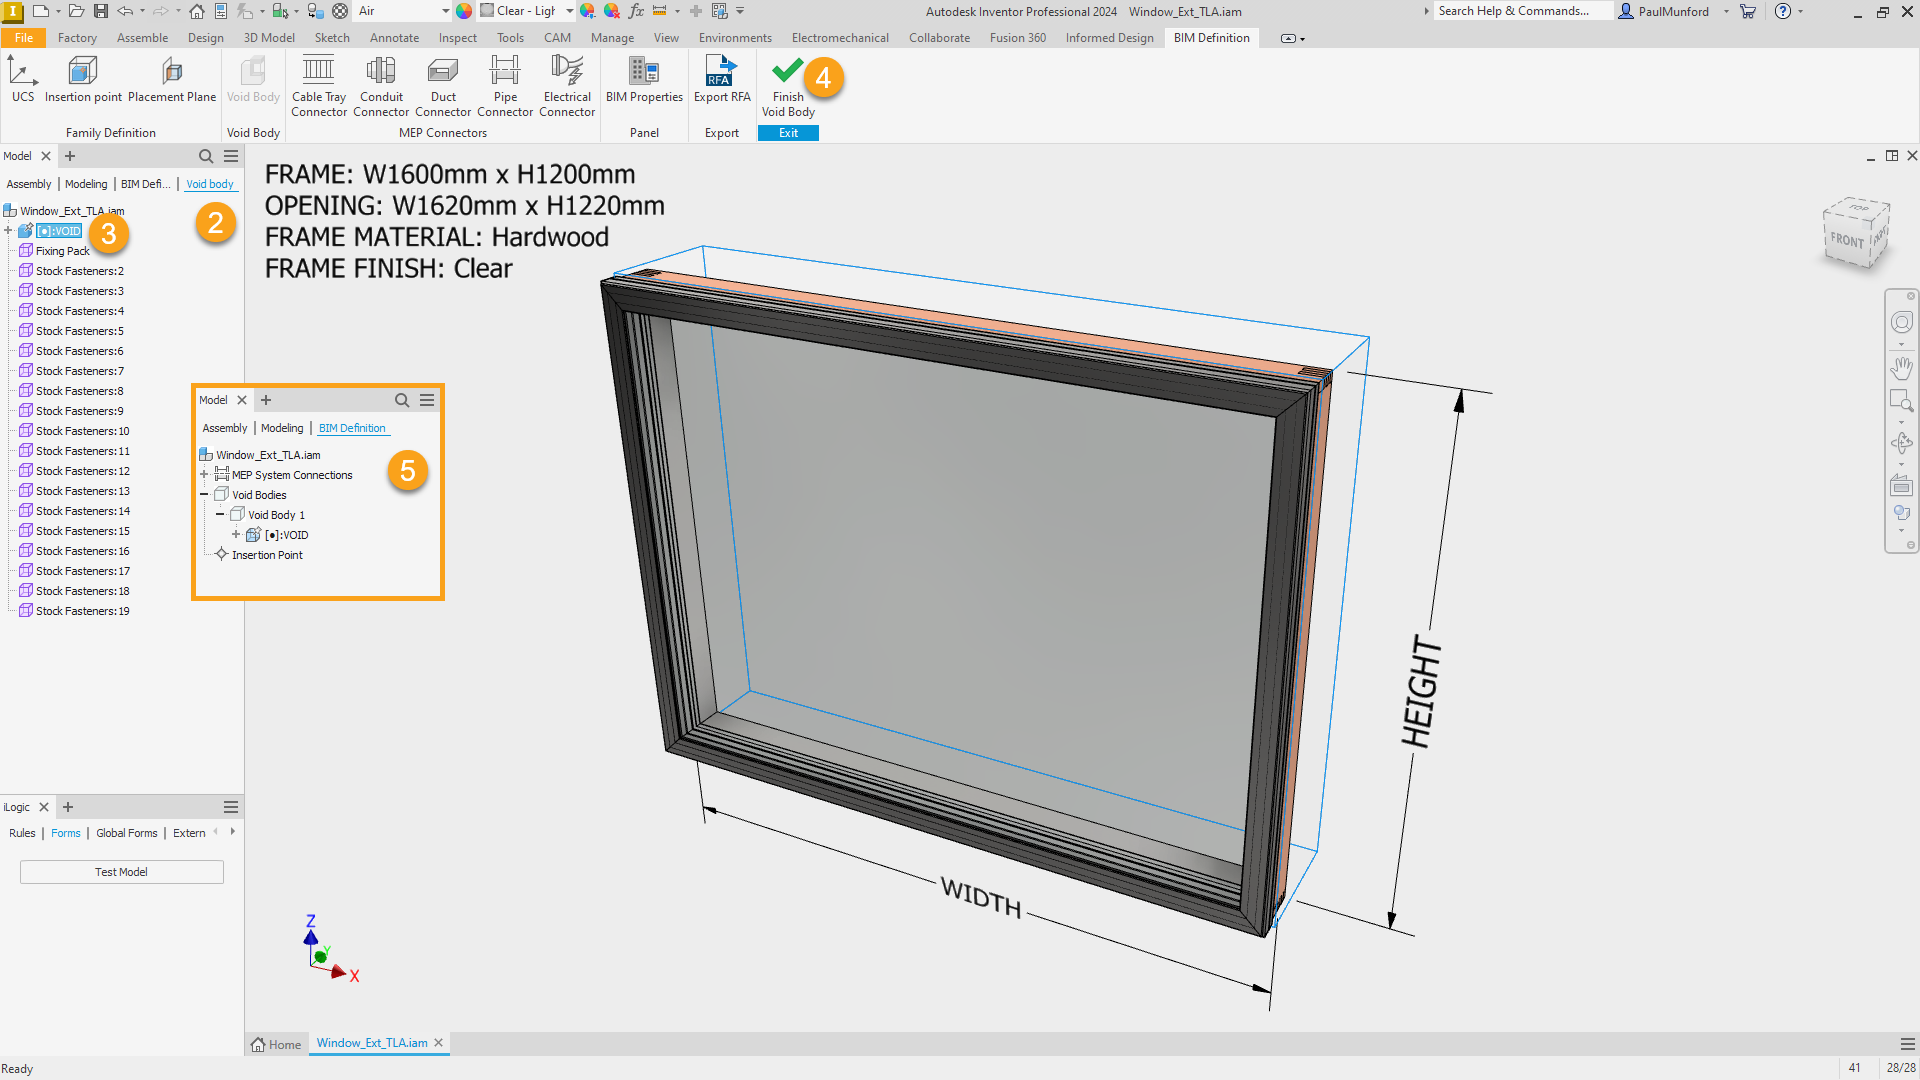
To create a Void body
With the Void Body command, you can pick a solid in the Inventor model, which will become 'Cut Geometry' in the Revit Family (RFA) when published via Informed Design or exported to RFA.
Preparation
Required: Add a part or parts to your Inventor assembly, to represent void bodies.
Note: Void bodies cannot host MEP connectors. Remove any MEP connectors from the solid before converting it to a void body.

BIM Definition: Void Body
- Click the 'Void Body' button.
- The 'Void body' model browser will display eligible 3D solids for selection.
- Select a component in the browser. CTRL+Click to select multiple.
- Click 'Finish Void Body' (Exit).
- The selected item will now be listed in the 'BIM Definition' browser under 'Void Bodies'.
Redefining or removing a Void body
- In the BIM Definition model browser, RMB click on 'Void Bodies'.
- Choose 'Redefine Void Body' to select a new body.
- Choose 'Remove All Void Bodies' to remove Void Bodies.
To remove a specific Void body
- In the BIM Definition model browser, RMB click on 'Void Body'.
- Choose 'Remove Void Body'.
Bringing Void Bodies into Revit
Option one: Publish your model with Informed Design for Inventor. Place your model using Informed Design for Revit.
Note: This method must be used if your void bodies are driven by input rules
Learn how to publish a product to Informed design
Option two: Export your model to RFA, then load into Revit.
Learn how to Export a Revit family using the BIM Definition RFA Export Command
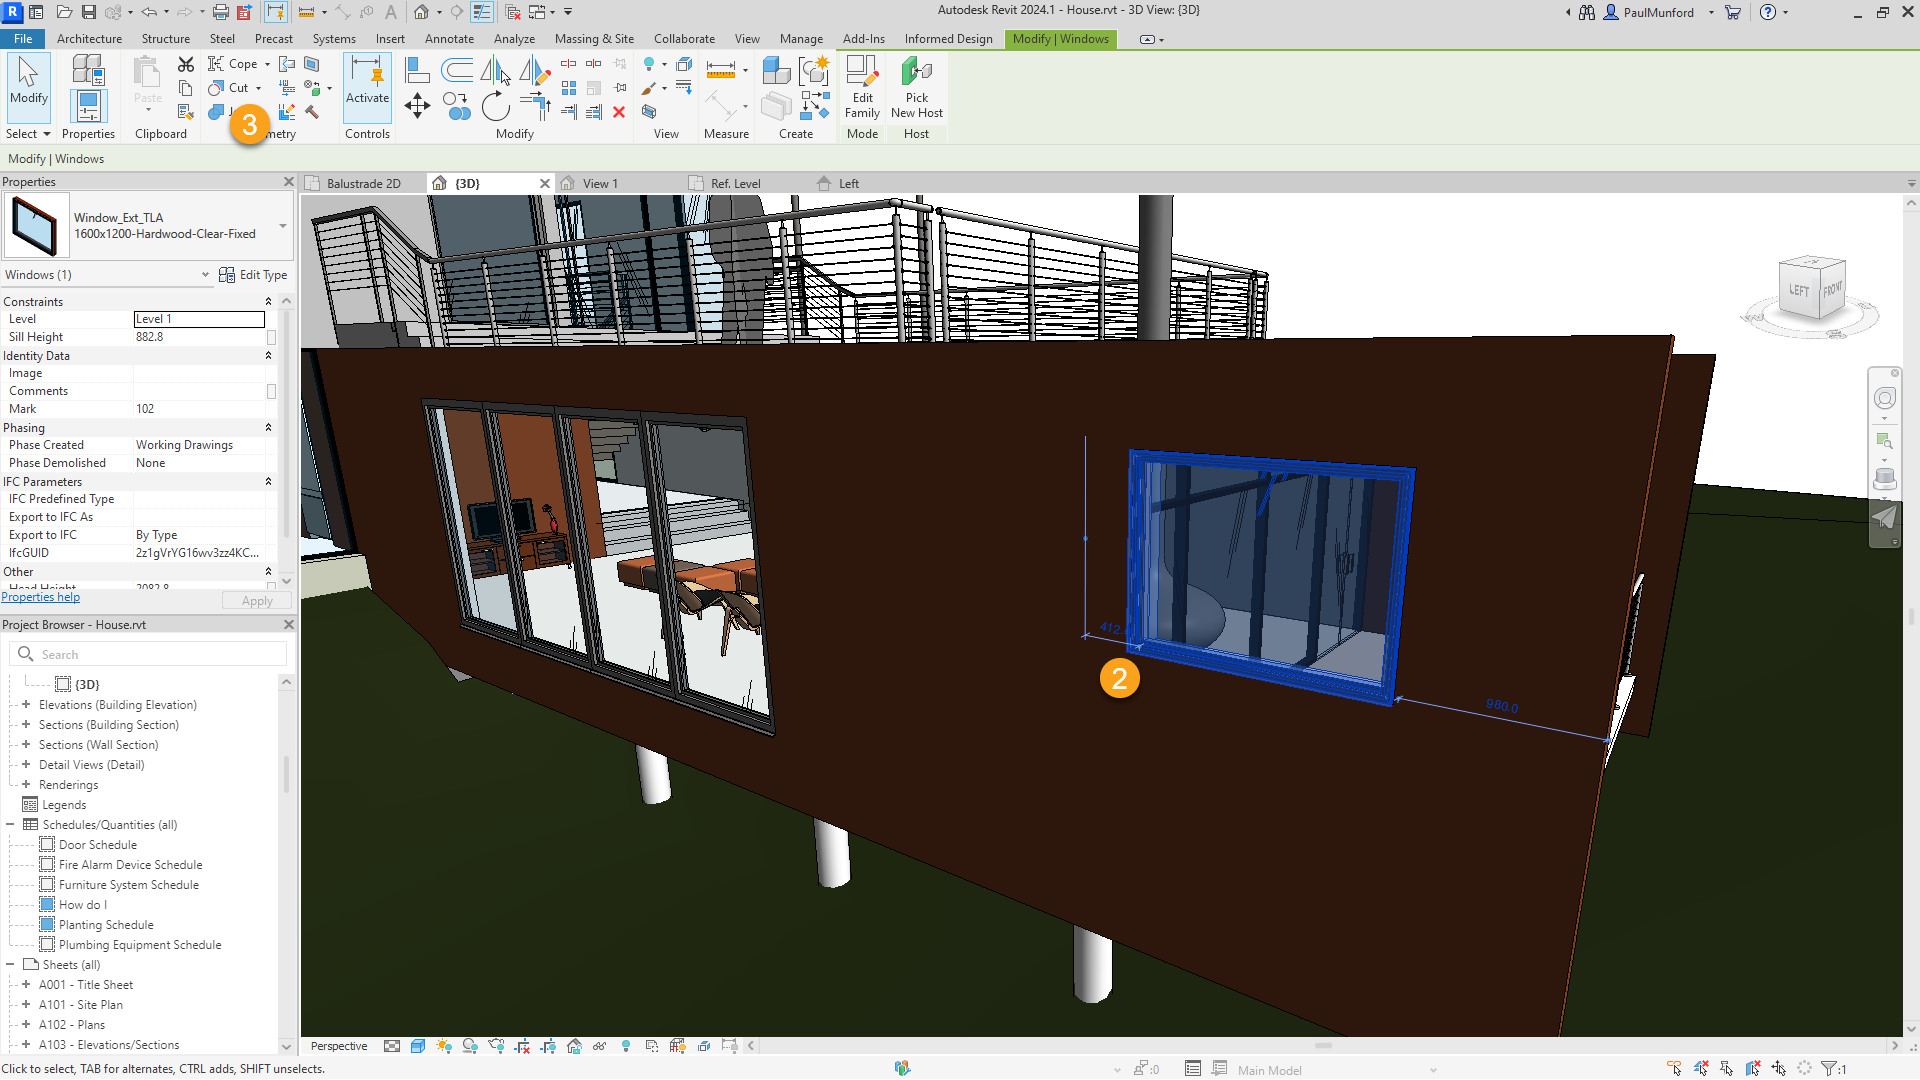
Using Void Bodies in Revit Projects
- Place the Revit Family, intersecting the element to be cut.
- Select the Revit Family instance.
- Use 'Cut Geometry' from the Modify Tab.
- Select the element to be cut, then the Family instance.
The void body that was defined in Inventor will remove intersecting Geometry.