Auxiliary Curve
Insert a auxiliary curve between two points.
Properties
Specify the following parameters in the Properties panel.
| Link | |
| Link Number | Specifies the link number. You can change the automatically generated Link Number value. |
| Geometry Type | |
| Creation Type |
Specifies the type of curve to draw:
|
| Arc Tessellation |
Specifies the number of line segments used to represent the curve. Note: This value must be between 2 and 100.
Click
|
| Geometry Properties | |
| Start Point | Specifies the start point of the curve. |
| Center Point (Arc: General) | Specifies the center point (either Point or Auxiliary Point) of a general arc. |
| Arc Point (Arc: 3 Points) | Specifies the through point (either Point or Auxiliary Point) of a three-point arc. |
| End Point | Specifies the end point (either Point or Auxiliary Point) of the curve. |
| Mid-Ordinate (Parabola: General) | Specifies the distance between the lowest point of a parabola and its vertex.
Click
|
| Miscellaneous | |
| Comment | Indicates notes about the curve. Comments can be displayed in the Preview panel. |
 to open the Expression Editor, where you can enter or calculate a value.
Example
To see an example of how this geometry element is used, open the following Sample PKT file:
Auxiliary Curve Example.pkt
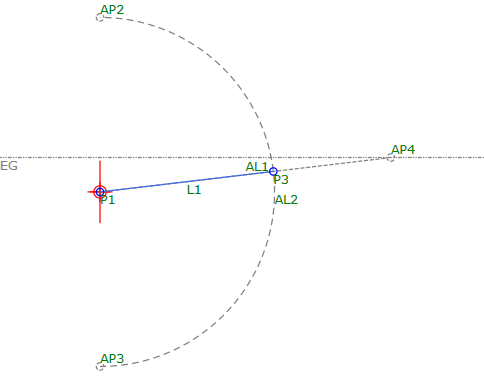
The example PKT contains one auxiliary curve, one auxiliary link, and one link. In the flowchart, the curve is defined by a start point, an end point, and a parameter of radius. To review its parameters, select the auxiliary curve in the flowchart, and then check the Geometry Properties section of the Properties panel.