Installation and Updates
This topic includes the system requirements, prerequisites, install, uninstall, and update procedures.
System Requirements
Software
- Operating System: 64-bit Microsoft® Windows® 11 or Windows 10
- Microsoft .Net Framework 4.8 or higher
Prerequisites
Download and install the relevant Revit host software from the Revit help site.
- Revit 2023.1.2 or later 2023 version to integrate and use Autodesk Data Exchange Connector for Revit 2023 and Data Exchange - Dynamo Connector Revit 2023.
- Revit 2024.2.0 or later 2024 version to integrate and use Autodesk Data Exchange Connector for Revit 2024 and Data Exchange - Dynamo Connector Revit 2024.
- Revit 2025.4.0 or later 2025 version to integrate and use Autodesk Data Exchange Connector for Revit 2025 and Data Exchange - Dynamo Connector Revit 2025.
- Revit 2026.3 or later 2026 version to integrate and use Autodesk Data Exchange Connector for Revit 2026 and Data Exchange - Dynamo Connector Revit 2026.
Download the relevant version of the Data Exchange - Dynamo Connector installer from the Feedback Portal.
- Data Exchange - Dynamo Connector Revit 2023. This version of connector is compatible with Revit 2023.1.2 or a later 2023 version of the Revit software.
- Data Exchange - Dynamo Connector Revit 2024. This version of the connector is compatible with Revit 2024.2.0 version of the Revit software.
- Data Exchange - Dynamo Connector Revit 2025. This version of the connector is compatible with Revit 2025.4.0 version of the Revit software.
- Data Exchange - Dynamo Connector Revit 2026. This version of the connector is compatible with Revit 2026.3 version of the Revit software.
To use both Autodesk Data Exchange Connector for Revit and Data Exchange - Dynamo Connector within the Revit Software, install the compatible versions of both connectors. Following are the compatible versions of both the Connectors
Download and install the Autodesk Data Exchange Connector for Revit 2023 and Data Exchange - Dynamo Connector Revit 2023 for Revit 2023.1.2 or a later 2023 version.
Download and install the Autodesk Data Exchange Connector for Revit 2024 and Data Exchange - Dynamo Connector Revit 2024 for Revit 2024.2.0.
Download and install the Autodesk Data Exchange Connector for Revit 2025 and Data Exchange - Dynamo Connector Revit 2025 for Revit 2025.4.0.
Download and install the Autodesk Data Exchange Connector for Revit 2026 and Data Exchange - Dynamo Connector Revit 2026 for Revit 2026.3
If you install noncompatible versions of Revit and Dynamo Connectors, you will face issues while using the Data Exchange - Dynamo Connector. To solve this, either install the compatible versions of both the Connectors or uninstall the older version of the Autodesk Data Exchange Connector for Revit (if already installed) and use the Data Exchange - Dynamo Connector independently without any issues. If you encounter any issues with the version, please contact support at data.exchange.support@autodesk.com.
Make sure that you have an Autodesk Construction Cloud (ACC) or trial License to access the Autodesk Docs projects on ACC.
Your Account Administrator must add you to at least one of the projects on ACC.
Make sure that you have the required permissions to the folder where you perform the following actions:
- Creating Data Exchange: “View+Download+Publish+Upload” or higher.
- Loading Data Exchange: “View+Download” or higher. For more information, see Folder Permissions.
Uninstall the previous version of the Data Exchange - Dynamo Connector before installing the latest build.
Important: Data Exchanges in US, EMEA, and AUS based hubs are supported.
Install
This section explains how to install the “Data Exchange - Dynamo Connector”. Make sure that you read the System Requirements and Prerequisites sections and complete the required actions before installing the Connector.
Third-Party Notice:
If you are authorizing a third-party application to access your Autodesk account, the application you are connecting to is provided by a third party and not provided by Autodesk, Inc. By clicking install, you are allowing the third-party app to access and use your data in accordance with the third party’s legal terms and privacy policy, and you assume all responsibility for such access and use via the third-party application.
Double-click the downloaded Data Exchange - Dynamo Connector Revit x_x.x.x-BETA.exe (for example, Data Exchange - Dynamo Connector Revit 2023_1.2.0-BETA.exe) installer package from the Feedback Portal.
The installation setup wizard appears, click Next.
Accept the License Agreement.
Click Install to confirm the installation.
After successful installation, click Finish to exit.
The Data Exchange - Dynamo Connector will be available to use in the Revit software upon completion of the preceding steps. Furthermore, it can be added as a plug-in within the Dynamo Sandbox software, and the instructions for this can be found in the Dynamo Sandbox Software topic.
Revit
After following the previous steps, the Connector will be added to the Revit software as a plug-in. The following steps explain how you can access the Connector from Revit.
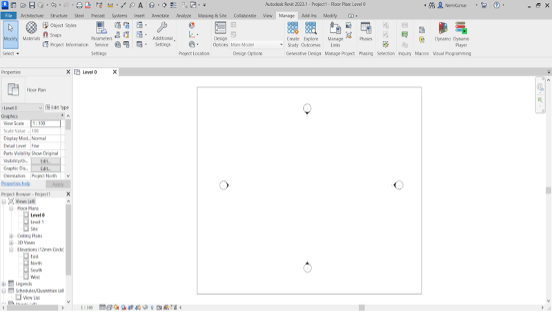
In the Revit software, click Manage and then click Dynamo.
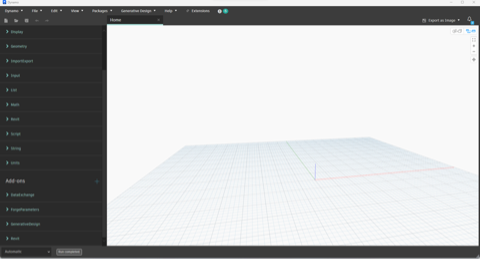
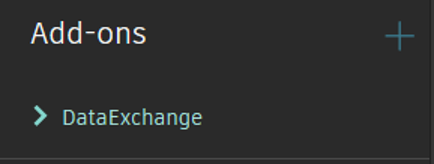
The Connector opens and the Data Exchange library containing all the nodes will be listed under the Add-ons section.
Dynamo Sandbox Software
This topic explains how to install the Dynamo Sandbox software and then add the Connector as a plug-in. Make sure that you read the Prerequisites section before installing the Connector.
Download and unzip the relevant Dynamo Sandbox software.
- Dynamo Sandbox 2.16 for Data Exchange - Dynamo Connector 2023 (for Revit 2023.1.1 and a later 2023 version)
- Dynamo Sandbox 2.18 for Data Exchange - Dynamo Connector 2024(for Revit 2024.2)
- Dynamo Sandbox 3.3 for Data Exchange - Dynamo Connector 2025 (for Revit 2025.4)
- Dynamo Sandbox 3.6 for Data Exchange - Dynamo Connector 2026 (for Revit 2026.3)
Double-click the DynamoSandbox.exe file.
This will open the Dynamo Sandbox software.
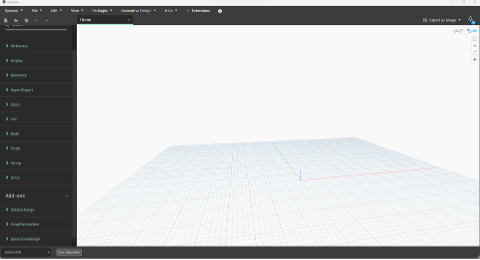
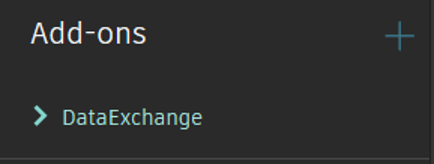
The Data Exchange library containing all the nodes will be listed under the Add-ons section.
Uninstall
This topic contains instructions on how to uninstall the Data Exchange – Dynamo Connector.
- In the Windows search bar, search and select Control Panel.
- Select Programs > Programs and Features.
- Select Data Exchange - Dynamo Connector from the list of programs.
- Click Uninstall.
- A dialog box appears requesting your confirmation, click Yes.
- After successful uninstallation, click OK.
Update
Download and install the required version by following the steps from the Install section.
