Load and Unload Exchanges
This topic details how to share data using Autodesk Data Exchange Connector for Tekla. Following are the steps to load an exchange in Tekla Structures Active Document.
Load an Exchange
The load feature allows you to view and load an exchange from Autodesk Docs to your connector.
Click Data Exchange under the DATA EXCHANGE tab.
Click Load exchange.
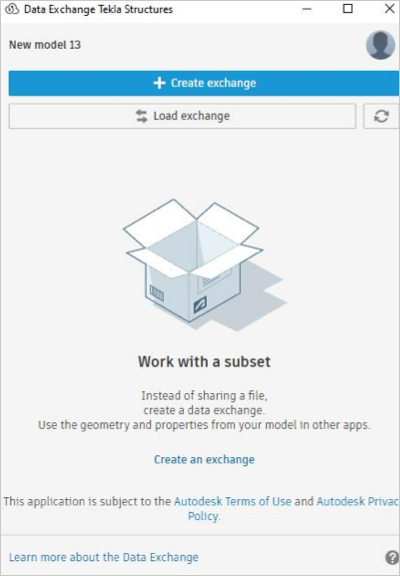
You will view a list of the exchanges you can access in Autodesk Docs. You can also switch between different projects from the project drop-down list.
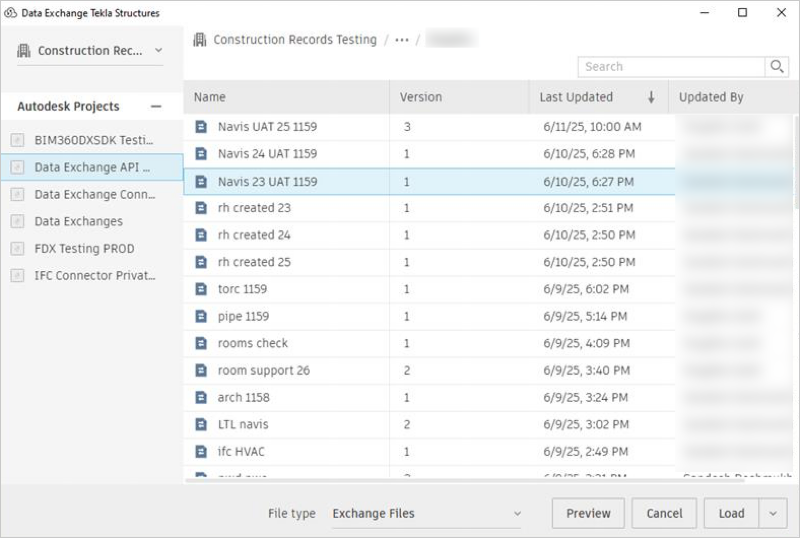
Select your project, select an exchange, and click Load.
Important: You can preview the exchange before loading with the Preview button.Once you've selected the exchange to load, you click on the "Load" dropdown to choose Advanced load options.
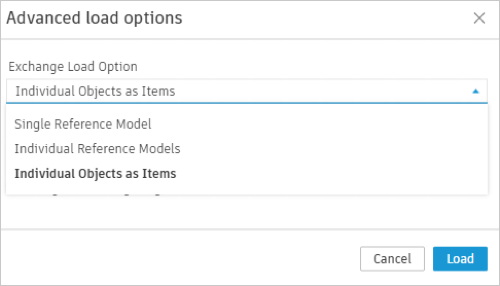
In the Advanced load options dialog, you can see the Exchange Load Option setting. You can choose one of the following:
Single Reference Model
This is the fastest option that loads the entire Data Exchange as a single, unified reference model in Tekla Structures. This option treats all objects in the exchange as one cohesive unit, similar to loading an external reference file.
When to Use:
- When you need quick visualization for coordination purposes
- Large exchanges with hundreds or thousands of objects
- When individual object properties are not required
Limitations:
- Individual object attributes/properties are not accessible.
- Cannot be converted to native Tekla Structures objects as of the current version.
- Limited editing capabilities - treated as an external reference.
Individual Reference Models
This is the slower loading with complete data access. It loads each object from the Data Exchange as a separate reference model, preserving all individual object attributes and properties while maintaining them as reference geometry.
When to Use:
- When you need access to detailed object properties and attributes
- When object metadata is critical for downstream processes
- Smaller to medium-sized exchanges
Benefits:
- Full access to all object attributes and parameters
- Individual object selection and inspection are possible
- Maintains object groups and categories
Limitations:
- Slower loading times, especially for large exchanges
- Objects remain as references, not native Tekla Structures objects
Individual Objects as Items (Recommended)
This is the recommended and faster option with full functionality. Each object from the exchange is an individual item in Tekla Structures, providing the optimal balance between loading speed and data accessibility. This method creates discrete objects that can be selected and queried while maintaining good performance.
When to Use:
- Most workflows provide the best overall experience
- When you need both performance and attribute access
- Coordination workflows requiring object selection
Benefits:
- Fast loading performance
- Objects will be loaded as native Tekla Structures Items.
- Individual object attributes preserved
- Objects can be selected and highlighted individually
- Optimal balance of speed and functionality
Best For:
General coordination workflows
Integration with Tekla Structures tools and processes
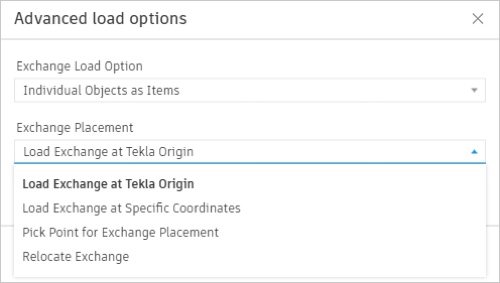
After selecting the load option, you will be prompted to choose where to place the exchange in Tekla Structures. In the Exchange Placement window, you have four options:
- Load Exchange at Tekla Structures Origin: The exchange will be placed at the model’s origin (0,0,0).
- Load Exchange at specific Coordinates: Manually enter the X, Y, and Z coordinates to place the exchange at a specific location.
- Pick point for Exchange Placement: Select this option to place the exchange interactively by clicking on a location within the model using your cursor.
- Relocate Exchange: Select a reference point on the exchange and specify where you want to move the exchange.
Choose the required option and click Load.
You can select Group to Category Mapping and Include Parameter while the exchange loading is in process.
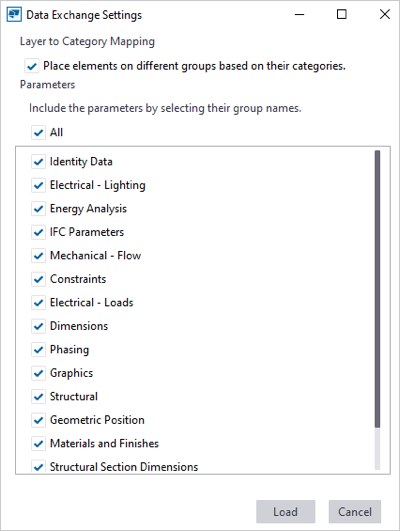
If the model contains unsupported or failed elements, they’re now automatically captured in a detailed HTML report. After the workflow finishes, the interface shows a notification with a clickable link to the report. The progress bar shows the progress.
The exchange loading process can be canceled at any time by clicking the Cancel button.
The exchange will be listed in the connector interface after the load is completed.
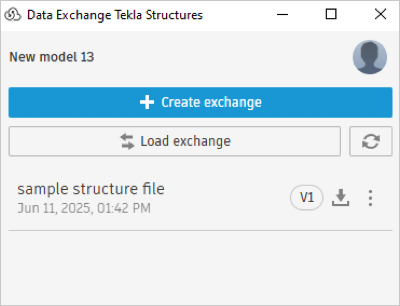 Important: In loading an exchange from Dynamo to Tekla Structures, the exchanges are created for native objects from Dynamo. When you load that exchange in Tekla Structures, it adds parameters under the General category.
The workflow involves the following steps:
- Creating or defining parameters in Dynamo and creating an exchange.
- Loading an exchange in Tekla Structures.
- Parameters for Dynamo's natively created objects will be added to the General category in Tekla Structures.
Load the Latest Version of an Exchange
When a newer version of an exchange is available in Autodesk Docs, you can use the Load the latest feature in the connector to refresh, view, and load the latest version. Additionally, the Push Events feature automatically notifies users when one or more exchanges in the list have new versions available. A blue dot appears in the interface to indicate these updates.
Click refresh icon to check if any of the exchanges you have loaded to the connector have newer versions available, in Autodesk Docs. If an exchange has the latest versions available, then it shows a blue dot.
Select the relevant exchange which needs to be updated from the list.
Click More menu and click Load the latest from the drop-down list.
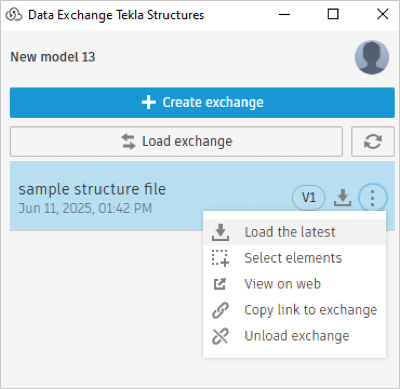
You can select Group to Category Mapping and include Parameter while the loading is in process.
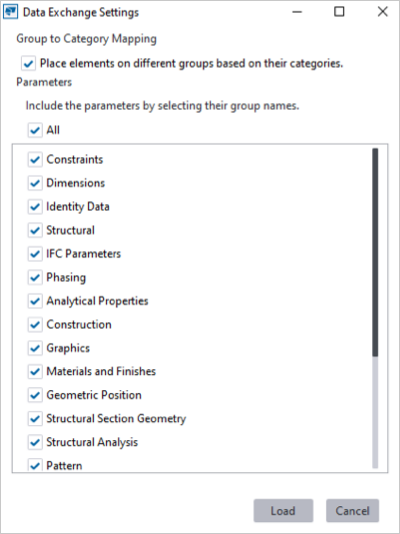
If the model contains unsupported or failed elements, they’re now automatically captured in a detailed HTML report. After the workflow finishes, the interface shows a notification with a clickable link to the report. The progress bar shows the progress.
The exchange loading process can be canceled at any time by clicking the Cancel button.
The exchange will update to the latest version, with the latest changes. (for example, V1 to V2).
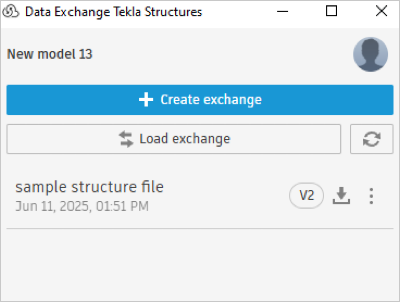
Unload an Exchange
You can unload the selected exchange and remove it from the connector interface. While this feature allows you to remove the exchange from the connector interface, it does not remove the exchange from Autodesk Docs or the associated data from the Tekla Structures model. This means that although the exchanges may not be visible in the interface, they are still available in Autodesk Docs and Tekla Structures software.
Select an exchange from the connector interface list.
Click More menu and click Unload Exchange from the drop-down list.
A warning message will appear to inform you that removing an exchange will eliminate all its associated elements from your file. Click Unload to confirm.

It unloads the exchange and removes it from interface.
Unload a Deleted Exchange
You can unload or remove exchanges from the connector interface when the corresponding exchanges are deleted and no longer available in Autodesk Docs.
Open Tekla Structures model which references the deleted exchange in Autodesk Docs.
Open the connector interface and click the refresh icon.
A message appears to confirm if you want to unload the deleted exchange from Tekla Structures software.
Select the exchange from the list and click Unload. It removes the deleted exchange from the interface.
Important: Select Cancel to retain the Tekla Structures objects of an exchange.
