
Editing Splines
Use the settings in the 3D Path tab to work with the spline you created. You edit splines in the same way as you edit garbage masks, working with their vertices and tangents. See Manipulating Vertices and Tangents.
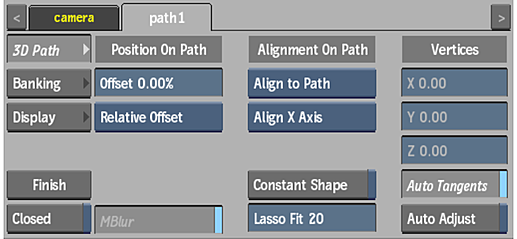
Finish button
Click to finish an open spline.
Closed button
Enable to close a spline from the last to first point.
Motion Blur button
Enable to use a motion blur effect for the selected path (can only be used if the global Motion Blur is enabled in the Action Setup menu).
Constant Shape button
Enable to modify the spline's shape without setting keyframes. This forces all animatable parameters to be set for the whole clip rather than for only the current frame.
It also removes any existing keyframes and applies the shape of the current frame to the rest of the clip.
Lasso Fit field
Displays the number of points in the segments of the spline that are drawn freehand. Use a lower number to simplify the curve by removing vertices and tangents, resulting in a smoother curve. Editable.
X Vertex field
Displays the position of the selected vertices on the X axis. Editable.
Y Vertex field
Displays the position of the selected vertices on the Y axis. Editable.
Z Vertex field
Displays the position of the selected vertices on the Z axis. Editable.
Auto Tangents button
Enable to position a tangent for each vertex set, to create a smooth curve between the vertices. When enabled, it is possible to create a spline with both straight and curved segments.
When Auto Tangents is disabled, the tangents are positioned under the vertex, resulting in straight lines between vertices. When you draw freehand segments in a spline with Auto Tangents off, vertices are added with broken tangents, allowing the spline to follow your cursor movement.
Auto Adjust button
Enable to automatically adjust the tangent handles of the two adjacent vertices when moving vertices, to create smooth curves between the vertices.