| Disclaimer |
|---|
|
We do not guarantee the information in this document. The presence of a class or method in this document does not guarantee it will exist and/or work as described. December 2019 |
Introduction
This topic includes the basics of using Ruby, and then introduces features specific to InfoWorks ICM, InfoWorks WS Pro and, the Innovyze-supplied product, InfoAsset Manager. It is intended for users who have some knowledge of programming but are not experts. Most of the material covered in this topic is common to all InfoWorks products, although for consistency, the examples are based on the uses within InfoAsset Manager. Since the focus is on the use of Ruby, not the details of the application, the extension to InfoWorks ICM and InfoWorks WS Pro should be obvious.
You will need the following:
- A copy of InfoAsset Manager, InfoWorks ICM or InfoWorks WS Pro.
- A suitable text editor designed for editing scripts. TextPad is a suitable such program, which offers useful highlighting when editing Ruby scripts, but there are others available.
- If you are using InfoAsset Manager, the InfoAsset Manager tutorial network Malden can be imported from a snapshot file.
Lesson 1 - Writing and running a script
Open your text editor and type in the line:
puts 'Hello World'
Save the file in a folder you can find as lesson1.rb (rb is the standard file extension for Ruby scripts).
In this example, we are working with the InfoAsset Manager tutorial Malden network which can be imported from a snapshot file.
However, in your InfoWorks product, you can open any network.
Go to Network menu Run Ruby script, and choose the file, lesson1.rb, that you just saved.
A window will appear with the heading Script Output and displays the text:
Hello World
Congratulations, you have run your first script.
What we have done here is used puts to output a string, i.e. a piece of text. Simple strings like this begin and end with single quote. There are other strings beginning and ending with double quotes which will be described later.
When you use the function puts like this in an InfoWorks product, such as InfoAsset Manager, the outputs are stored in a file whilst the script is running, then when the script is finished the file is displayed (and then deleted when you close the window).
Lesson 2 - Variables
Enter the following into a new file named lesson2_1.rb, save it and run it from within an InfoWorks product, such as InfoAsset Manager, as before:
a=123
b=456.789
C='badger'
puts a
puts b
puts c
You will see the following:
123
456.789
badger
Variables can be thought of as slots that can contain values e.g. in this case a is the name of the slot and the value it contains is the number 3, b is the name of the slot and the value it contains is the number 456.789, c is the name of the slot and the value it contains is the string 'badger'.
| Slot name | Slot value |
|
a |
123 |
|
b |
456.789 |
|
C |
badger |
Variable names must begin with a lowercase letter, and can contain lower and uppercase letters, digits and the underscore (_) character e.g.
aVariable, this_is_a_variable,variable9 etc.
Because they cannot contain spaces people usually represent words likeThis or like_this i.e. either by capitalising the first letter of all subsequent words or by putting an underscore between each word.
The value in the variable's slot can vary, hence the name variable.
To demonstrate this, enter the following into a new file called lesson2_2.rb and run it inside an InfoWorks product, such as InfoAsset Manager, as before:
a=123.456
puts a
a=234.567
puts a
a=345.678
puts a
You will see the following:
123.456
234.567
345.678
This is because the variable a is given the value 123.456, then this is output using the puts function, then it is given a new value, 234.456, then this is output using the puts function, then it is given a new value 345.678, then this is output using the puts function.
You can think of this as the slot with name a starting with value 123.456:
| Slot name | Slot value |
|
a |
123.456 |
Then the value held in the slot is changed to 234.567, but it is still the same slot and no more slots have been created:
| Slot name | Slot value |
|
a |
234.567 |
Then the value in the slot is changed to 345.678, but again it is still the same slot and again no more slots have been created:
| Slot name | Slot value |
|
a |
345.678 |
[For people familiar with programming to some extent, note that you do not have to 'declare' the variable before using it. The first time you assign a value to it by saying a = 123.456, it comes into existence.]
In addition to assigning values to variables you can perform calculations on them.
Enter the following into a new file, lesson2_3.rb and run it as before:
puts 120/40
puts (12+3)/3
a = 12
puts a / 4
b = 30
c = a * b
puts c
b = c * a
puts b
You will see the output
3
5
3
360
4320
The things that are calculated and then output with puts or which are stored in variables above such as:
- 123.456
- a
- a/4
- (12+3)/3
- c*a
are known as 'expressions'.
The value given when the expression is calculated is referred to as its 'result'. The values such as 120, 40 etc. above that aren't variables are referred to as constants because, unlike variables, they don't vary.
Now enter this into a new file, lesson2_4.rb and run it as before:
a=23
a=a+1
puts a
You will see the value 24. What this demonstrates is that you can use the old values of variables when calculating new ones. If you think of it as a mathematician would, as being an equation 'a=a+1' then this doesn't many any sense, but if you think of the variables as being slots then taking the value of the slot named a, adding one to it and putting it back this makes perfect sense.
Now enter the following into a new file, lesson2_5.rb and run it - the result may surprise you!
puts 10/3
The answer you will see is:
3
This is because Ruby (in common with InfoWorks databases such as InfoAsset Manager databases, Access databases, Oracle databases, GISs, most other programming languages, and indeed most software) has two primary sorts of numbers:
Integers, which represent whole e.g. 1, 7, 213, 499 etc. (as well as zero and negative numbers e.g. -234)
Floating point numbers, which represent values including decimal places e.g. lengths, widths, heights, flows, volumes etc. etc. eg. -23.234, -11.27 etc. (the reason they are called 'floating point' numbers is one we will gloss over at this point - there are many complications with how computers represent this sort of number, and whole books have been written about it, however on the whole you should not need to know these details).
The expression 10/3 is treated as division of an integer by an integer and gives the result as an integer. Assuming that this is not in fact what is wanted, the expression can be evaluated using floating point numbers by saying any of the following:
puts 10.0/3
puts 10/3.0
puts 10.0/3.0
Type those into a new file, save it as lesson2_6.rb and run it, you will see that the answers are all the same:
3.3333333333333335
3.3333333333333335
3.3333333333333335
- By entering the constants with .0 on the end, the values are treated as floating point numbers rather than integers.
- By performing the calculation with one or more floating point numbers in the expression ensures that the calculation is done using floating point numbers, and therefore gives the answer you probably wanted and expected.
There are also a variety of expressions that can be performed on things other than numbers. One you will probably use frequently is to assemble strings using the '+' operator e.g.
puts 'Hello' + ' ' + 'World'
will output
'Hello World'
Lesson 3 - Error messages
It may be that you have successfully typed in all the examples above. If you haven't you have probably seen an error message already. If you haven't seen an error already, or even if you have, we will now type something deliberately incorrect to cause one to appear.
Type the following into a new file save it with the name lesson3_1.rb, then run it from an InfoWorks product such as InfoAsset Manager:
puts badger
You will see the following error message:
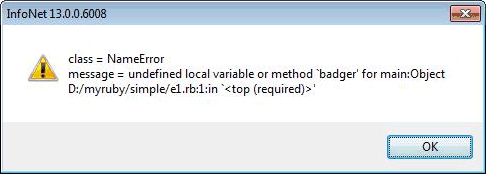
The precise meaning of the class = NameError and the main:Object will become apparent later, but the important part of the message is 'undefined local variable or method 'badger'' and the line number of the script in which it occurred. Your text editor should have some way of showing you the line numbers. Textpad, for example, shows the current line number on the status bar, and can show the line numbers at all times if you select the 'Line Numbers' option on the View menu'. What this message means is that you are trying to do something with the value of a variable which has not had a value set. Variables come into existence when values are set for them, not when you attempt to get values from them, therefore to output the value of a variable badger without setting it is an error. It could, of course, also be that you meant to output the string 'badger' in which case you should have said the following:
puts 'badger'
Now type the following into a file, save it as lesson3_2.r and run it:
puts 3/0
You will see the following error message:
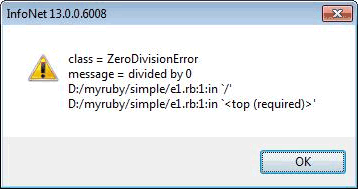
This is the error message you will see when you try to divide a number by zero.
Other error messages will be shown in due course throughout these lessons.
Lesson 4 - Methods
Suppose you have a string myString containing the value 'badger', and want to find its length (i.e. how many characters it contains, 6 in this case) you do this as follows:
Type the following into a new file, save it as lesson4_1.rb, then run it from an InfoWorks product such as InfoAsset Manager:
myString='badger'
puts myString.length
This will output the following:
6
This has used length which is termed a 'method' to find the length of the string, then puts has been used to output the value. The value produced by the method is referred to as the 'return value' and the method is said to 'return' it - in this case we say that the length method returned 6.
When we use a method in a script as we did with the line
puts myString.length
we say that the method has been 'called'.
The notation used here is to follow the variable name with a dot followed by the name of the method.
Other methods that can be used in conjunction with strings in this manner include capitalize, upcase, downcase, swapcase and reverse.
Type the following into a new file, save it as lesson4_2.rb
myString='baDGEr'
puts myString.capitalize
puts myString.upcas
puts myString.downcase
puts myString.swapcase
puts myString.reverse
Before running it, write down what you expect to see based on the names of the methods, the run it and compare what you expected with what you saw.
In the case of the methods demonstrated above it is not necessary to supply any other information to perform the necessary tasks - you don't need to provide any other information to reverse a string or find its length.
In other cases, however, it is necessary to supply extra information. For example, the method count returns the number of times a particular letter occurs in a string.
Enter the following into a new file, save it as lesson4_2.rb, then run it:
myRiver='Mississippi'
puts myRiver.count('M')
puts myRiver.count('i')
puts myRiver.count('s')
puts myRiver.count('p')
puts myRiver.count('z')
This will output the following:
1
4
4
2
0
In the line:
puts myRiver.count('M')
we say that 'M' is the 'argument' .
The method count here has one argument. It is also possible for methods to have more than one argument. The tr method has two arguments. Its purpose is to replace all occurrences of one string in another string with a second string.
Enter the following into a new file, save it as lesson4_3.rb, then run it:
myRiver='Mississippi'
puts myRiver.tr('M','N')
puts myRiver.tr('s','z')
puts myRiver.tr('i','y')
puts myRiver.tr('p','s')
In the line
puts myRiver.tr('M','N')
we say that 'M' and 'N' are the arguments of the method.
Arguments follow the names of the method, are enclosed in brackets and if there is more than one of them are separated by commas.
Lesson 5 - Arrays
An 'array' represents a number of values in order e.g. the days of the week, the months of the year, the nodes in a network, the details in a CCTV survey, the coordinates of bends in a pipe. Arrays have a number of things in them (e.g. 7 for days of the week, 12 for months of the year) and are ordered e.g. there is a 1st day, a 2nd day (even though you have to decide which is the first!), a 1st month, a 12th month. Array is a technical term which refers to something which is probably usually referred colloquially as a 'list' (e.g. a list of days, a list of students in a class, a list of manholes in a survey etc.), but the term 'list' when used in computer software refers to something slightly different with a specific technical meaning which isn't going to be discussed here, which is why the term 'array' is used.
Enter the following into a new file, save it as lesson5_1.rb, then run it.
days=['Monday','Tuesday','Wednesday','Thursday','Friday','Saturday','Sunday']
puts days
puts days.length
puts days[0]
puts days[1]
puts days[6]
puts days[-1]
puts days[-2]
The output will be:
Monday
Tuesday
Wednesday
Thursday
Friday
Saturday
Sunday
7
Monday
Tuesday
Sunday
Sunday
Saturday
The first line defines the array, the notation for this in Ruby is to begin with an open square bracket, then list the values separated by commas, then end with the close square bracket.
The second line uses puts to output the array. As you see from the output this writes each of the values on a separate line.
The third line uses the length method of the array, which returns the number of elements in the array.
The fourth, fifth and sixth lines demonstrate how to get individual values from an array. To get an individual value you put an integer, which can be a variable or expression but aren't in these cases, in square brackets.
The positions are numbered from 0, not 1 as you might expect, so the first thing in the array 'Monday', is returned by days[0], the 2nd 'Tuesday' is returned by days[1] and so up to days[6] which returns 'Sunday' - notice that 6 is one less than the length returned by the length method.
As well as counting forwards you can also count backwards so that days[-1] returns the last item in the array, days[-2] returns the last but one etc.
There are other ways of creating arrays which will be covered later.
Lesson 6 - Introducing the InfoAsset Manager objects
Check that you have access to the Malden network which will be used as the network for this and subsequent lessons.
In the same way that we found the length of the array above by days.length, we can find information about the InfoAsset Manager software.
Run the script:
puts 'Welcome to '+WSApplication.version
You will see something like:
Welcome to 13.0.0.6008
(depending of course on the exact version you are running).
This, using the '.' as described before runs a 'method' on the WSApplication (which will be described in more detail later) which returns a string containing the software's version number. The script has then taken two strings and used '+' to join them together as shown previously.
The most useful method of WSApplication when used from InfoAsset Manager is current_network, the purpose of which is to provide access to the current network, and from this all the objects in it, the relations between them and so forth.
Run the script:
net=WSApplication.current_network
puts net
This will return something like:
#<WSOpenNetwork:0xc7752e8>
This means that the object returned by WSApplication.current_network and stored in the variable net is a WSOpenNetwork. A more formal way of describing this is to say that net is a WSOpenNetwork, or even more formally that net is an instance of the class WSOpenNetwork.
Having obtained an object for the current network we can then find information about the objects in the network and manipulate them in many ways. For instance, if we know that there is a manhole with the name 'MH111111' we can output its x and y coordinates by running the script:
net=WSApplication.current_network
my_manhole=net.row_object('cams_manhole','MH111111')
puts my_manhole
puts my_manhole.x
puts my_manhole.y
This will output the following:
#<WSNode:0xc774f8c>
278580.0
187586.0
The first line of the output is similar to that obtained above for the network and shows that the object obtained from the network is an instance of the class WSNode, the second and third lines show the x and y coordinates of the manhole, which can be verified by looking at the node's details in the software.
What we have done here is call the method row_object on the network with the arguments 'cams_manhole' (a string) and 'MH111111' (another string). The first string is the name used to identify the nodes table in collection networks, these are listed in full in the supported documentation but a number will be introduced in the course of this document. The second string is the ID of the manhole we are interested in.
Now change the script to:
net=WSApplication.current_network
manholeID='MH111111'
my_manhole=net.row_object('cams_manhole',manholeID)
puts 'the x coordinate of manhole '+manholeID+' is '+my_manhole.x
What has happened here is that the manhole ID has been stored in the variable manholeID, because we are going to use it twice, and it is better to only type things once to avoid making mistakes so the two don't tie up.
The aim here is to produce a more informative message that just outputting the ID and the coordinates by joining some strings together using the '+' operator.
Run the script. You will see the error message:
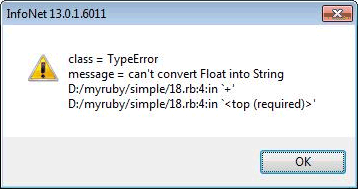
The reason for this is that we weren't, in fact, joining strings together, we were joining 3 strings ('the x coordinate of manhole', the manhole ID and ' is ' to a number. This is not permitted by Ruby, so we must explicitly convert the number to a string by using the 'to_s' method.
Change the script by changing the final line to:
puts 'the x coordinate of manhole '+manholeID+' is '+my_manhole.x.to_s
and rerunning the script, you will see the desired output:
the x coordinate of manhole MH111111 is 278580.0
Lesson 7 - While loops (Part 1)
Rather than obtaining one object in this fashion we will often want to obtain all the objects of a particular type in the network.
This lesson will show how we can list the IDs of all the manholes in the network.
First of all, suppose we want to output the numbers 1 to 100 and then output the word 'done', we could do this by writing a script:
puts 1
puts 2
puts 3
puts 4
puts 5
…
puts 100
puts 'done'
But this would be rather silly, and would require more work if we changed our minds and wanted the numbers 1 to 1000.
Instead, the way we do this is to write the script:
i=1
while i<101
      puts i
      i=i+1
end
puts 'done'
The meaning of this is essentially what you would expect it to mean in plain English, i.e. repeatedly perform the instructions between the while and the end for as long as the expression on the while line is true - i.e. for as long as i is less than 101.
To give a concrete example, suppose you had a handful of 5p pieces and were buying a coffee from a machine that cost 60p you might informally say this as
'while the money you have put in the machine is less than 60p
Put in another 5p
end'
In script terms this would be:
paid=0
while paid<60
        paid=paid+5
end
Type the script above (the one outputting the numbers from 1 to 100) into your text editor, save it with the rb suffix in a directory you can remember and run it to verify the output is, indeed, the numbers from 1 to 100. You will want to make the lines between the while and the end start further over to the right than the while and end lines and the 'i=1' line - the idea here is to make it easy to see which lines are inside the while and the end. Ruby does not insist on this but when you start to write scripts of any complexity you will strongly regret not doing this, this is called 'indenting your code'.
Run the script and admire the output.
The variable i is set to the value 1.
The variable i is compared with the value 101 to see if it less than it, if it is then all the lines between the while and the end are run in order (unless there is something else to affect the order things happen, which there isn't) i.e. in this case the value of the variable i is output, then 1 is added to it, then control returns to the while and the test is performed again and the instructions between the while and the end are performed and so on until the value of i becomes 101, the while test then fails and so execution moves on to the final line:
puts 'done'
There are more concise ways of doing this which will be described later, but they only really make any sense once the mechanism described here has been properly understood.
As well as < meaning 'less than' there are other similar tests as follows:
- <= less than or equal to
- == equal to (notice that this is the equal character = twice)
- != not equal to
- > greater than >
- = greater than or equal to
Lesson 8 - While loops (Part 2)
We now return to the array of the names of the days of the week. By using a loop it is possible to loop through them all.
Enter this into your text editor, save it as lesson9_1.rb, and then run it.
days=['Monday','Tuesday','Wednesday','Thursday','Friday','Saturday','Sunday']
i=0
while i<days.length
      countStartingFromOne=i+1
      puts 'day '+countStartingFromOne.to_s+' is named '+days[i]
      i=i+1
end
This will produce the output:
day 1 is named Monday
day 2 is named Tuesday
day 3 is named Wednesday
day 4 is named Thursday
day 5 is named Friday
day 6 is named Saturday
day 7 is named Sunday
Notice we have again used the to_s method to convert I into a string to allow us to build up the output string.
What is going on here should be apparent from ideas already discussed - the names of the days are stored in an array with length 7 and stored in the array with Monday being element index 0, Tuesday 1 and so on up to Sunday being element 6. To output them all we write a loop with I taking the values 0, 1, 2, 3, 4, 5 and 6 in turn - making sure that the condition in the while line stops us reaching 7 which is past the end of the array.
Having done this with the numbers and the days, we now move on to a more concrete example - outputting the IDs of all the manholes in the network
Type the following into your text editor, save it as lesson9_2.rb and run it:
net=WSApplication.current_network
manholes=net.row_objects('cams_manhole')
puts manholes.length
This will output the number of manholes:
61
It does this by getting an array of manholes using the method of the network object which returns an array of objects, given the type of object as an argument. Having got the array it then outputs its length using the length method of the array. Again we are using the '.' notation to use a method of an object.
Now type the following into your text editor, save it as lesson9_3.rb and run it:
net=WSApplication.current_network
manholes=net.row_objects('cams_manhole')
i=0
while i<manholes.length
      manhole=manholes[i]
      puts manhole.id
      i=i+1
end
You will see a list of all the manhole IDs.
This script is working on the same principles as the one that outputs the numbers, but instead of outputting the numbers, it outputs the IDs of manholes - using the square brackets notation described earlier to get elements from an array in the same way that we did with the array of names of days of the week. It gets each manhole in turn starting with the one at index 0, the first in the array and continuing until the last in the array with index manholes.length-1.
Having got each manhole in turn, it then uses the id method of each manhole to get its value. The id method returns the id of all objects regardless of what the name is in the database as shown in export files and the SQL and open data import and export centres. Indeed, id will work even for objects where the 'id' is made up of more than one field. In this respect it is the same as the oid field in SQL in the software.
Notice that we are using the test for less than rather than less than or equal to. You will find that you usually have to do this because arrays start with index 0, so the last index of an array with n elements is n-1.
Now change the script to change the 2 lines that say:
manhole=manholes[i]
puts manhole.id
to
puts manholes[i].id
and run it.
You will see that the result is the same. This shows that you don't need to store the manhole object in a variable before calling a method on it - manholes[i].id will return the ID of the manhole without storing it in a variable. You will see this sort of thing frequently - if you have an object a with a method b which returns an object with method c which returns an object with method d then you can happily use a.b.c.d
Something to watch out for is what happens should you forget to put the i=i+1 line into the script. Remove it from the script so the script now reads
net=WSApplication.current_network
manholes=net.row_objects('cams_manhole')
i=0
while i<manholes.length
      puts manholes[i].id
end
Run it. You will see that the following appears on the screen and stays there:
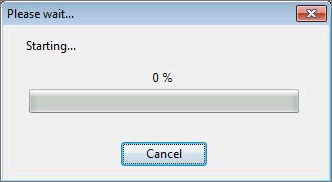
This occurs because the script is outputting the ID of the first manhole, then checking to see if I is less than the number of manholes in the array, which it is, then outputting the ID of the first manhole, then checking to see if I is less than the number of manholes in the array, which it is, and so on and so on.
Click Cancel. You will see the error message:
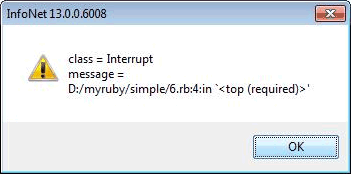
This tells you that the script was interrupted before it finished. After you click OK the software may spend some time doing nothing whilst it reads the file of output messages in order to display it, which may potentially take some time.
Lesson 9 - If (Part 1)
Along with loops, the other main mechanism for controlling what happens in scripts is the if block.
Suppose we want to classify pipes with width less than 200mm as small and others as 'not small', we do this using the if construct in Ruby.
We will start by demonstrating this without reference to actual network data. Type the following into your text editor, save it as lesson10_1.rb, then run it.
myWidth=23
if myWidth < 200
     puts 'the pipe is small'
end
puts 'finished'
As with the while example in the previous lesson, remember to indent the line between the if and the line beginning end by using the tab key to the left of the Q.
You will see the output
the pipe is small
finished
Now change the first line to
myWidth=250
Now save and rerun the script - you can do this by finding it in the 'recent scripts' menu item.
This time the output will be
finished
What has happened here is that in the first case the test in the if statement was true, because the variable myWidth was set to the value 23 and 23 is less than 200, so the line of script between the if and the end was run, so the string 'the pipe is small' was output.
In the second case, however, the variable myWidth contained the value 250 so the test failed because 250 isn't less than 200, so the line of script between the if and the end wasn't run, so just the final line was run, outputting the string 'finished'.
If you were to miss out the final line writing out 'finished' then nothing would be displayed at all since InfoAsset Manager only opens and displays a file if there is something to show. It will turn out later that you will quite often want to write scripts that don't output anything to be shown in this fashion because you are changing network data, or selecting objects, or outputting other files etc
Lesson 10 - If (Part 2)
Now we want to output a line to say that the pipe isn't small if its width is greater than or equal to 200 mm.
We do this by adding an extra part to the if block beginning with just the word 'else'.
Change the script you were using in the last example by adding the following lines:
else
     puts 'the pipe is not small'
and changing the value of myWidth back to 23, then run it:
myWidth=23
if myWidth < 200
      puts 'the pipe is small'
else
      puts 'the pipe is not small'
end
puts 'finished'
Notice that the convention is that the else lines up with the if and the end, and the lines between the if and the else and between the else and the end are indented using the Tab key.
The result will be the same as in the previous lesson because the script from the if to the else is run, then it is skipped until the end.
Now change the myWidth value back to 250 and run it, you will see the output:
the pipe is not small
finished
This is because the test in the if line was performed and it failed, therefore the part of the script between the else and the end was run.
Note that it is possible to have more than one line between the if and the else, and between the else and the end - all the lines between the if and the else are run if the expression is true, otherwise all the lines between the else and the end are run.
To demonstrate this, change the script to the following and run it twice, once with the myWidth value set to 23 and once with it set to 250.
myWidth=23
if myWidth < 200
      puts 'the pipe is small'
      puts 'I SAID - THE PIPE IS SMALL'
else
      puts 'the pipe is not small'
      puts 'I SAID - THE PIPE IS NOT SMALL'
end
puts 'finished'
Suppose you want to classify the pipe as small, medium or large i.e. to have three choices rather than two, perhaps by saying that any pipe with a width at least 200mm but less than 400mm is medium.
The way this is done is to have a second test after the if test. This test begins with the 'word' elsif. Elsif is, of course not really a word - it is the only instance in Ruby of something like this not being a real word.
Type in this following script or make a copy of the previous one and edit it so it says the following:
myWidth=23
if myWidth < 200
      puts 'the pipe is small'
elsif myWidth < 400
      puts 'the pipe is medium'
else
      puts 'the pipe is large'
end
puts 'finished'
Now run the script, the output will be as before. Now change the value of myWidth in the first line to 250 and run the script, the output will be:
the pipe is medium
finished
Now change it to 450 and run the script, the output will be:
the pipe is large
finished
There are two things to note here:
Firstly, the tests are run in order until one of the tests is true. This means that although we only want the script to output 'the pipe is medium' if the width is between 200 and 400 mm, we don't have to explicitly say this (this is covered in a later lesson), we rely on the fact that if the width is less than 200mm the first test succeeds and the other tests are not performed.
This means that the order of the tests matter, so if you were to swap the lines and put them in the wrong order it wouldn't work. If you edited the script to say:
myWidth=23
if myWidth < 400
      puts 'the pipe is medium'
elsif myWidth < 200
      puts 'the pipe is small'
else
      puts 'the pipe is large'
end
puts 'finished'
And ran it, you would get the output:
the pipe is medium
finished
This is because myWidth is less than 400 so the first test succeeds so the lines of script between the if and the elsif are run so the string 'the pipe is medium' is output. If you think about it you will see that 'the pipe is small' is never output because there are no circumstances under which the first test will fail but the second test will succeed.
The second thing to note is that there can be more than one elsif line. If you have a large number of them then there may be better was of structuring your code but we will cover that later. The else and the lines of script following it are optional even if there is one or more elsif lines.
Lesson 11 - Selecting objects based on a test
We are now in a position to do something more interesting with the real network data.
Enter the following text and save it with the rb suffix.
net=WSApplication.current_network
net.clear_selection
Select some objects in the network then run the script.
You will see that the selection is cleared.
The aim now is to write a script which performs the same function as this SQL:
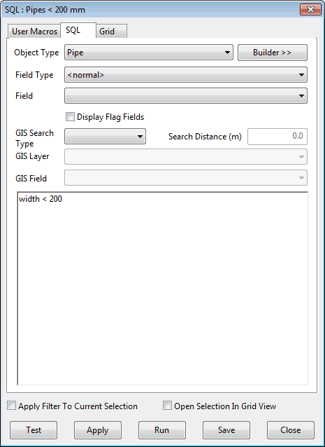
Type the following into your text editor, save it as lesson12_1.rb, then run it:
net=WSApplication.current_network
net.clear_selection
pipes=net.row_objects('cams_pipe')
i=0
while i<pipes.length
      pipe=pipes[i]
      if pipe.width < 200
            pipe.selected=true
      end
      i=i+1
end
Notice that this is the first time we have put an if inside a while block. If can go inside while and vice versa. You will notice that we have continued to use the tab key to indent things, so that everything between the while and the end, including the if and its end are indented once, and the one line that is between the if and its end is indented twice. This means that it is easy to keep track of what is run every time the while's expression is evaluated and turns out to be true, and also to keep track of what is run if the if expression is true.
Notice also the use of the word true. The values true and false (spelt that way, all in lower case) are two special values used in Ruby. You may be familiar with them from SQL, or you can think of them as being the equivalent of checked and unchecked as in check boxes e.g. the 'evidence of vermin' check box is checked if there IS evidence of vermin in a manhole, in this case the value of that field is true. If there isn't evidence of vermin, the check box will be unchecked and the value of the field will be false.
In this case above when we say:
pipe.selected = true
We are setting the selected property of the pipe to true i.e. we are selecting the pipe. Notice that the '.' is used when setting things (pipe.selected = true) as well as when getting values (pipe.width < 200).
The values true and false are known as Boolean values, named after George Boole, an English mathematician and philosopher - hence the capital B at the beginning of Boolean.
Now run the script shown above. You will see an error message as follows:
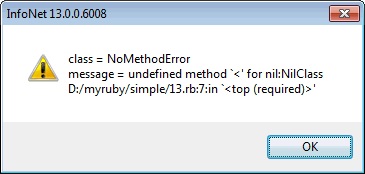
Notice that this error occurs on line 7 of the script, .which is the line that says:
if pipe.width < 200
The reason for the error message occurring is that pipe.width has the value nil for one of the pipes in the network. nil is a special value which means 'nothing', it is equivalent to NULL in SQL and serves the same purpose - to distinguish something with 'no value' from any other value such as 0, the string with no characters or false.
When a numeric field of an object in the network is blank (which is allowed in InfoAsset Manager) the value appears as blank in the grids and property sheets (and CSV export). When using the Ruby scripting in the software these field have the value nil.
If you look at the widths of the pipes in the network in a grid view you will see that there is, indeed, a pipe in the network with no value set for the field called width (which has the description US Width in the user interface).
In the SQL in InfoWorks / InfoAsset Manager, and in SQL in general, a query like width < 200 uncomplainingly ignores objects where the width is NULL (in SQL terms) and doesn't select them. In Ruby however, we cannot legitimately perform the test because the value is nil and therefore we are comparing nil with 200 which is not permitted. You can confirm this by typing the following into your text editor as a new script, saving it as lesson12_2.rb, then running it:
if nil < 200
     puts 'not expecting to see this message'
end
As expected this causes the following error message to be displayed:
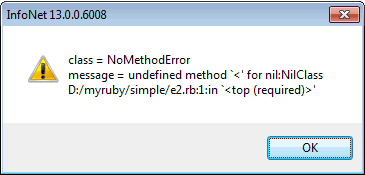
This is of course identical to the error message above except that the line number is different, being the first line of the script.
Having established that blank values are the cause of the error message, the question is now to prevent them. The answer here is to prevent the test being done if the value is nil. This is done by testing it with the method .nil?
Enter the following into the text editor as a new script, save it as lesson12_3.rb and run it. It sets the values of 7 variables and then tests to see if they are nil or not.
a=nil
b=''
c=0
d=0.0
e='badger'
f=123
g=123.456
h=true
i=false
puts a.nil?
puts b.nil?
puts c.nil?
puts d.nil?
puts e.nil?
puts f.nil?
puts g.nil?
puts h.nil?
puts i.nil?
The output will be
true
false
false
false
false
false
false
false
false
In passing, this demonstrates how puts behaves with Boolean values, because the nil? method when applied to objects returns true or false. More importantly it demonstrates that nil is the only one of these values for which the nil? method returns true. This script could of course have been written testing all the values in an array in a loop but for the sake of clarity it wasn't written that way.
This method enables a script to be written that will select the pipes that have values of the width set where the value is less than 200. Take the script you saved above as lesson12_1.rb, edit it so it says the following, save it as lesson12_3.rb, then run it:
net=WSApplication.current_network
net.clear_selection
pipes=net.row_objects('cams_pipe')
i=0
while i<pipes.length
      pipe=pipes[i]
      if pipe.width.nil?
      else
            if pipe.width < 200
                  pipe.selected=true
            end
      end
      i=i+1
end
Admire the selection of pipes and use the grids in the software to verify the correct objects have been selected.
There are a couple of things to note about the script:
Firstly, the test has been performed to see if the pipe width is nil using pipe.width.nil? If it is true then nothing is done for the pipe, therefore there is nothing between the if and the else. This is legitimate Ruby, though slightly unusual for reasons that will be explained shortly.
Secondly, this is the first time we have used an if inside another if.An If can be put inside an if(and, it turns out a while can go inside another while). We continue to use the tab key to indent the things between each while and the associated end , and between if and else and else and end.
This script has combined the things learnt so far, and has allowed a Ruby script to be used to select all of the objects of a particular type matching a particular condition.
Admittedly it has demonstrated that for the things that SQL can do easily, it can do in two lines instead of 14, but it is an important milestone. A more concise way of doing this will be described later.
As this is our first script which has reached three levels of indentation, this is a good time to mention comments! Comments are pieces of text added to your script that are for the benefit of you when you come back to the script, possibly after months or years, and to other people who find themselves in the position of having to understand or maintain the script. The comments are for the benefit of human beings, not the computer, so they are ignored when the script is run.
In Ruby comments begin with the # character (usually called 'hash' in the UK and 'pound' in the US). Anything on the same line following the # character is treated as a comment and is ignored when the script is run e.g.
# this is a comment on a line on its own
# this is a comment which is
# spread over 2 lines

            # this comment is indented
i=i+1 # this is a comment to the right of some code
There is much to be said about the art of commenting, the main things to say are:
Firstly, the comment should not just mirror the code, there is no point saying something like
i=i+1 # add one to variable i
Secondly, remember when you change the script, change the comment if necessary so that the comment is still correct.
net=WSApplication.current_network
net.clear_selection
pipes=net.row_objects('cams_pipe')
# loop through all the pipes in the network, using i
# as the index into the array
i=0
while i<pipes.length
      pipe=pipes[i]
      if pipe.width.nil?
            # do nothing if the pipe width is nil
      else
            if pipe.width < 200
                  pipe.selected=true
            end
      end
      i=i+1
end
As this is still a relatively simple script, only a couple of comments have been added.
The next lesson will take this to the next stage by allowing more complex tests, and showing how to make the testing of the values of the pipes less verbose.
Lesson 12 - More complex logical expressions (part 1)
The start of this lesson falls into 2 alternative parts - lesson 12a if you are familiar with the use of AND, OR and NOT in SQL (or something similar) and 12b if you aren't.
This lesson covers how to select pipes meeting the criteria width '< 200 OR length < 60' This selection was performed by the 'Minor Pipes' query in the InfoAsset Manager tutorial data.
12A - For those not familiar with SQL or similar
The expressions we have seen above in if, elsif and while lines in the scripts are ones that either return true or false depending on whether some criteria are met or not. If they are met then it is true, otherwise it is false.
The terms we use in English for combining rules are 'and', 'or' and 'not'. ('or' is actually slightly more complicated than it appears at first glance, for a reason we will come to shortly).
We might for example say:
'I will go to the bar if I have the money and I have time
What you are saying here is that you will go to the pub if two conditions are both true
- I have the money
- I have the time
We can draw a table covering the four possibilities here
A - I have the money, I have the time
B - I have the money, I don't have the time
C - I don't have the money, I have the time
D - I don't have the money, I don't have the time
Of those four possibilities only one will result in you going to the pub - possibility A
Remember this table, we will come back to it.
Now, when you're at the pub you fancy a cigarette. You have, of course, to sit outside to smoke it, so you say:
I will have a cigarette if it's warm enough or the pub has outdoor gas heaters
What you are saying here is I will have a cigarette if at least one of these two conditions are true
- It's warm enough
- The pub has outdoor gas heaters
I say at least one because you would happily sit outside if the weather was warm enough, and it had outdoor gas heaters.
Once again we can draw up a table
A - It's warm enough, the pub has outdoor gas heaters
B - It's warm enough, the pub doesn't have outdoor gas heaters
C - It's not warm enough, the pub has outdoor gas heaters
D - It's not warm enough, the pub doesn't have outdoor gas headers
Of these four possibilities you will have a cigarette in 3 of them - A, B and C.
The tricky thing about 'or' is that sometimes it means this and sometimes it doesn't - if you say 'I'll go for a swim or a run', you don't mean 'I'll go for a swim, or a run, or both'. However, in general if you think about it you will come to the conclusion that it usually means at least one of the two things, but it could be both - for another example, if you say 'a pipe is important if its flow is above so many litres per second or it serves more than so many households' you would still consider it important if its flow were above so many litres per second AND it served so many households. You are using this 'normal' meaning of 'or' (known technically as 'inclusive or') if you could add (or both) onto the end of the sentence without it changing the meaning of it.
The other main word we use to describe this sort of thing is 'not'. Some of the things above can be framed in turns of not e.g.
I'll go to the pub if I'm not broke
I'll sit outside if it's not too cold
How do we represent this sort of thing in Ruby - with the symbols:
- && for and
- || for or
- ! for not
The && and || really are pairs of characters. The | is the character you get if you click shift on the key with the \ on I to the left of the Z. You probably haven't needed it before. It is known as the 'pipe' symbol (not to be confused with any other sort of pipe).
If you specify:
pipe.width < 200 || pipe.length<60
this means 'the pipe width is less than 200 or the pipe length is less than 60 (or both)'
If you specify:
pipe.width>200 && pipe.length>60
this means 'the pipe width is greater than 200 and the pipe length is greater than 60'.
In practise things are slightly more complex than this as we have to allow for the possibility that the values are nil. This is described in lesson 14.
You should now skip 12B and go on to lesson 13.
12B- For those familiar with SQL or similar
The correspondence between keywords in Ruby and keywords in SQL is as follows:
|
SQL |
Ruby |
|---|---|
|
AND |
&& |
|
OR |
|| |
|
NOT |
! |
Those are, indeed, pairs of the & and | characters. The | character, which is one that you probably haven't found much use for previously, is on the UK keyboard as the shifted character to the left of the Z, with \ as the un-shifted character. It is known as the 'pipe' character.
These are the same as those used in various other programming languages so you may be familiar with this notation from one of those.
The expression width < 200 OR length < 60 in SQL in InfoAsset Manager would turn into the following in the Ruby script:
pipe.width < 200 || pipe.length < 60
Except that in the SQL in InfoAsset Manager if you say <a> or <b> then this will be true if either expression <a> is true and non-null or expression <b> is true and non-null regardless of whether the other is null or not i.e. if we had the following values for 4 pipes:
|
Id |
Width |
Length |
|---|---|---|
|
a |
180 |
300 |
|
b |
<null> |
50 |
|
c |
180 |
<null> |
|
d |
<null> |
<null> |
(In the InfoAsset Manager user interface the NULL values are displayed as blank in the grids and property sheets).
The query above will select pipes a, b and c - in the case of pipe a the width meets the criteria but the length didn't, but this is OK because the test is one or the other. In the cases of pipes b and c one of the width and length meets the criteria and the other is null. In the case of pipe d the pipe will not be selected because both values are null.
In Ruby we need to explicitly do the tests for the blank / null / nil values (depending on how you want to describe them - the 3 all mean the same thing) as described in lesson 13, to which you should now continue.
Lesson 13 - More complex logical expressions (part 2)
As described in the two sections of lesson 13, when performing tests on numeric fields it is necessary to allow for the possibility that either or both values are nil therefore the test needs to be:
if (!pipe.width.nil? && pipe.width < 200) ||(!pipe.length.nil? && pipe.length<60)The script therefore becomes:
net=WSApplication.current_network
net.clear_selection
pipes=net.row_objects('cams_pipe')
i=0
while i<pipes.length
      pipe=pipes[i]
      if (!pipe.width.nil? && pipe.width < 200) ||
(!pipe.length.nil? && pipe.length<60)
            pipe.selected=true
      end
      i=i+1
end
This eliminates one of the two ifs that appeared in the version in lesson12_3.rb.
The brackets here mean what you would expect i.e. the things in brackets are worked out first i.e. we work out (!pipe.width.nil? && pipe.width < 200) and (!pipe.length.nil? && pipe.length<60) and then combine them.
The way Ruby evaluates expressions of the form:
Something || Something else || Something else againIs to stop once it has found something true (because it doesn't need to evaluate the other things, as if it has found something true the value of the overall expression is true)- i.e. if Something is true, then it doesn't evaluates Something else, and if Something is false but Something else is true it won't evalulate something else again.
Similarly if the expression is of the form:
This && That && The OtherIt stops when it finds something false (because it doesn't need to evaluate the other things, as if it has found something false, the value of the overall expression is false).
An important implication of this is that if you have an expression like:
!pipe.width.nil? && pipe.width<200The second part won't be evaluated if pipe.width is nil, so the error that occurred above because of comparing a nil value with 200 doesn't occur.
Of course, this is possibly what you expected anyway!
- the notation
and
- the need to explicitly do tests for nil
It is, by the way, not necessarily to test values for nil if they are text fields or Boolean fields - the way Ruby is used in InfoAsset Manager does not distinguish between nil strings and strings of zero length, or between nil Boolean fields and false ones.
Lesson 14 - Setting values
In this lesson, we will introduce the setting of values in objects.
We will start by setting a sample numeric user field and a sample data user field for each node. We will set the field user_number_20 to the number -123.45 and the field user_text_20 to the string 'badger'.
When setting values it is necessary to group them in what is known as a 'transaction'. This has a technical meaning which we won't go into here, but the important things to remember are:
- All setting of values has to be within a transaction.
- You almost certainly don't want to have lots of transactions in a script, one will almost certainly be enough.
The transaction is started with a call to the transaction_begin method of the network, and ended with the transaction_commit method.
Everything within each transaction is treated as one operation for purposes of undo and redo - it is described as 'Scripted transaction' on the undo / redo menu items.
It is also necessary to call the write method on every object that you change the data of. The purpose of this method is to ensure that time is not wasted updating the database multiple times if you are setting multiple fields for the same object.
Enter this script into your text editor, save it as lesson15_1.rb and run it:
net=WSApplication.current_network
net.transaction_begin
nodes=net.row_objects('cams_manhole')
i=0
while i<nodes.length
      node=nodes[i]
      node.user_number_20=-123.45
      node.user_text_20='badger'
      node.write
      i=i+1
end
net.transaction_commit
Observe that the values have been set. Now undo and redo the changes using the appropriate menu items.
Experimentally delete the net.transaction_begin line, save and run the script, you will get the error message:
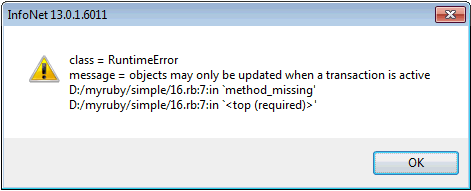
If you attempt to modify the values of objects without starting a transaction this is the error you will get.
Lesson 15 - Each
It is now time to describe a more compact way of looping through arrays.
Remember that we can loop through the array of days of the week like this:
days=['Monday','Tuesday','Wednesday','Thursday','Friday','Saturday','Sunday']
i=0
while i<days.length
      countStartingFromOne=i+1
      puts 'day '+countStartingFromOne.to_s+' is named '+days[i]
      i=i+1
end
Another way often used in Ruby to loop through an array is shown below - enter the following in your text editor, save it as lesson16_1.rb, then run it:
days=['Monday','Tuesday','Wednesday','Thursday','Friday','Saturday','Sunday']
days.each do |day|
      puts day
end
What this means is, 'perform the action between the do and the corresponding end for each element of the array, storing that element in the variable day. The name of the 'loop variable', day in this case, is written between two pipe symbols. This is the same character which is used in the logical expressions previously covered.
Note: Another way of writing this is:
days=['Monday','Tuesday','Wednesday','Thursday','Friday','Saturday','Sunday']
days.each { |day|
      puts day
}
I.e., this replaces do with { and end with }, the 'curly brackets' found above the [ and ] keys. I personally don't like this as in my opinion it leads to a particularly ugly mix of words and symbols in the structure of the scripts, so this course won't be using that way of doing things.
We can now see a shorter way of writing our earlier script which selected all pipes with width less than 200 mm; enter this into you text editor, save it as lesson16_2.rb then run it:
net=WSApplication.current_network
net.clear_selection
pipes=net.row_objects('cams_pipe')
pipes.each do |pipe|
      if !pipe.width.nil? && pipe.width < 200
            pipe.selected=true
      end
end
What the loop now means is 'perform this if test for each pipe in the array of pipes in order, assigning that pipe to the temporary variable pipe. (Note the unfortunate clash of the use of the pipe symbol and the use of a variable named pipe).
There are two ways you can shorten this further:
Firstly, don't use a temporary variable for the collection of pipes - the script would become:
net=WSApplication.current_network
net.clear_selection
net.row_objects('cams_pipe').each do |pipe|
      if !pipe.width.nil? && pipe.width < 200
            pipe.selected=true
      end
end
Secondly, it is possible to rewrite the test on a single line like this:
pipe.selected=true if !pipe.width.nil? && pipe.width < 200
Rather than having the if test beginning a block which ends with end, in cases where you are only going to only have one line in the block it is possible to instead write it in the form:
<action> if <expression>
This corresponds to plain English of the form 'put your coat on if it's raining'.
The script then becomes as shown below; enter this into your text editor, save it as lesson16_3.rb then run it:
net=WSApplication.current_network
net.clear_selection
pipes=net.row_objects('cams_pipe').each do |pipe|
pipe.selected=true if !pipe.width.nil? && pipe.width< 200
end
It is important when writing scripts not to get too carried away making things as terse as possible.
From now on, the examples will use each as a way of performing actions for all elements of an array.
Lesson 16 - Structure Blobs
Various data fields in InfoAsset Manager are represented as 'structure blobs' - the field contains a number of 'rows' of values for each object which in some respects behave as though they are a sub-table - they have a number of named fields with values.
Key examples in InfoAsset Manager collection networks are the details of CCTV surveys and the incoming and outgoing pipes of manhole surveys - a full list can be found in the documentation.
These fields are accessed in a similar way to the fields that have been dealt with so far (e.g. user fields) except that rather than the values being built-in Ruby types such as strings, numbers and Booleans they are of another class defined by the Innovyze software- a WSStructure.
This simple example below counts the number of CCTV surveys and detail records in a network. Enter it into you text editor, save it as lesson17_1.rb, then run it.
net=WSApplication.current_network
net.clear_selection
surveys=0
details=0
pipes=net.row_objects('cams_cctv_survey').each do |survey|
      surveys=surveys+1
      details=details+survey.details.length
end
puts "surveys = "+surveys.to_s
puts "details = "+details.to_s
The only new thing in this is that the script gets the number of lines in the details for each survey with survey.details.length. This gets the WSStructure object for the details for the survey and gets its length i.e. the number of rows.
When you run the script the output will be:
surveys = 48
details = 321
Notice that it is not necessary to test whether survey.details is nil because fields containing these tables of data are always returned as a WSStructure object, even if they don't contain any data. In the case where they don't contain any data the length of the object is 0.
There is a shorter way of adding values to a variable that has not yet been covered. Rather than writing:
surveys=surveys+1
details=details+survey.details.length
It is possible to write:
surveys+=1
details+=survey.details.length
These both mean exactly the same thing as the long versions. It is possible to use the other operators such as -, * and / in this way.
From now on examples will use this mechanism.
If you are familiar with various programming languages including C and JavaScript you may expect to be able to add one to surveys by saying surveys++. This is not possible in Ruby.
As you would expect, it is possible to get values from individual detail records of the surveys.
Suppose that you wished to output a list of how many details of type 'GP' each survey has, you can do that as shown below. Enter this script into your text editor, save it as lesson17_2.rb, then run it:
net=WSApplication.current_network
pipes=net.row_objects('cams_cctv_survey').each do |survey|
      gp=0
      survey.details.each do |detail|
            if detail.code=='GP'
                  gp+=1
            end
      end
      puts survey.id+' has '+gp.to_s+' GP records'
end
Remember that the test for two things having the same value is == - the equals sign repeated twice.
This works by looping through all the surveys, and for each survey setting the variable gp to zero, so that it will contain the number of details with code GP for that survey, then looping through the details of that survey and adding 1 to the count of details with code GP each time we find one, then we output a message for each survey with the count, remembering that we have to convert the count to a string with the to_s method.
Notice that we continue our practice of indenting each block with one more tab character than the previous block.
It would be possible to select surveys that contain at least one detail with code 'GP' by modifying the script slightly. Edit the script, save it as lesson17_3.rb, then run it:
net=WSApplication.current_network
net.clear_selection
pipes=net.row_objects('cams_cctv_survey').each do |survey|
      gp=0
      survey.details.each do |detail|
            if detail.code=='GP'
                  gp+=1
            end
      end
      if gp>0
            survey.selected=true
      end
end
This is the equivalent of the SQL:
ANY(details.code='GP')
Suppose that we wish to alter the data for the surveys by taking the video code field and adding 10000 to it if it is greater than zero, because we have changed our video naming convention). We do this as shown below. Enter this script into your text editor, save it as lesson17_4.rb, then run it:
net=WSApplication.current_network
net.clear_selection
net.transaction_begin
pipes=net.row_objects('cams_cctv_survey').each do |survey|
      survey.details.each do |detail|
            if detail.video_no>0
                  detail.video_no+=10000.0
            end
      end
      survey.details.write
      survey.write
end
net.transaction_commit
Note the following:
- Because we are changing values they need to be inside a transaction as with the changing of text / numerical / Boolean values.
- It is necessary to call the write method on each survey as with the changing of text / numerical / Boolean values.
- It is also necessary to call the write method of the actual WSStructure object, the survey details in this case. Writing is therefore a two stage process, write is called on the WSStructure to write the current working values of the structure object back to the object of which it is a field, the survey in this case, having done this it is then also necessary to call write on the survey object.
Lesson 17 - Navigation between objects
Suppose we wish to select all pipes that have a downstream manhole of type 'F' (outfall). In SQL this is done like this:
ds_node.node_type = 'F'
In a script we do this by looping through all the pipes, finding their upstream node and looking at the value.
There are two ways of doing this :- the first is specific to finding links from nodes and vice versa, the other is a more general way of navigating between any objects with physical or logical connections (e.g. from assets to surveys and vice versa).
Enter the following into your text editor, save it as lesson18_1.rb, and then run it:
net=WSApplication.current_network
net.clear_selection
pipes=net.row_objects('cams_pipe').each do |pipe|
      ds_node=pipe.ds_node
      if !ds_node.nil? && ds_node.node_type=='F'
            pipe.selected=true
      end
end
This uses the ds_node method of the pipe, which returns the node as an object, if the pipe has a downstream node, or nil otherwise. Therefore, the script tests to see if the node is nil. And if it isn't, the script checks to see that its node_type is 'F', and it if is, the pipe is selected.
The other way of doing this uses the navigate1 method. Start with the above script, save it as lesson18_2.rb, edit it to change the line shown in bold below, and then run it:
net=WSApplication.current_network
net.clear_selection
pipes=net.row_objects('cams_pipe').each do |pipe|
      ds_node=pipe.navigate1('ds_node')
      if !ds_node.nil? && ds_node.node_type=='F'
            pipe.selected=true
      end
end
This works in the same way as the version shown in lesson18_1.rb except that the navigate1 method is used instead . This is more general than the ds_node method. It takes one argument, which is the nature of the connection between the objects represented as a string - in this case the argument is the string 'ds_node'. The argument is the same as the prefix used in the SQL in the software for the implicit joins, they are also listed in the detailed documentation.
'One-to-many' links, i.e. links where one object is linked to more than one other object are handled using the navigate method. This method returns an array of objects.
e.g. to select pipes with more than one survey (which can be done in SQL as COUNT(cctv_surveys.*)>1 ), enter the following into you text editor, save it as lesson18_3.rb, then run it:
net=WSApplication.current_network
net.clear_selection
pipes=net.row_objects('cams_pipe').each do |pipe|
      surveys=pipe.navigate('cctv_surveys')
      if surveys.length>1pipe.selected=true
      end
end
Lesson 18 - More array functionality
This lesson covers some array functionality you may well find useful.
So far we have seen two ways of setting up arrays. They are:
- Using the Ruby notation to initialise them. For example:
myArray=['a','list','of','values']
- Getting them from InfoAsset Manager. For example:
myArray=net.row_objects('cams_pipe')
Another way in which arrays can be set up is by creating a new array object and assigning it to a variable as follows:
myArray=Array.new
(obviously the array name doesn't need to have 'array' in it - as it is a variable it does need to begin with a lower case letter though).
To add things to an array you can either use the << (less than symbol twice e.g.)
myArray << 'a'
myArray << 'list'
myArray << 'of'
myArray << 'values'
The idea here is that the << symbolises the direction the data item is going when it gets put on the end of the array.
Alternatively, if you don't like that, you can use the push method
myArray.push 'a'
myArray.push 'list'
myArray.push 'of'
myArray.push 'values'
In both cases you can, in fact, add more than one value to the end of the array in one line. In the case of << you can do this as follows:
myArray << 'a' << 'list' << 'of' << 'values'
In the case of push it would look like this:
myArray.push 'a','list','of','values'
Sometimes you will want to see if a value is in an array. You can do this by using the include? method which returns true if the value is in the array, false if it isn't. e.g. if you were to run this:
myArray = Array.new
myArray.push 'a','list','of','values'
puts myArray.include? 'a'
puts myArray.include? 'badger'
it would output
true
false
If for some reason you would like to know the index in the array of a particular value (i.e. in the case of the array we have set up here 'a' has the index 0 because it is the first item in the array (i.e. item 0, counting from zero) and 'values' has the index 3), you can use the index method e.g.
myArray = Array.new
myArray.push 'a','list','of','values'
puts myArray.index 'a'
puts myArray.index 'values'
would output
0
3
Next, recall one of our early examples, which outputs the numbers 1 to 100
i=1
while i<=100
      puts i
      i=i+1
end
puts'done'
A shorter way of doing this is to use something know as a range, which has the notation (1..100) - i.e. an open bracket, followed by the start number, followed by two dots followed by the end number. This is something you can loop through with 'each' like an array or all the manholes in a network returned by one of our software's methods. So, to output the numbers 1 to 100 you can write
(1..100).each do |i|
     puts i
end
You could use this as another way of looping through all the values in an array e.g. to output the days of the week from our previous example you could write this as
days=['Monday','Tuesday','Wednesday','Thursday','Friday','Saturday','Sunday']
(0..days.length-1).each do |i|
      puts days[i]
end
Because values in an array start with item 0, it is so common to want to start a range with 0 and end with something minus one, there is a way of doing this which is to use three instead of two dots. The range then finishes at one less than the entered value, so we could output the days of the week as follows:
days=['Monday','Tuesday','Wednesday','Thursday','Friday','Saturday','Sunday']
(0...days.length).each do |i|
       puts days[i]
end
There is, of course, great scope for confusion here.
Finally for this lesson, a way of taking the first item from an array (i.e. the item with index 0) so that the old 2nd item becomes the first (i.e. with index 0) is to use the shift method of the array.
working=myArray.shiftFor example, with the arrays of days we could run the script to take the days of the array one at a time
days=['Monday','Tuesday','Wednesday','Thursday','Friday','Saturday','Sunday']
while days.length>0myDay=days.shift
      puts 'the day selected is '+myDay
      puts 'there are '+days.length.to_s+' days left in the array'
end
The output of this would be:
the day selected is Monday
there are 6 days left in the array
the day selected is Tuesday
there are 5 days left in the array
the day selected is Wednesday
there are 4 days left in the array
the day selected is Thursday
there are 3 days left in the array
the day selected is Friday
there are 2 days left in the array
the day selected is Saturday
there are 1 days left in the array
the day selected is Sunday
there are 0 days left in the array
This will turn out to be very useful later when we are tracing round networks.
We can now put some of this into practise.
Suppose we wish to list all the CCTV detail codes in the network, we can do this by looping through all the CCTV surveys, and all the details in each survey, as we have done before, but this time we build up an array of the codes, using the mechanisms described above, specifically
- Use of Array.new to create an array
- Use of include? to see if a value is in an array
- Use of << to add values to an array
Enter this into your text editor, save it as lesson19_1.rb, and then run it.
net=WSApplication.current_network
codes=Array.new
pipes=net.row_objects('cams_cctv_survey').each do |survey|
      gp=0
      survey.details.each do |detail|
            code=detail.code
            if !codes.include? code
                  codes << code
            end
      end
end
puts codes
This loops through all the details for each survey, gets the code, then if it is not in the array adds it to the array.
Suppose we want to count the number of codes we could do this by adding a second array and making sure we keep the two synchronised so that the count for the code in the first position is in the first position in the count array etc.
Enter the following into your text editor, save it as lesson19_2.rb, and then run it:
net=WSApplication.current_network
codes=Array.new
counts=Array.new
pipes=net.row_objects('cams_cctv_survey').each do |survey|
      gp=0
      survey.details.each do |detail|
            code=detail.code
            if !codes.include? codecodes <<
                  codecounts << 0
            end
            index=codes.index code
            counts[index]+=1end
      end
(0...codes.length).each do |i|
      puts codes[i]+':'+counts[i].to_s
end
As you can see we have added another array, when we add a new code at the end of the codes array we add the value 0 to the end of the counts array, then for each detail record, whether or not the code is new, we find its index and add one to the corresponding count.
It will turn out that there is a more efficient way of doing this using a different data structure described in a later lesson.
Lesson 19 - Advanced navigation
Suppose that you wish to use Ruby to select all the nodes and links upstream of a given node, how do you go about this?
Enter the following script into your text editor, save it as lesson20_1.rb, select one manhole in the network, and then run the script:
net=WSApplication.current_network
roc=net.row_object_collection_selection('cams_manhole')
selectedNodes=0
selectedLinks=0
if roc.length!=1
      puts 'please select one manhole'
else
      ro=roc[0]
      ro.selected=true
      selectedNodes+=1
      unprocessedLinks=Array.new
      ro.us_links.each do |l|
            if !l._seen
                  unprocessedLinks << l
            end
      end
      while unprocessedLinks.size>0
            working=unprocessedLinks.shift
            working.selected=true
            selectedLinks+=1
            workingUSNode=working.navigate1('us_node')
            if !workingUSNode.nil?
                  workingUSNode.selected=true
                  selectedNodes+=1
                  workingUSNode.us_links.each do |l|
                        if !l._seen
                              unprocessedLinks << l
                              l._seen=true
                        end
                  end
            end
      end
      puts 'selected nodes '+selectedNodes.to_s
      puts 'selected links '+selectedLinks.to_s
end
This is considerably more complex than the previous examples we have seen so far.
As you can see it uses the following of the array mechanisms described in the previous lesson:
- New arrays with Array.new
- Adding things to the end of arrays using <<
- Taking the front element from an array using shift
It also uses a new concept, that of 'tags'. A tag is a way of storing extra values other than database field values associated with WSRowObject objects. Note that the term 'tag' is our term, so you won't find it in 'normal' Ruby documentation (although they are not an extension to the Ruby programming language, they are just a mechanism we have provided using standard Ruby facilities).
Any WSRowObject object can have any number of tags associated with it. Tag names must begin with an underscore, and their names may only contain unaccented letters (upper and lower case), digits and the underscore character.
They are created by assigning values to them:
workingUSNode._mytag=12345.678 working
USNode._mytag2='Badger'
Unlike database fields tags are not permanently stored anywhere; they exist only whilst the script is running.
Also unlike database fields, tags exist in the 'Ruby' world, they are essentially Ruby values so they can store things that database fields can't e.g. Ruby arrays.
In this case we are using one tag, with the name '_seen'.
We also use the row_object_collection_selection method of the network to get a WSRowObjectCollection object containing all the currently selected objects of a particular type.
As the ability to trace through networks is such a significant one with Ruby scripts we will walk through this one in detail.
The essential idea here is to start with one node, find all the upstream links from that node, then find the upstream nodes (if any) from those links, then the upstream links from those, then the upstream nodes from them (if any) and so on until there are no more upstream nodes or links.
Whilst we do this we have to bear in mind that the networks may contain loops so we have to make sure that we don't end up literally going round in circles - this is what we use the _seen tag for.
At a more detailed level our mechanism is to keep an array of links that we have not yet processed, links will be added to the end of the list and taken from the front. We always make sure that we don't do any more with a node or link we have already looked at, to make sure of this when we look at a node or link we set the _seen tag to true.
We start by checked that there is only one manhole in the selection. If there isn't then we output a message and don't do anything else.
Otherwise we start by navigating to all the upstream links of the node, then if they haven't been seen add them to our array of unprocessed links. Something to think about is why we have to check that the links haven't been seen, and why we say they are seen at the time we add them to the array.
We then continue by taking the first unprocessed link from the list. We navigate to its upstream node, which may be nil if it doesn't have one, then we navigate to its upstream links and if they haven't been seen already we add links to the list.
We then continue doing this until the list is empty, meaning we have found all the nodes and links upstream of the initial node and selected them. We then write out the number of nodes and links that we have selected.
Start by selecting the node MH454572 in the example network.
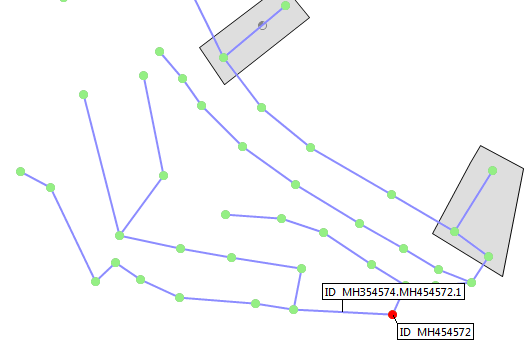
The script starts by finding all the upstream links of the manhole and adds them to the array of unprocessed links. As the array started empty it now contains one link, MH354574.MH454572.1.
We now move onto the main loop, which begins:
while unprocessedLinks.size>0
The test succeeds, so the body of the loop is executed. The first line of this is:
working=unprocessedLinks.shift
This has the effect of
- a) Setting working to the link at the beginning of the array
- b) Shifting everything else in the array along by one position.
In this case, as the array contains only one link, the one we have just added MH354574.MH454572.1 this has the effect of setting working to be that link and leaving the array empty.
The link is selected, and its upstream node is testing to see if it is nil, which it isn't, therefore the node itself is selected and its upstream links are added to the array.
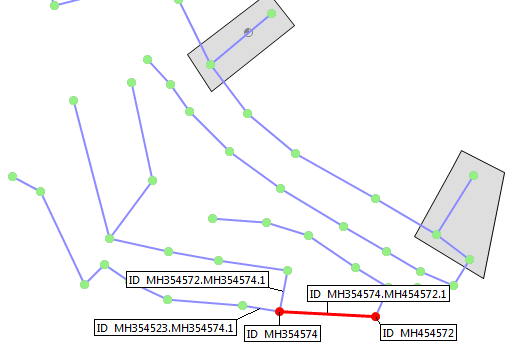
The two upstream links are MH354523.MH354574.1 and MH354572.MH354574.1 so they are added to the array (in that order). As the array was empty it contents are now:
[MH354523.MH354574.1,MH354572.MH354574.1]
(this is a semi-informal notation and not what Ruby would output if you used puts with the array).
The end of the body of the loop has now been reached so the test is performed again.
Again, the test succeeds because the array of unprocessed links contains 2 links now.
This time, working=unprocessedLinks.shift
Has the effect of setting working to the first link in the array, MH354523.MH354574.1, and removing it from the array, so the array now only contains the other one of the two links just added, i.e. MH354572.MH354574.1.
The link is selected, and its upstream node is testing to see if it is nil, which it isn't, therefore the node itself is selected and its upstream links are added to the array.
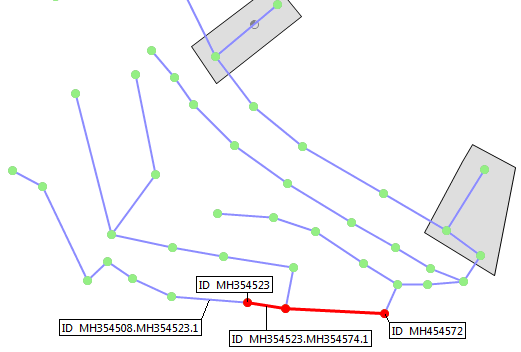
As this node (MH354523) only has one upstream link, that link is added to the working array. The working array now contains:
[MH354572.MH354574.1,MH354508.MH354523.1]
Notice that the new link is added at the back of the working array.
Once again, the end of the body of the while has been reached so the test is performed again, and again succeeded because there are two links in the array.
Working is set to MH354572.MH354574.1, and when it is removed from the array, the array now just contains the link just added i.e. MH354508.MH354523.1
The link is selected and its upstream node is tested to see if it is nil, which it isn't, therefore the node itself if selected and its upstream links are added to the array.
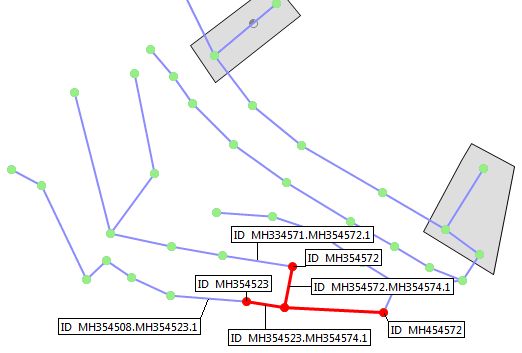
As the node (MH354572) has one upstream link, that link is added to the working array, the working array now contains:
[MH354508.MH354523.1,MH334571.MH354572.1]
Notice that the new link is added at the back of the working array. Notice also that because of the way we have done things, now that the part of the network we are tracing has split into two branches, the tracing is proceeding along both branches simultaneously, rather than following one branch to the end and then going back to the second one - it is possible to do it that way if you need to for some reason by writing the script differently.
After 5 more times round the loop the selection looks like this:
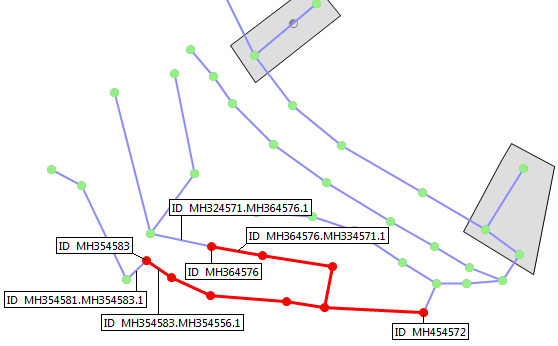
In the picture above, the unprocessed links array contains the two labelled but unselected links:
[MH324571.MH364576.1,MH354581.MH354583.1]
Again, the test is passed because the array is not empty, working is set to the link MH324571.MH364576.1, and the array is left containing one element, the link MH354581.MH354583.1.
The link is selected and its upstream node is tested to see if it is nil, which it isn't, therefore the node itself if selected and its upstream links are added to the array.
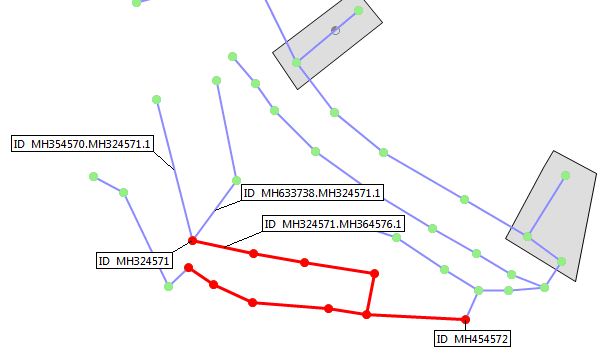
This time, the upstream node of the working link, MH324571 has two upstream links, MH354570.MH324571.1 and MH633738.MH324571.1. We therefore add them to the array, which for the first time in this exercise now contains three links:
[MH354581.MH354583.1,MH354570.MH324571.1,MH633738.MH324571.1]
The next time round the loop causes link MH354581.MH354583.1 to become the working link removed from the list, it and its upstream node, MH3554581 selected, and the upstream link of that node added to the array of working links.

The array of working links is now:
[MH354570.MH324571.1,MH633738.MH324571.1,MH354567.MH354581.1]
The next time round the loop causes link MH354570.MH324571.1 to become the working link removed from the list, and its upstream node, MH354570 selected.
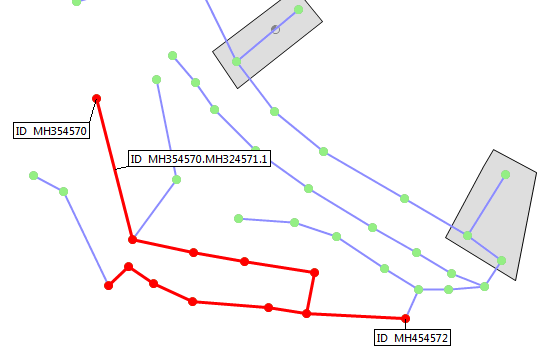
This time, however, for the first time, the upstream node has NO upstream links, so therefore NO links are added to the working array, so the array of working links remains unchanged from the point at which the call to shift removed the link from it, so the array is now:
[MH633738.MH324571.1,MH354567.MH354581.1]
The next time round the loop causes the link at index 0 of the array, link MH633738.MH324571.1 to be removed from the array and to become the working link, and it and and its upstream node MH633738 to be selected.
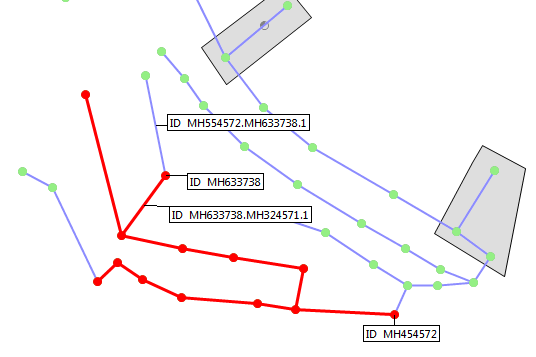
The node's upstream link is added to the array of working links, which becomes:
[MH354567.MH354581.1,MH554572.MH633738.1]
The next time round the loop causes the link at index 0 of the array, link MH354567.MH354581.1 to be removed from the array and to become the working link, and it and and its upstream node MH354567 to be selected.
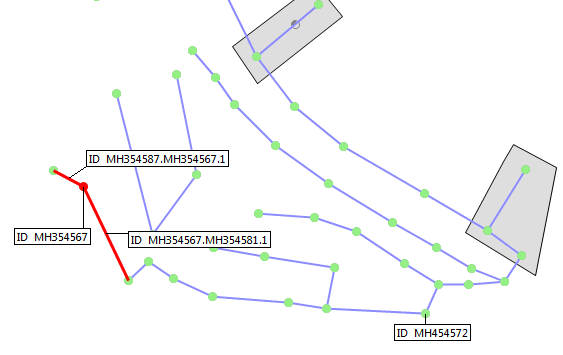
The node's upstream link is added to the array of working links, which becomes:
[MH554572.MH633738.1,MH354587.MH354567.1]
The next time round the loop causes the link at index 0 of the array, link MH554572.MH633738.1to be removed from the array and to become the working link, and it and its upstream node MH554572 to be selected.
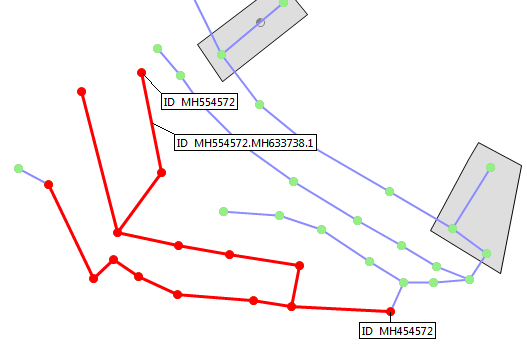
As with the case encountered above for the middle of the three branches, this upstream node has no upstream links, therefore the array of working links remains as it was after the shift call caused the link to be removed from the array, so the array shrinks to having one element:
[MH354587.MH354567.1]
The next time round the loop causes the link at index 0 of the array, link MH354587.MH354567.1 to be removed from the array (which now has no objects in it), and to become the working link, and it and its upstream node MH354587 to be selected.
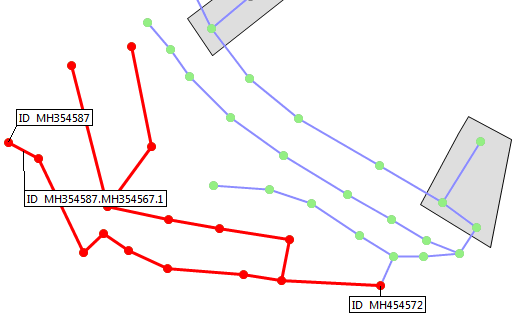
As with the previous loop, the upstream node has no upstream links, so the array remains as it was after the shift call i.e. it remains empty.
The test in the while loop therefore fails, so the execution of the script moves to the end of the while loop, so the script outputs the number of selected nodes and links and then stops.
This can be the basis for more complex tracing where you wish to either stop tracing when particular criteria are met, or to accumulate values as you trace round networks.
Lesson 20 - Hashes
We saw in Lesson 15 a way of counting the number of defects with particular codes. We did this by using two parallel arrays, one for the codes and one for the count.
A more efficient way of doing this, both from the point of view of writing the script and from the point of view of running the script, is to use a data structure known as a 'hash'.
The name 'hash' is a somewhat unhelpful one, since it reflects a detail of how they actually work which is irrelevant for our purposes.
The important thing about a hash is that it is used to store values associated with objects in a way that can be efficiently stored and accessed without having to do as we did in the example in lesson 15; going through all the contents of an array to find a value that identified the object - in our case it was a string.
Consider how we might store a table from the CCTV survey codes to an explanation of what they mean e.g.
| Code | Description |
|---|---|
| B | Broken Pipe |
| BJ | Broken Joint |
| BR | Major connection without manhole |
| BRF | Major connection w/o manhole (F) |
| CC | Crack Circumferential |
| CCJ | Crack Circumferential at Joint |
| CL | Crack Longitudinal |
| CLJ | Crack Longitudinal at Joint |
| CM | Cracks Multiple |
| CMJ | Cracks Multiple at Joint |
In reality, we don't need to do this in a script because InfoAsset Manager already does this. We could do this like this:
cctv_defect=Hash.new
cctv_defect['B']='Broken Pipe'
cctv_defect['BJ']='Broken Joint'
cctv_defect['BR']='Major connection without manhole'
cctv_defect['BRF']='Major connection w/o manhole (F)'
cctv_defect['CC']='Crack Circumferential'
cctv_defect['CCJ']='Crack Circumferential at Joint'
cctv_defect['CL']='Crack Longitudinal'
cctv_defect['CLJ']='Crack Longitudinal at Joint'
cctv_defect['CM']='Cracks Multiple'
cctv_defect['CMJ']='Cracks Multiple at Joint'
etc.
This corresponds to defining the array with Array.new and then adding values to it with <<.
Then to 'look up' values we could say e.g.
puts cctv_defect['CMJ']
which would output
'Cracks Multiple at Joint'
The things that are used to refer to values are referred to as 'keys'.
Notice that we use the square brackets [ ] with an expression in between them to look up values in the hash in the same way that we do with arrays, but in the case of the hash the values do not have to be numbers - in this case they are strings.
The equivalent for hashes of myArray=['a','list','of','values'] is:
cctv_defect={
      'B'=>'Broken Pipe',
      'BJ'=>'Broken Pipe at Joint',
      'BR'=>'Major connection without manhole',
      'BRF'=>'Major connection w/o manhole (F)',
      'CC'=>'Crack Circumferential',
      'CCJ'=>'Crack Circumferential at Joint',
      'CL'=>'Crack Longitudinal',
      'CLJ'=>'Crack Longitudinal at Joint',
      'CM'=>'Cracks Multiple',
      'CMJ'=>'Cracks Multiple at Joint'
      }
Note that the hash begins and ends with { and } instead of [ and ] for arrays, and that => (the equals sign followed by the greater than sign, intended to look like an arrow) is used to separate the key and the value for key value pair.
We can use a hash to simplify this example from lesson 19 which you will have saved as lesson19_2.rb
net=WSApplication.current_network
codes=Array.new

counts=Array.new
pipes=net.row_objects('cams_cctv_survey').each do |survey|
      gp=0
      survey.details.each do |detail|
            code=detail.code
            if !codes.include? code
                  codes << code
                  counts << 0
            end
            index=codes.index code
            counts[index]+=1
      end
end
(0...codes.length).each do |i|
     puts codes[i]+':'+counts[i].to_s
end
Instead of storing the values in two arrays we can use a hash, using the code as the key and the count as the value. Take the previous script, modify it as follows and save it as lesson21_1.rb, then run it:
net=WSApplication.current_network
codes_count=Hash.new
pipes=net.row_objects('cams_cctv_survey').each do |survey|
      gp=0
      survey.details.each do |detail|
            code=detail.code
            if !codes_count.has_key? code
                  codes_count[code]=0
            end
            codes_count[count]+=1
       end
end
puts codes_count
This will output the hash as follows:
{"ST"=>48, "MH"=>70, "WL"=>48,"OJS"=>4, "ELJ"=>6, "GP"=>48, "FM"=>2, "FH"=>34,"FC"=>2, "JDS"=>6, "CC"=>13, "CX"=>1, "JDM"=>3,"DES"=>12, "EL"=>2, "SA"=>14, "OB"=>1, "RTJ"=>1,"CL"=>2, "DE"=>4}
The hash is created, empty, by the line:
codes_count=Hash.new
Then, for each code of each survey, what we do is the following:
if !codes_count.has_key? code
       codes_count[code]=0
end
codes_count[count]+=1
We first see whether the key is already in the hash - we do this using the has_key? method of the hash which returns true if the hash has it as a key, false otherwise. If it isn't a key of the hash then we add it to the hash with the value 0 - meaning we have currently found no survey details with it as a code.
We then add 1 to the value associated with the given key in the hash - the key value pair will always exist by this point because either it already existed, or else it was just created.
For example, suppose the first 3 CCTV survey details have codes ST, MH and MH.
For the first detail, the hash has no entries, so it hasn't got key ST, so the key ST is created with the value 0. It is then immediately incremented so key ST has the value 1.
For the second detail, the hash has one entry, but it hasn't got the key MH, so the key MH is created with the value 0, it is then immediately incremented so key MH has the value 1, and key ST has the value 1.
For the third detail, the hash has 2 entries, with keys ST and MH. Since the key MH already exists it doesn't get created because the test !codes_count.has_key? code fails, but the value for key MH is incremented regardless so at this point key ST has value 1 and key MH has value 2.
If you were to attempt to output the hash by using its each method you would probably get something you don't want - replace the last line with the following then run the script:
count=1
codes_count.each do |item|
      puts 'item '+count.to_s+' is '+item.to_s
      count+=1
end
You will get the following output:
item 1 is ["ST", 48]
item 2 is ["MH", 70]
item 3 is ["WL", 48]
item 4 is ["OJS", 4]
item 5 is ["ELJ", 6]
item 6 is ["GP", 48]
item 7 is ["FM", 2]
item 8 is ["FH", 34]
item 9 is ["FC", 2]
item 10 is ["JDS", 6]
item 11 is ["CC", 13]
item 12 is ["CX", 1]
item 13 is ["JDM", 3]
item 14 is ["DES", 12]
item 15 is ["EL", 2]
item 16 is ["SA", 14]
item 17 is ["OB", 1]
item 18 is ["RTJ", 1]
item 19 is ["CL", 2]
item 20 is ["DE", 4]
This is because each item in the hash is the key value pair - so the first item is the pair with key ST and value 48. The key value pair is an array with two values, so if you change the script so the final part is as follows the run the script:
codes_count.each do |item|
      puts 'code '+item[0].to_s+' appears '+item[1].to_s+' times'
end
You will get the following output:
codes_count.each do |item|
      puts 'code '+item[0].to_s+' appears '+item[1].to_s+' times'
end
ST appears 48 times
code MH appears 70 times
code WL appears 48 times
code OJS appears 4 times
code ELJ appears 6 times
code GP appears 48 times
code FM appears 2 times
code FH appears 34 times
code FC appears 2 times
code JDS appears 6 times
code CC appears 13 times
code CX appears 1 times
code JDM appears 3 times
code DES appears 12 times
code EL appears 2 times
code SA appears 14 times
code OB appears 1 times
code RTJ appears 1 times
code CL appears 2 times
code DE appears 4 times
An alternative way of doing this is to use the keys method of the hash which returns an array containing its keys, which you can then loop through using its each method.
Replace the final part of the script with the following then run it:
codes_count.keys.each do |key|
      puts 'code '+key+' appears '+codes_count[key].to_s+' times'
end
It is worth making sure you understand exactly what is going on here.
- The keys method of the hash codes_count is used to return an array containing all the keys from the hash.
- The each method of the array is used to loop through all the values in the array of keys
- For each key we built up a string containing the string 'code ' followed by the key itself followed by the string ' appears ' followed by the value we get looking up the value associated with that key in the hash (converted to a string), followed by the string ' times '.
The advantage of doing things in this way is that we can refine this further to get the keys in alphabetical order. We do this by calling the sort method on the array returned by the keys method of the hash.
Change the final part of the script by inserting the sort method so that it now reads as follows, then run it:
codes_count.keys.sort.each do |key|
      puts 'code '+key+' appears '+codes_count[key].to_s+' times'
end
The output will be:
code CC appears 13 times
code CL appears 2 times
code CX appears 1 times
code DE appears 4 times
code DES appears 12 times
code EL appears 2 times
code ELJ appears 6 times
code FC appears 2 times
code FH appears 34 times
code FM appears 2 times
code GP appears 48 times
code JDM appears 3 times
code JDS appears 6 times
code MH appears 70 times
code OB appears 1 times
code OJS appears 4 times
code RTJ appears 1 times
code SA appears 14 times
code ST appears 48 times
code WL appears 48 times
It is important to realise that there is nothing 'magic' going on here - the count method of the hash returns an array, which is then sorted by the sort method of the array, which returns an array (now sorted), then the sort method is called on it as before.
Lesson 21 - String formatting
There is a more concise and flexible way of producing strings for output that does not require the joining together of a number of strings using by using + to join strings together and the explicit use of the to_s method to convert the values of expressions to strings.
Consider the string expression used in one of the examples in the previous lesson:
puts 'code '+key+' appears '+codes_count[key].to_s+' times'
An alternative way of representing this is:
puts "code #{key} appears #{codes_count[key]} times"
The string here is enclosed by the double rather than single quote character, and everything in the string is output verbatim apart from parts between the #{ pair of characters and the } characters which are treated as expressions and then are implicitly converted to strings using their to_s methods.
In this case the expressions that are output are:
keyand
codes_count[key]Another reason for using double quotes round a string is to allow various 'special' sequences of characters to be used e.g. \n for newline, this will be useful when displaying message boxes and writing files, both of which are covered in later lessons.
Lesson 22 - Message boxes
It is possible to display a variety of message boxes from Ruby scripts.
Type the following script into your text editor then save it as Lesson23_1.rb.
out=WSApplication.message_box(
'This is the message box text','YesNoCancel','?',false)
puts "got value #{out}"
Run the script, you will see the following message box:
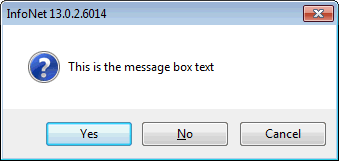
Select the Cancel button and you will see the following output:
got value Cancel
Run it again and select the Yes button and you will see the following output:
got value Yes
Now edit the script to change the second parameter to OKCancel and rerun it. You will see the following message box:
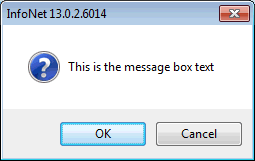
Now change the third parameter to !, and rerun the script. You will see the following message box:
Notice that the icon has changed from the question mark to the exclamation mark.
As well as YesNoCancel and OKCancel, the other valid values for the 2d parameter are OK and YesNo which cause the following buttons to be displayed: respectively:
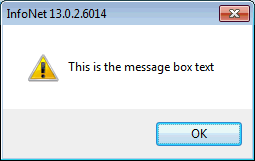
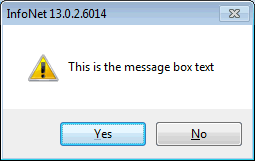
As well as ? and !, the other valid values for the 3rd parameter are Stop and Information which cause the following icons to be displayed respectively:
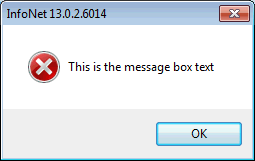
It is possible to display multiple lines of text by using \n to separate the lines and enclosing the string in double quotes. To demonstrate this change the script to the following, then run it:
out=WSApplication.message_box(
"Line 1\nLine 2\nLine 3\nLine 4\n",'OK','Information',false)
puts "got value #{out}"
The following message box will be displayed:
The purpose of the final parameter is to 'hard-wire' cancel i.e. if the 4th parameter is set to true and the dialog contains a cancel button and the user clicks on it, the running of the script is terminated as though the script had been terminated by hitting the Escape key.
e.g. modify the script to say the following:
out=WSApplication.message_box(
"Line 1\nLine 2\nLine 3\nLine4\n",'OKCancel','Information',true)
puts "got value #{out}"
Run the script and click the OK button in the normal way, the following will be output:
got value OK
Now rerun the script but hit the cancel button. The script will be interrupted and the following message box will be displayed:
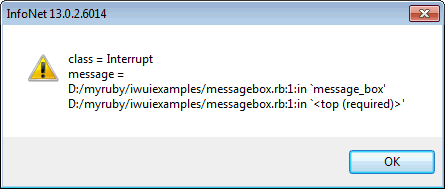
Notice that the line following the message box does not get reached so nothing is output to the output window.
If you use nil as the second parameter, this is treated as though you entered 'OKCancel', if you use nil as the third parameter, this is treated as though you entered '!' and if you enter nil as the fourth parameter this is treated as though you entered true.
Therefore, if you run the script
out=WSApplication.message_box(
"Line 1\nLine 2\nLine 3\nLine 4\n",nil,nil,nil)
puts "got value #{out}"
The following is displayed:
Pressing the Cancel button will interrupt script execution as shown above. You can, of course, mix nil and non-nil values for different parameters e.g. use nil for the 2nd but no the 3rd of 4th.
Lesson 23 - Input Boxes
A simple way of getting input from the user is to use the input_box method.
Enter the following into you text editor, save it as lesson24.rb, then run it:
out=WSApplication.input_box("Message box prompt line 1\nMessage
box prompt line 2\nMessage Box prompt line 3",'Message box
title','')
if out.nil?
      puts "cancel hit"
else
      puts "OK hit, the input is #{out}"
end
The following will be displayed:
Enter some text into the text box e.g
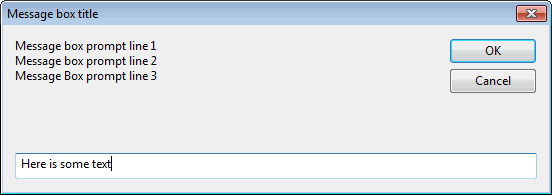
Then click OK.
The following will be output:
OK hit, the input is Here is some text
Run the script again, but this time click the Cancel button, the following will be output:
cancel hit
The method returns the entered string if the OK button is hit, but nil if the cancel button is hit. The first parameter is the prompt text (i.e. the text that appears in the top level of the dialog), The second parameter is the window title.
The third parameter is a string containing the initial value of the text, which the user can then edit. Change the script to the following then run it:
out=WSApplication.input_box("Message box prompt
line 1\nMessage box prompt line 2\nMessage Box prompt line
3",'Message box title','Here is some initial text')
if out.nil?
      puts "cancel hit"
else
      puts "OK hit, the input is #{out}"
end
The dialog appears as follows:
