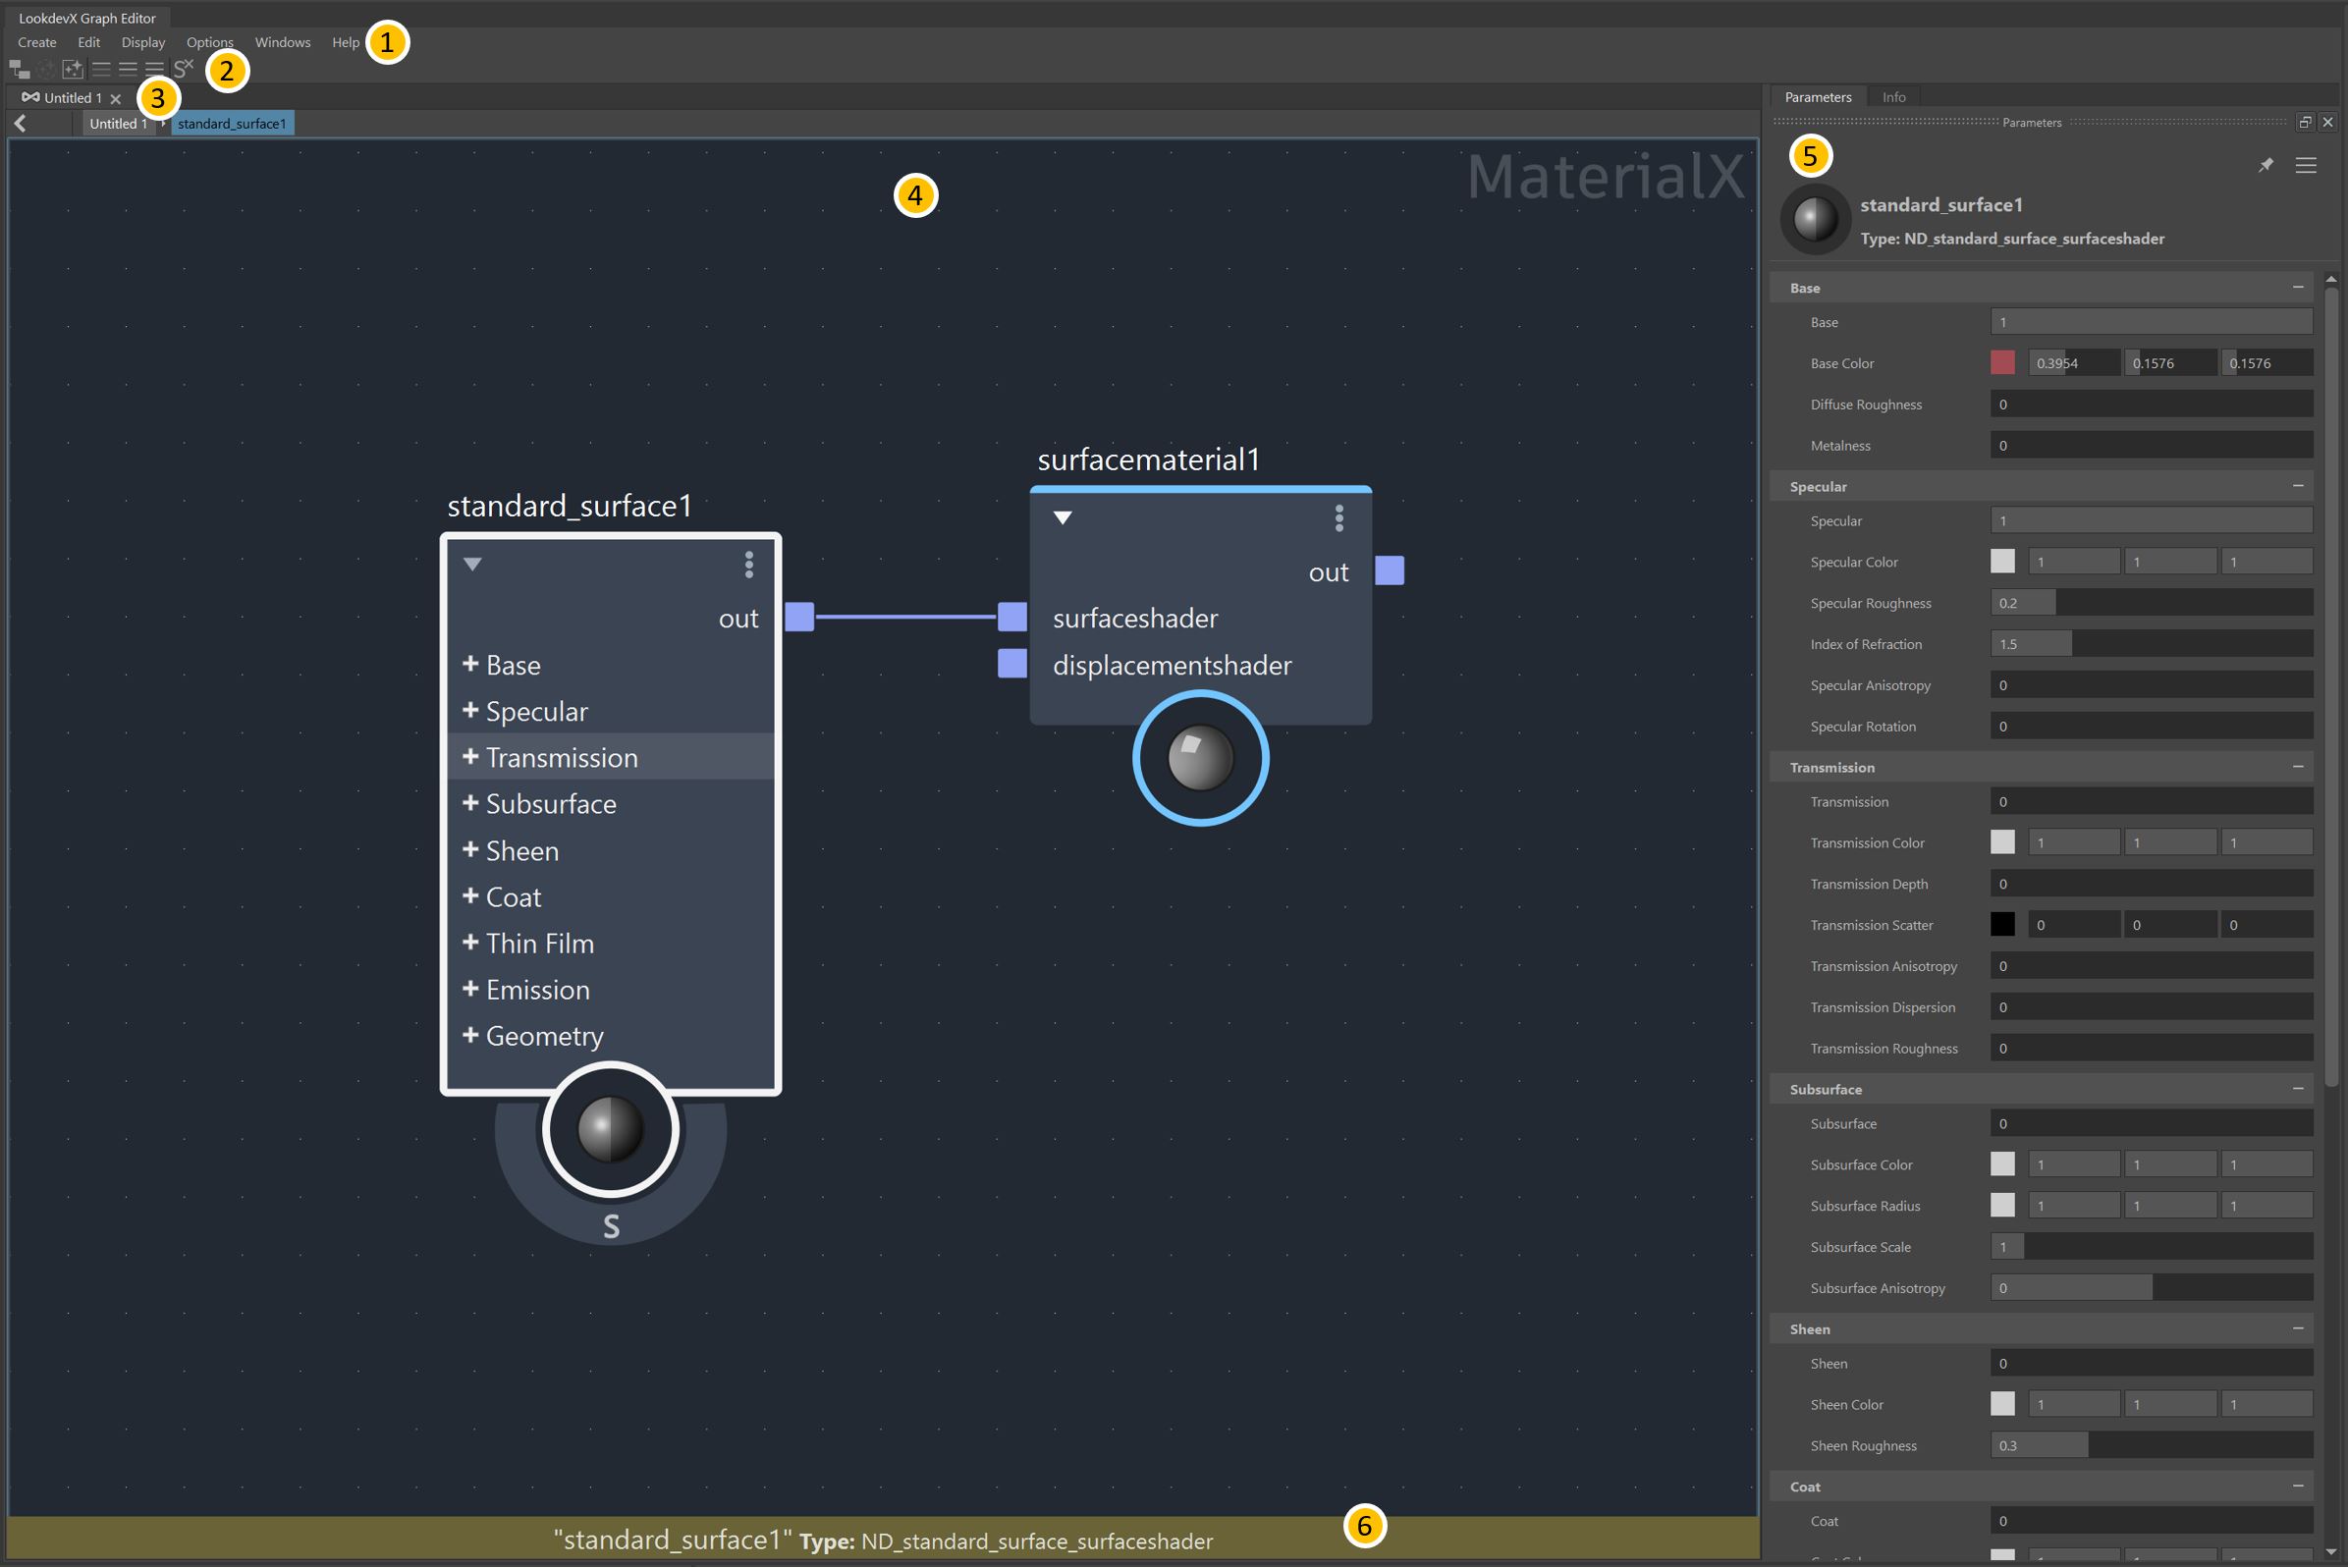
Exploring the UI of LookdevX Graph Editor
The LookdevX Graph Editor is where you view, author and edit materials.

Menus The menus contain both tools and actions for working in your graph. The content of the menus will change depending on which data type (MaterialX or USD) you are working with.
Toolbar The toolbar contains icons for some commonly-used general commands, such as Graph Material from Selected, Clear Graph, and Solo.
Tabs The Tabs line displays the different tabs for both MaterialX and USD data types that are currently opened in LookdevX. Each tab contains a Main Editing Area where shader graphs can be created and edited. To create a new tab, click + and choose which type of tab you want to work with. Tabs can be renamed by selecting a tab, right-clicking and choosing Rename Active Tab. A second line of sub-tabs will appear underneath the first tab line when working inside of MaterialX documents or compounds. When you enter a MaterialX document, or as you dive deeper into nested compounds, this tab subline will act as a breadcrumb trail to help you navigate up and down through your graph. A sub-tab will appear for each level in the compound or document.
Main Editing Area The Main Editing Area is where the graph is created and edited. Many actions for creating and editing nodes and graphs can be performed through contextual menus.
Parameters Editor When a node is selected in the Main Editing Area, its properties are displayed in the Property Editor under the Parameters tab. Relevant information for nodes can also be found here under the Info tab. Use the Pin option to "pin" the properties of a given node in the Property Editor. Pinning a node's properties will keep them displayed no matter if another node is selected.
Info Bar The Info Bar displays information regarding any errors or warnings that affect the graph or nodes.