
Accessing the Custom Renderer in the User Interface
This topic describes how you can access the custom renderer in the user interface after deploying the CustomRenderer sample. For information about the CustomRenderer sample, see the Quick Start section in the Custom Renderer API topic.
You can access the custom renderer plug-in from the user interface in the following ways:
Menu – As shown in the following figure a new Renderer menu is displayed above the viewer. You can choose the custom renderer settings in the Renderer menu. It lists the available renderers and the user defined presets. The Default option refers to the MotionBuilder’s default renderer. The OR – Sample Renderer Callback option refers to the sample custom renderer plug-in, and its sub menu options PointCloud, WireFrame, and Solid refer to the user defined presets in the sample.
 Note: The Renderer menu appears only when a custom renderer plug-in is deployed in one of the plug-in paths.
Asset Settings – You can control the asset settings panel for the renderer by subclassing
FBRendererCallbackLayout. The asset settings panel appears when you select the custom renderer in the Renderer menu, or when you double-click the custom renderer option that is listed in the Navigator tab under System Core Renderer as shown in the following figure.
You can design your own asset settings panel for the custom renderer.
Property View – You can access the renderer properties through the property view as shown in the following figure.
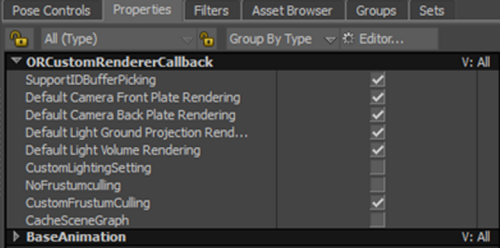
The property view changes to display the renderer’s properties when you select the renderer from the Renderer menu.
Additionally, the camera title is expanded to include the custom renderer name and its current preset setting, if selected. The following figure shows how the renderer and preset are displayed alongside the camera title in the viewport.
