
Note:
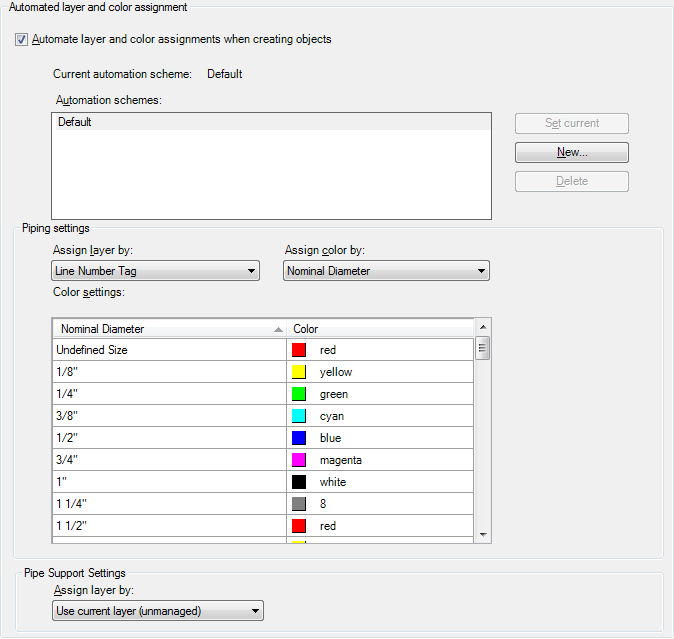
When the check box labeled Automate Layer And Color Assignments When Creating Objects is cleared, default AutoCAD layer and color settings are in effect.
- In the Setup tree view, expand Plant 3D DWG Settings. Click Layer and Color Settings.
- On the Automated Layer And Color Assignment pane, do the following:
- Make sure the check box labeled Automate Layer And Color Assignments When Creating Objects is selected.
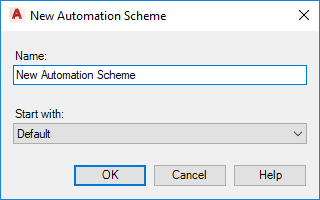
- Click New.
- In the New Automation Scheme dialog box, do the following:
- In the Name box, enter a name for your automated scheme.
- In the Start With list, click an existing scheme (for example: Default).
- Click OK.
- On the Automated Layer And Color Assignment pane, do the following:
- In the Assign Layer By list, click a property (for example: Spec).
- In the Assign Color By list: click a property or leave the setting unchanged (for example: Nominal Diameter).
- In the Color column, click the color you want to change. In the AutoCAD Select Color dialog box, click a new color. Click OK.
For more information about the Select Color dialog box, see “Set the Current Color” in the AutoCAD Help system.
- Click Save Changes.
- To replace the default scheme with the new scheme, click Set Current.
- Click OK.
The new automated scheme is reflected in all open models. All other models in the project reflect this change when you open them.