
When a new P&ID property is added during a project, you can map it to a corresponding Plant 3D property.
- In the Project Setup tree view, expand Plant 3D DWG Settings. Click P&ID Object Mapping.
- On the P&ID Object Mapping pane, under P&ID Classes, expand the tree, and click the P&ID object to which you have added a property (for example, Gate Valve).
- In the P&ID Object Mapping pane, under Plant 3D Classes, use the Property Mapping table to do the following:
- In the P&ID Property column, locate the property you have added (for example, Material).
- In the Plant 3D Property column, click the corresponding 3D property (for example,
Material).
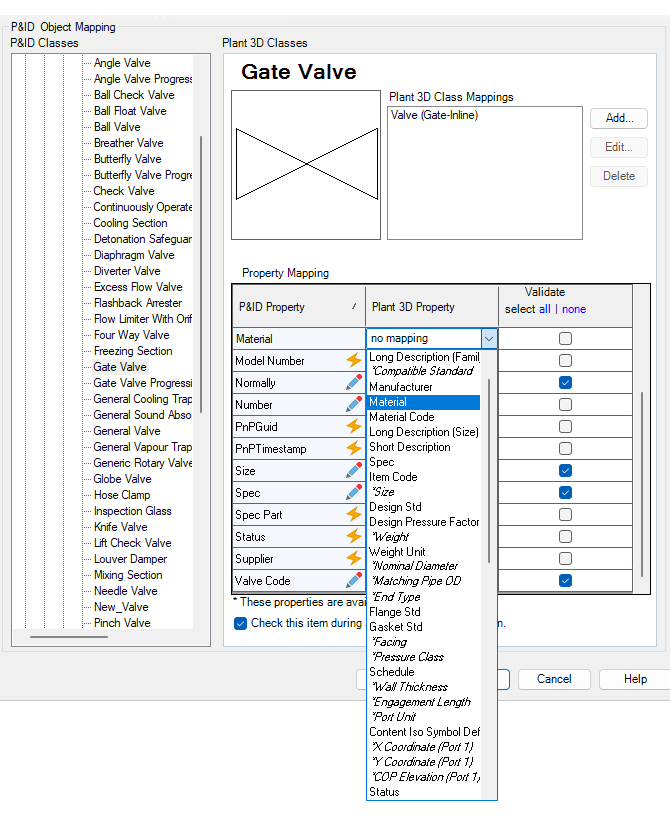 The Property Mapping table displays individual icons. These icons indicate whether a property is in acquired mode or override mode.
- For properties in override mode
- From dropdown list, choose the appropriate value for mapping.
- Alt+click to reset all properties to acquired mode.
- For properties in acquired mode
- Click the icon to switch to override mode before editing the mapping.
- Alt+click to override all properties.
- For properties in override mode
- Click OK.