
Use this tab to insert ppoints by changing the shape of the pcurve.

The following example illustrates the options on this dialog.
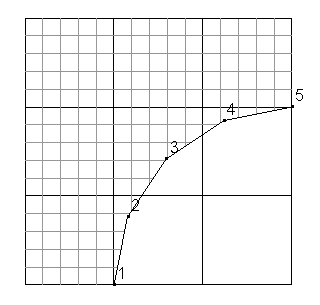
Position of new ppoint — This defines the position of the new ppoint in the pcurve. For example, if you enter 3, the new ppoint becomes 3 and the original ppoints from 3 onwards are renumbered.
There are two ways to insert ppoints using this page of the dialog:
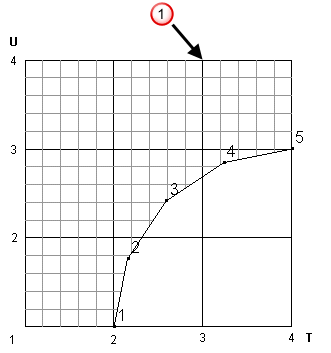
- Parametric — This inserts a ppoint into the
pcurve at the
T and
U parameters on the surface.
In this example, you want to insert a new ppoint at T = 3 and U = 4
 .
.
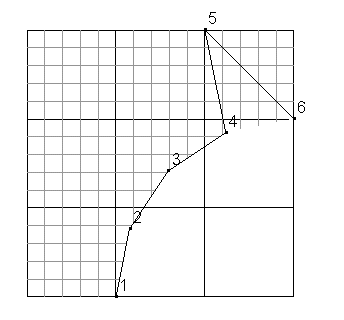
To make the new ppoint lie between ppoints 4 and 5, you need to enter 5 in the Position box. The result is shown below:
- Geometric — This enters a ppoint at the position on the surface nearest to the specified point.
Enter the X Y Z coordinates, or click the Position
 button to open the
Position dialog, where you can use position entry tools.
Note: You can also enter a position by clicking on the screen.
button to open the
Position dialog, where you can use position entry tools.
Note: You can also enter a position by clicking on the screen.For example:
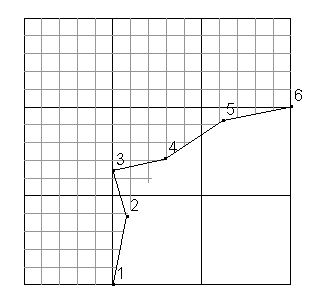
- Enter the X, Y, Z coordinates. In the following example, the entered coordinates match the following position
 :
:
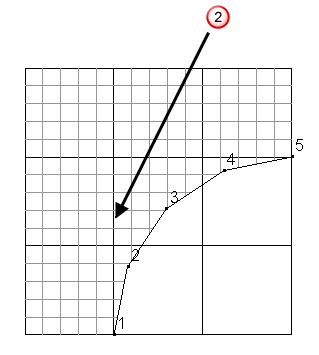
- To make the new ppoint lie between ppoints 2 and 3, enter 3 in the Position box. The result is shown in below:
- Enter the X, Y, Z coordinates. In the following example, the entered coordinates match the following position