The following is an example of morphing a mesh using planar regions:
- Select the mesh.
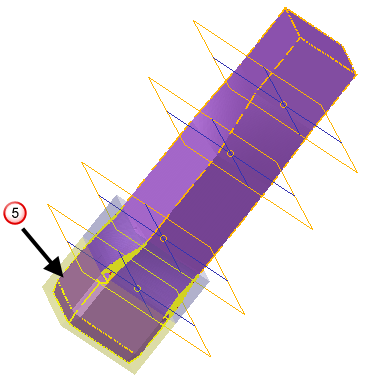
- Click Mesh Tools tab > Triangles panel > Morph Using Planes to display the
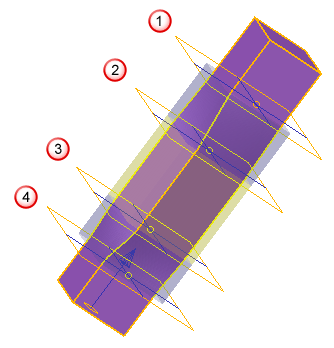
Morph Triangles by Planar Regions dialog. Planes are used to indicate the different regions on the model:
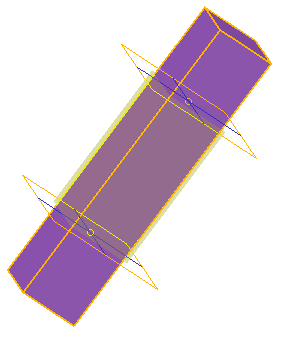
- Double-click the top plane to display the Plane dialog.
- Define the top plane as follows:
- Set Z to 30.
- Click OK to move the plane.
- Double-click the bottom plane to display the Plane dialog.
- Define the bottom plane as follows:
- Set Z to 15.
- Click
OK
to move the plane. The top and bottom planes now look like this:
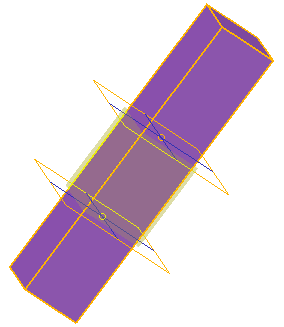
- Define the
Transform region as follows:
- Select Rotate from the list.
- Set the Angle to 10.
- Click
Preview.
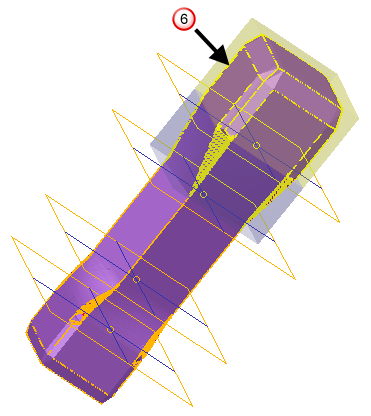
The region between the two planes is rotated by 10
 :
:
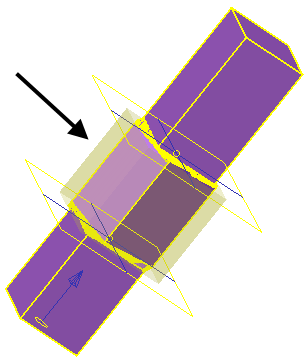
- Specify the
Blend Area
as follows:
- Select Smooth from the Before list.
- Select Linear from the After list.
- Click Preview.
The bottom blend, between
 and
and
 , is created using the smooth algorithm.
The top blend, between
 and
and
 , is created using the linear algorithm.
- Click the
Previous Region
 button to move to the bottom region,
 .
.
- Create an offset region as follows:
- Select Offset from the Transform Region list.
- Set Distance to 1.
- Click
Preview.
Region
is offset by
1:
- Press
Next Region
 button twice to move to the top region,
 .
.
- Create an offset region as follows:
- Select Offset from the Transform list.
- Set Distance to 2.
- Click
Preview.
Region
is offset by
2:
- Click
OK
to modify the model as follows:
- Region
 is rotated by 10.
- Bottom blend
 uses the smooth algorithm.
- Top blend
 uses the linear algorithm.
- Bottom region
is offset by 1.
- Top region
is offset by 2.
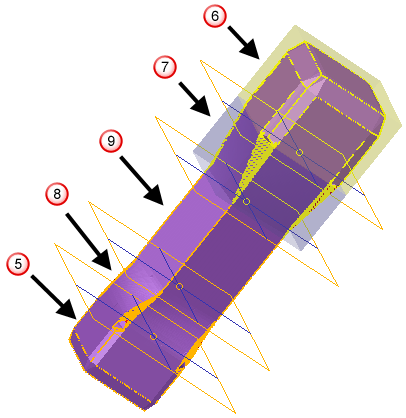
- Region
- Complete further morphing as required.