
Automatically rename nests and sheets
This feature is part of an extension. Extensions are a flexible way to access additional capabilities in Fusion. Learn more.
Create and edit a naming rule
On the Manufacture workspace toolbar, click Fabrication > Manage > Automatic Naming
 .
.The Automatic Naming dialog opens.
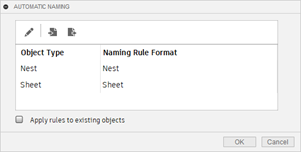
From the Object Type list, click the Nest or Sheet row.
Click the edit button
 . The Edit Naming Rule dialog opens.
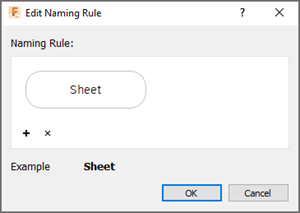
Click Add Information
 to add custom text, material, or material thickness information to the naming rule.
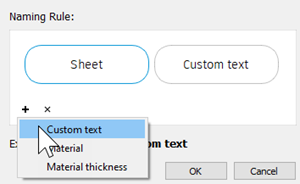
In the Example group, a preview shows you how the items will be named in the browser.

Click OK. The naming rule applies to new objects created of this type.
(Optional) To apply the rule to existing objects in the browser, in the Automatic Naming dialog, select Apply rules to existing objects.
Click OK.
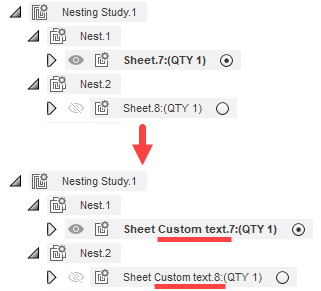
Objects in the Browser you set the naming rule for get renamed, and the rule applies to all future objects created of this type in the document.
Import a naming rule
On the Manufacture workspace toolbar, click Fabrication > Manage > Automatic Naming
.The Automatic Naming dialog opens.
Click the import button
 . A prompt appears to inform you that the naming rule has been imported from your hub.
Click OK.
Export a naming rule
On the Manufacture workspace toolbar, click Fabrication > Manage > Automatic Naming
.The Automatic Naming dialog opens.
Click the export button
 . A prompt appears to inform you that the naming rule has been exported to your hub.Note: If a naming rule file exists in your hub, you will have to overwrite the existing file to successfully export the new naming rule.
Click OK.