Work with shared part numbers
This content only applies if you're working in a hub with collaborative editing. Check for this icon ![]() next to the hub name to confirm that you're using a collaborative editing hub. Learn about collaborative editing.
next to the hub name to confirm that you're using a collaborative editing hub. Learn about collaborative editing.
Share a part number across multiple variations of a model or component so you can easily switch between variations for different contexts. The tasks in this topic illustrate how to work with shared part numbers using three variations of a backplate. You can also assign shared part numbers from the Save As, Save As and Replace, and Save Copy As dialogs.

- Variation with a bit of extra material to create a cost analysis that might be a little more than what actual costs will be, to help with budget planning.
- Simple variation used for demonstrations or sharing without divulging proprietary information.
- Variation closer to what the final product will be; for example, this version might provide more accurate stress analysis.
Assign a part number to the first model
When you create and save a model for the first time, and you use the New Part Number option in the Save As dialog, Fusion automatically generates a unique, time-based part value for the number, such as 2023-11-20-10-10-10-000. You can use the Properties panel to change this to your own unique part number, such as ABC-1.
If necessary, click the Show Data Panel icon
 to open the Data Panel.
In the Fusion Browser, right-click the component and select Properties.
In the Properties panel that opens, beside the Part Number box, click More
 and select Edit Part Number.
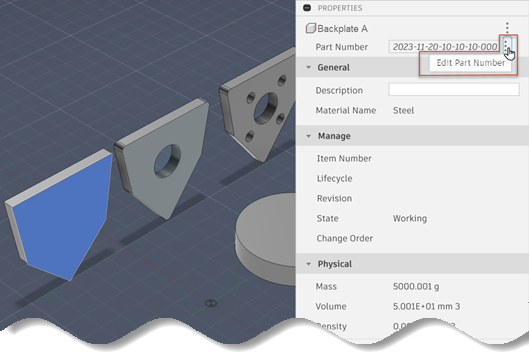
In the Part Number box, enter a unique part number for the component.
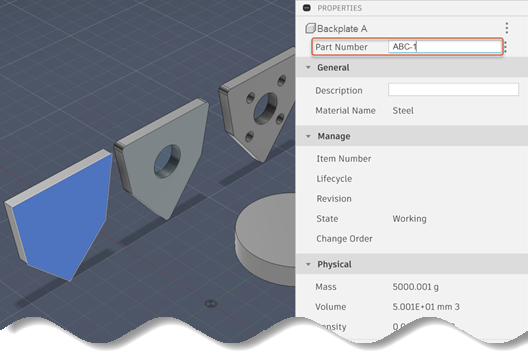
Save your design to record the change.
Assign the same part number to a second component
Follow these steps to apply the new part number you just created to a second component.
Repeat the the preceding procedure for the second component and assign the same part number to it (
ABC-1).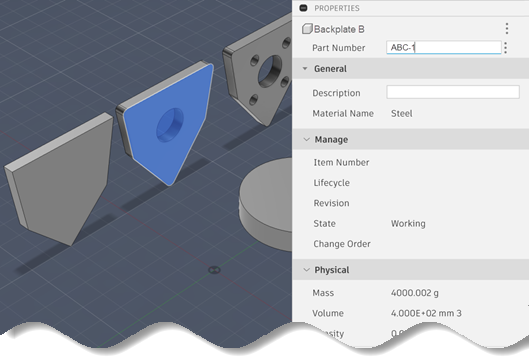
When you enter the part number in the Properties dialog, Fusion detects it's already in use and will prompt you to confirm that you want to share the number between the components.
Click Continue to confirm that you want to share the part number.
A small triangle
 in the box indicates that the change is being saved to the cloud.
Once the part number has been saved, an icon at the top of the dialog indicates that this component is a secondary component
 to the first (primary) component.
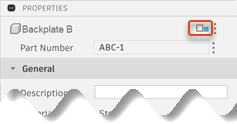
Reopen Properties for the first component and check the icon at the top of the dialog.
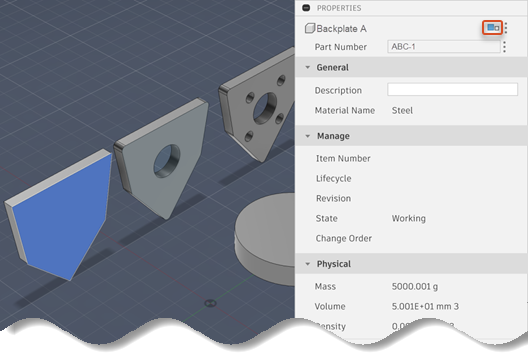
The primary icon
 indicates that the first component is now considered to be the primary component. This is expected, since it was the first component to be given this part number.
Make the third component the primary
Follow these steps to apply the shared part number to the third component, then make it the primary component.
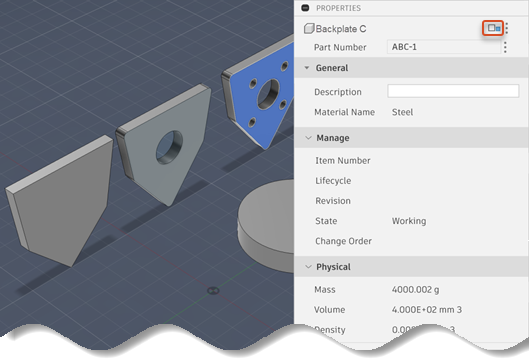
Repeat the steps of the preceding procedure, but on the third component.
Like in the preceding procedure, this component is now considered to be secondary, which is indicated by the secondary icon
 .
.
To make this the primary component, click More
 beside the shared part number icon (
 ) and select Make primary.
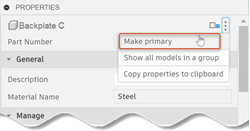
The icon changes to indicate that this is now the primary component.
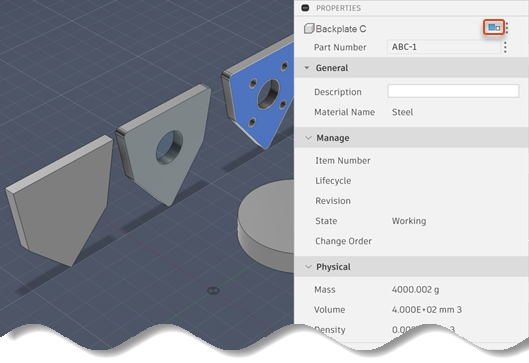
As the primary component, its properties are used whenever this component is referenced by amnother assembly. At any point, you can repeat these steps on one of the other variations of this component to make it the primary.
Remove (unlink) a component from a shared part number
- In the Fusion Browser, right-click the component and select Properties.
- In the Properties panel that opens, beside the Part Number box, click More
 and select Remove from shared part number.
This removes the component from the shared part number group and assigns it its own value. You can always return the component to the group by re-assigning the shared part number to it.
Edit a shared part number
When you edit the shared part number of a model, the change is applied to all other models that share that part number.
In the Fusion Browser, right-click the component and select Properties.
In the Properties panel that opens, beside the Part Number box, click More
 and select Edit shared part number.
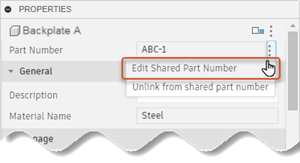
In the Part Number box, enter a new part number for the group.
You must use a number that is not already in use. Directly changing a shared part number to a part number that already exists is not supported.
Combine shared part number groups
You can't combine one shared part number group with another shared part number group in one step. However, you can move models over to another group one at a time if necessary.
Find the model that is currently part of a shared part number group and that you want to move to a different shared part number group.
Remove that model from its current shared part number group, as previously described in this topic.
When you do this, Fusion generates a unique part number for the model.
Edit the part number of the model to change it to the shared part number of the group you want to add it to.
Repeat the previous steps for the other models as necessary.
