
Activity 10: Pencil cut2
In this activity, we will use use the 3D Pencil strategy again, to reduce the amount of stock in the corners of the cavity, with a smaller tool.
Previously we used a 3 mm ball mill. Now we will use a 2 mm ball mill.
Prerequisites
- Activity 9 is complete.
Steps
Start a new 3D Pencil operation and, from the Tutorial Tools (Metric) library, select the #23 - Ø2 mm R1 mm ball tool.
- On the Manufacture toolbar, Milling tab, select 3D > Pencil
 .
. - On the Tool tab
 , click Select. This opens the tool library.
 - In the Tool Library dialog, select Fusion Library > Tutorial Tools (Metric).
- From the list, select #23 - Ø2 mm R1 mm (Ball end mill).
- Click Select.
- On the Manufacture toolbar, Milling tab, select 3D > Pencil
Stepover cut value, cut angle.
- Click the Passes tab
 .
. - Set Stepover to .08 mm.
- Set Number of Stepovers to 11.
- Click OK to begin calculating the toolpath.
- Click the Passes tab
Activity 10 summary
In this activity you selected a 3D Pencil finishing operation and used a smaller tool to clean out the fine corners.
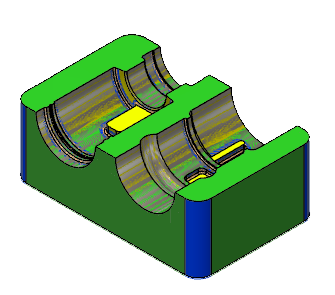
| The calculated toolpath is shown below. | The Simulated toolpath is shown below. |
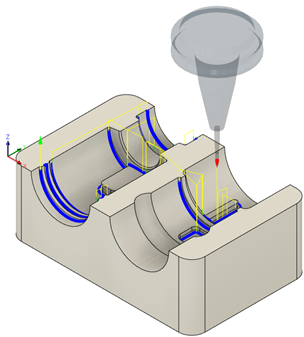 |
 |
The toolpath is shown with a red arrow start, yellow rapid move, green lead in/out move, blue cutting moves and a green arrow at the end.