Once you've set up the network rendering system and software, there are two steps to starting a network rendering session:
- Start the Manager program on one machine and the Server program on every other machine in the network. See Basic Procedures for Network Rendering. The machine being used as a manager can also be used as a rendering server.
- Start a rendering job from 3ds Max on a networked machine with an authorized copy of 3ds Max.
The Manager and Server programs need to be started and left running during a network rendering session. Either program remains in operation until you shut it down or shut down the machine.
When you've set up the Manager and Server network services, you're ready to submit an animation to the network rendering queue. There are two stages to starting network rendering:
- On the render dialog, set all desired rendering parameters, such as resolution and the output file type.
In 3ds Max, you can render from the
 Render Setup dialog, or the Render To Texture dialog.
 - On the Render Setup dialog, from the Render button drop-down menu, choose Submit To Network Rendering.

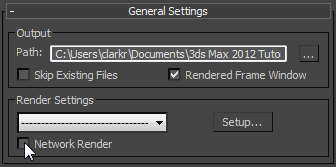
If you are using the Render To Texture dialog, then on the General Settings rollout click to turn on Network Render, and then click Render at the bottom of the dialog.

3ds Max opens the Network Job Assignment dialog, which lets you make final decisions about the job and submit your animation to the rendering servers.
Procedures
These procedures explain how to start and submit a network rendering job in 3ds Max.
This procedure explains how to render a job over the network, once the Backburner Manager and Server are running. (See Autodesk Backburner Installation Guide at www.autodesk.com/backburner-documentation for information on setting up the Backburner Manager and Server.)
To start the Manager program:
- Run the Manager program from the Start menu
 Programs
  Autodesk
  Backburner folder.
 The first time you run the Manager after installation or after deleting the backburner.xml file, the Manager Properties dialog appears. In most cases, you can accept the default settings and click OK to continue.
Thereafter, when you start the Manager, its window appears and the "Starting Network Manager" message is displayed in the window. The machine is now running the Manager in Desktop mode. You can leave this window open to see messages relating to what the Manager and Servers are doing as they appear, or you can minimize it, whereupon it resides in the taskbar tray. To reopen the window when minimized, click its icon in the taskbar tray.
Note: If you're running Windows 2000 and have the NetBEUI protocol installed, and you have unplugged your network cable, when you start the manager, you'll see an error message, "Error starting network subsystem, cannot start manager." If this happens, reconnect the network cable and try again. - Alternatively, you can run the Manager as a service, as described in “Setting Up Backburner Manager as a Windows Service” in the Autodesk Backburner Installation Guide at www.autodesk.com/backburner-documentation. Once set up, the Manager automatically starts when you boot the system and it's always available.
To start the Server program:
- Run the Server program from the Start menu
 Programs
  Autodesk
  Backburner folder.
 The first time you run the Server after installation or after deleting the backburner.xml file, the Server Properties dialog appears. By default, Automatic Search is turned on, and the subnet mask is set to 255.255.255.0. This should work with most networks. Alternatively, turn off Automatic Search and enter the manager name or its IP address in the Manager Name or IP Address field.
Thereafter, when you start the Server, its window appears and the "Starting Backburner Server" message is displayed in the log window. After a few seconds you should also see the "Registration to (manager IP address) accepted" message in the Server window. This message indicates that the server has found the manager and is correctly communicating with it. If you do not see the "Registration to ..." message in the Server window, see “Troubleshooting Backburner” in the Autodesk Backburner User Guide at www.autodesk.com/backburner-documentation.
The machine is now running as a rendering Server in Desktop mode. You can leave this window open to see other messages as they appear, or you can minimize it to the taskbar tray. To reopen the window when minimized, click its icon in the taskbar tray.
- Alternatively, you can run the Server as a service, as described in Network Rendering Server. Just running the Manager as a service, once it's installed and started, it's always available, even after rebooting.
To start a network rendering job:
- Start the Backburner Manager and Backburner Server.
- Start 3ds Max on a machine with an authorized copy of 3ds Max.
- Open the scene you want to render.
- Choose Rendering menu
 Render Setup to display the Render Setup dialog.
 You can also render from the Execute Video Post dialog or the Render To Texture dialog.
- In the Render Output group, click the
 ellipsis button to display the Render Output File dialog.
 - In the File Name field, enter the Universal Naming Convention (UNC) name of the output directory, followed by the name of the output file. For example:
\\machine1\project1\images\output.tga
As an alternative to entering the UNC name from the keyboard, you can go to Save In
 My Network Places and navigate to the machine and shared directory where you want the servers to write the rendered frames. After selecting the machine and shared directory in the Map Network Drive dialog, enter the output file name (for example, output.tga), and then click OK. 3ds Max automatically converts the shared directory to the UNC format.
 If the output directory is mounted, enter the name and extension of the output file and choose the drive mounted for the output directory from the Save In list.
- Click OK to display the Setup Options dialog for the file format type you have selected.
- Make the desired settings and click OK.
- Click OK again to return to the Render Setup dialog.
Save File is turned on once you assign an output file.
- After setting any other rendering parameters, from the Render button drop-down menu, choose Submit To Network Rendering.

The Network Job Assignment dialog appears.
If you use Video Post, set the file location with an Add Image Output Event. After you click Execute Sequence, be sure to turn on Net Render before you click Render.
To submit a network rendering job:
- Start the Backburner Manager and Backburner Server.
- On the Network Job Assignment dialog, make sure the Automatic Search option is on, and then click Connect.
In most cases, 3ds Max detects the Manager machine and displays its attached Servers in the Server list. If auto-detect fails, turn off Automatic Search and manually enter the name or IP address of the network machine acting as the Manager, and then click Connect.
All rendering Servers running under the network Manager should be listed with green dots next to them. Even if a server is running an interactive session of 3ds Max, it will still render an assigned job by launching a second copy of 3ds Max.
- By default, the job will use all available Servers. To use only specific Servers, turn off Use All Servers and choose the machines you want to use from the Server list.
- Click Submit.
The job is submitted to the Manager, which then distributes the job to the machines assigned in the Network Job Assignment dialog. Network rendering begins.
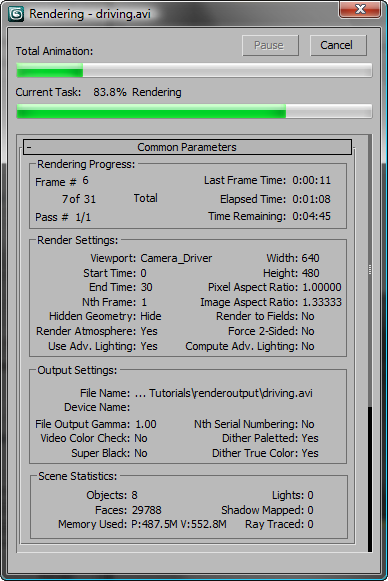
When network rendering begins on a rendering Server, the Rendering dialog appears on machines running serverapp.exe. If a machine is running the service version, no dialog appears.
