These instructions describe a more detailed workflow (than the Energy Analysis using Building Elements - Quick Start) for performing Energy Analysis using building elements in Revit. Use this workflow when you want to learn how to modify the building element model and its energy settings to refine the analysis.
To perform energy analysis using building elements
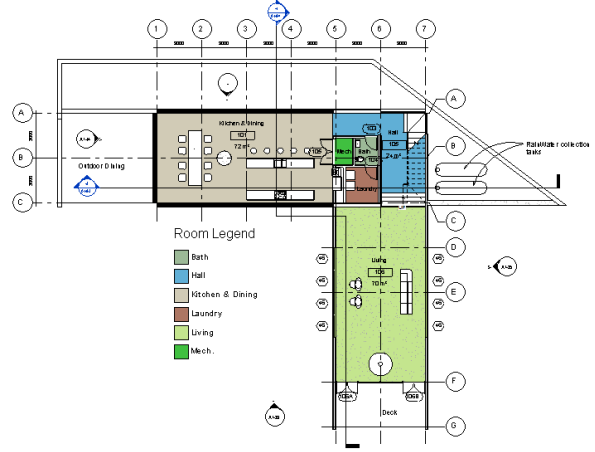
- Create the Revit building model.
- To set building elements as the basis for the energy simulation, click Analyze tab
 Energy Analysis panel
 Use Building Element Mode.
 - Modify energy settings.
- Click Analyze tabEnergy Analysis panel
 (Energy Settings).
 - Define basic energy settings. (See Common Settings.)
- Building Type. Review the occupancy type assigned to the building, and modify as needed.
- Ground Plane. Verify that the value shows the ground level for your model. During simulation, floors below the ground plane level are treated as underground floors.
- Location. Review the geographic location and weather station specified for the project, and modify as needed.
- Define optional energy settings.
- Export Category. Select Rooms (the default) or Spaces to determine how material thermal properties are defined for energy analysis. For details, see About Rooms and Spaces for Energy Analysis.
- Include Thermal Properties. When Export Category is set to Rooms, this parameter determines the material thermal properties that will be used in the analysis. For details, see About Rooms and Spaces for Energy Analysis.
- Analytical Space Resolution. The default resolution for analytical spaces may not be appropriate for every Revit model, so it may be necessary to iteratively adjust this setting. Increase this setting if you run a simulation and a message displays that the model is too large.
- Analytical Surface Resolution. The default resolution for analytical surfaces may not be appropriate for every Revit model, so it may be necessary to iteratively adjust this setting. Increase this setting if you run a simulation and a message displays that the model is too large.
- Conceptual Constructions. If you are not using thermal properties contained in building element layer materials, review the default conceptual constructions assigned to the surface subcategories, and modify as needed.
- Energy Model - Building Services. Review the building operation schedule, HVAC system, and outdoor air information, and modify their values as needed.
- Click OK.
- Click Analyze tab
- Sign in to Autodesk 360.
Click Sign in
Sign in to Autodesk 360. Enter your Autodesk ID and password. If you don't sign in prior to running a simulation, you will be prompted to do so. - Click Analyze tabEnergy Analysis panel
 Run Energy Simulation.
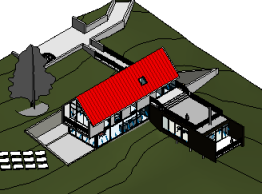
- In the dialog, select Create the Energy Analytical Model and continue to run the simulation.
The software detects the energy analytical model geometry. Depending on the size and complexity of the model, this may take considerable time.
The software checks to ensure that at a minimum the model consists of a reasonably closed shell that contains at least one floor, walls, a roof, and has a known geographic location. There are additional model requirements to consider to ensure a successful energy analysis. See Energy Analysis using Building Elements - Model Validation. -
You are informed when the energy analytical model has been generated. Click OK to proceed with the energy simulation.
It is recommended that you validate the energy analytical model and understand the limitations when performing an energy analysis. See Energy Analysis using Building Elements - Model Validation.
- In the Run Energy Simulation dialog, for run name, specify a name for the analysis.
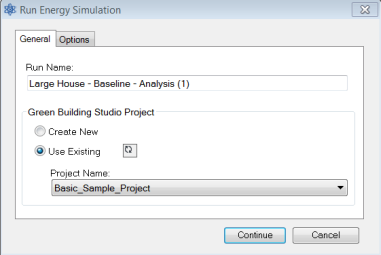
- Under Green Building Studio Project, do the following:
- If you are running the energy simulation for the first time or if you changed any energy settings (including the building type or location) for the Revit model, select Create New.
This option ensures that the latest Revit settings are used for the energy simulation.
- If you did not change any energy settings since the last energy simulation for this model or if you created a GBS project with pre-defined settings to use for this simulation, select Use Existing and specify the GBS project to use.
Settings in the existing GBS project override any changes made to energy settings in the Revit model, including building type and location.
For more information, see Specify the GBS Project for Energy Analysis.
- If you are running the energy simulation for the first time or if you changed any energy settings (including the building type or location) for the Revit model, select Create New.
- (Optional) Click the Options tab to specify utility billing data and weather period data sets, which can be added using Green Building Studio.
For more information, see Adding Utility Billing Data.
-
Click Continue to run the simulation.
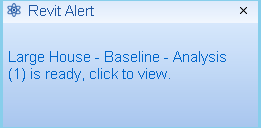
If there are no error conditions, a gbXML file is created and sent for simulation. The server returns the simulation results to Revit, where they are displayed in the Results and Compare dialog.
- When the simulation is complete, an alert displays. Click the analysis name in the alert to view the results.
Or, in the Energy Analysis panel, click
 Results & Compare, and select the analysis from the project tree.
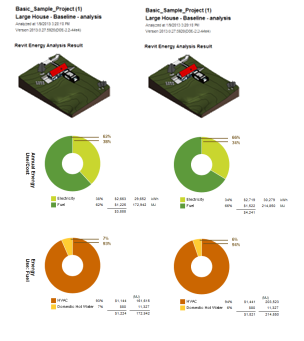
 - View the analysis results.
- (Optional) Modify the building model and energy settings as needed, and then run an analysis on the modified model.
To compare results, select multiple analysis results and click Compare on the toolbar.
- (Optional) Open results in Green Building Studio, or export results for use in another application.