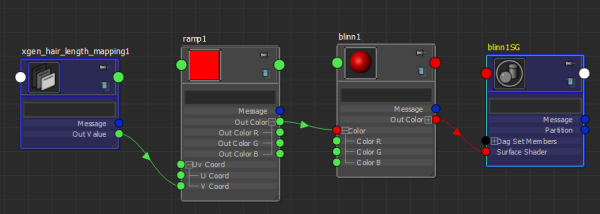
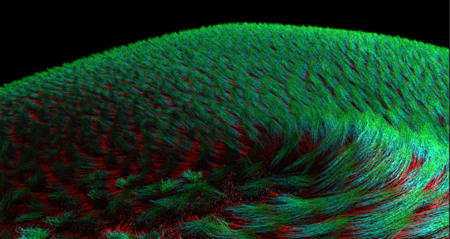
You can add multiple colors to splines and vary these colors along their length using a 2D ramp texture. To do this, you must connect an xgen_hair_length_mapping node to the ramp. This node provides U V coordinate space along the length of spline primitives for textures and ramps.
- In the Hypergraph, select your XGen hair shader network.
- In the
Node Editor (
Window > Node Editor), display the shader node connections.
For information about displaying node connections, creating nodes, and connecting nodes, see Node Editor basics.
- In the Node Editor, create a ramp [texture] node.
- Connect the ramp node's Output Color to a color input on you hair shader.
- Create an xgen_hair_length_mapping node.
- Connect the
Out Value of the
xgen_hair_length_ mapping node to the
V Coord input of the ramp node.

- Select the ramp node, and in the Ramp Attributes section of the Attribute Editor, set the ramp to color the splines along their length. For information about setting colors, see Ramp.
- Render your Description with mental ray.

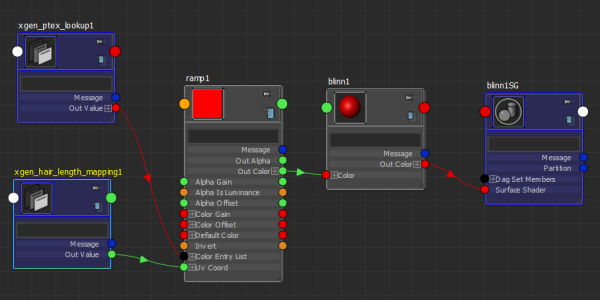
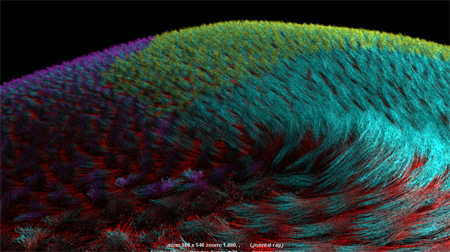
You can also apply a texture map to the ramp's color points by connecting an xgen_ptex_map_lookup node.
Apply a texture map to ramp color points
- In the Node Editor, select the ramp node.
- In the
Ramp Attributes section of the
Attribute Editor, select a ramp color point, and then click the map
 icon beside
Selected Color.
- In the Hypershade, create an xgen_ptex_lookup node.
- In the node's
Attribute Editor, click
 beside
File Name and browse to the location of the Ptex map or texture file.

- Render your Description with mental ray.
