Use the Batch Assembly tool to create multiple copies of an assembly. Batch assemblies can be useful for when you want to print multiple copies of a model in the same 3D-printing job.
The
Batch Assembly tool is similar to the
Block Copy
 tool, but only one item is created in the Project Tree no matter how many copies you create. This makes the Project Tree much more manageable. In addition, you can continue to make changes to your assembly after creating a batch assembly, and these changes are automatically made to each copy. For example, if you use the
Transform tool to scale the size of your assembly, the transform bounding box is drawn only around the original assembly, but each copy is scaled concurrently with the original.
tool, but only one item is created in the Project Tree no matter how many copies you create. This makes the Project Tree much more manageable. In addition, you can continue to make changes to your assembly after creating a batch assembly, and these changes are automatically made to each copy. For example, if you use the
Transform tool to scale the size of your assembly, the transform bounding box is drawn only around the original assembly, but each copy is scaled concurrently with the original.
File sizes for exported batch assemblies are much smaller than file sizes for the same number of copies created by Block Copy because ArtCAM only saves one copy instead of saving data for each copy.
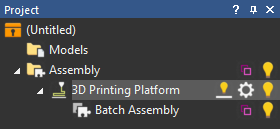
When you click the
Batch Assembly
 button on the
Assembly panel, a
Batch Assembly
button on the
Assembly panel, a
Batch Assembly
 item is created in the Project Tree.
To add items to a batch assembly:
- Drag items from other areas of the Project Tree and drop them into the
Batch Assembly
item.
- Right-click the
Batch Assembly
item in the Project Tree and use the context menu to import models into the batch assembly.
- Use the settings on the Batch Assembly panel to import or create items inside the batch assembly.
Select the
Batch Assembly
item to display the
Batch Assembly panel. You can change the layout of the
Batch Assembly at any point using the settings this panel.

The following settings are available:
Layout — Define the layout of the components in the Batch Assembly.
- Layout Type — Select how you want to layout the parts.
- 2D Block — Select this option to lay the parts out on one level.
- 3D Block — Select this option to lay the parts out in a 3D block.
- Platform Nesting — Select this option if you want to ensure your parts do not go outside the build area of your printer. This option is available only if you have created a 3D Printing Platform.
Note: If you want to adjust the spacing between the parts after selecting Platform Nesting, use the Automatic Layout options on the Platform Settings panel.
- Edit — Click to edit the parameters of your selected layout.
- Number — This box is available only if you have 2D Block or 3D Block selected. Enter the number of meshes you want in the X, Y, and Z directions. The Z box is available only if you have 3D Block selected.
- Spacing — This box is available only if you have
2D Block or
3D Block selected. Enter the distance between each mesh in the X, Y, and Z directions. The Z box is available only if you have
3D Block selected.
If you are creating a batch assembly for 3D-printing, it can be beneficial to have the bases of the copies join together so that all the copies are on one base. To do this:
- In the Layout area, reduce the X and Y Spacing values to 0. This removes the spacing between the bases, but causes the copies to touch, which is not ideal.
- In the 3D Printing Structures panel, increase the Border thickness value until there is adequate room around each copy.
- Maximise Copies — This option is available only if you have Platform Nesting selected. Select this option to fill the platform with as many parts as can fit.
- Number of Copies — This box is available only if you have Platform Nesting selected. Enter the number of copies you want to create.
Dimensions — The top row of this area displays the dimensions of the batch assembly as if a box was drawn around all visible and hidden parts. The bottom row, labelled Visible, displays the dimensions of the visible parts of the batch assembly only.
Positioning — Use these buttons to change the position of the batch assembly and scale the batch assembly.
 Transform — Interactively move, rotate, and scale the selected item.
 Nudge — Adjust the position of the mesh in the selected batch assembly.
 Scale — Scale the size of the mesh in the selected batch assembly in any of the three axes, or in all axes simultaneously.
 Object Selection — Turn on object selection.
 Lay On Surface — Lay an assembly component on the surface of a model.
 Snap to Platform — This button is available only if you have created a 3D printing platform. If you import a part that does not need supports, click
Snap to Platform to align it with the surface of the 3D printing platform.
Snap to Platform — This button is available only if you have created a 3D printing platform. If you import a part that does not need supports, click
Snap to Platform to align it with the surface of the 3D printing platform.
Tools — Use these buttons to mirror the model and emboss it as a relief.
 Mirror — Mirror an assembly in a batch assembly along X, Y, or Z, or around its own origin.
 Emboss Relief Wizard — Automate the process of creating embossed reliefs.
Children — Use these buttons to add gems, components, batch assemblies, or 3D printing jobs to the batch assembly.
 Add Gem — Add a gem
 to the batch assembly.
 Component Library — Open the component library and add a component
 to the batch assembly.
-
Batch Assembly — Add another
Batch Assembly
item to the batch assembly.
 Create New 3D Printing Structures — Add a
3D Printing Structures
Create New 3D Printing Structures — Add a
3D Printing Structures
 item to the Project Tree.