Use this dialog to create and append Schedules using specific objects.
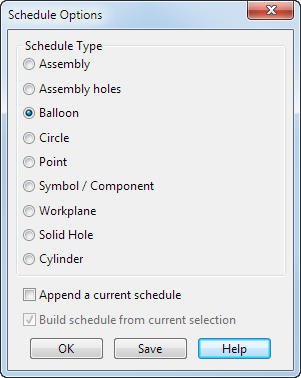
To create Schedule using this dialog:
- Select the Schedule Type option on the dialog that corresponds to the objects you have selected. Choose from:
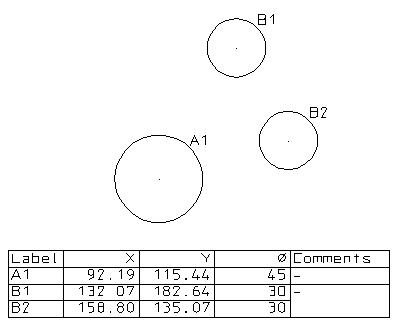
- If you want to create a schedule on the screen, click a position on the drawing in the graphics window:

The top left corner of the schedule is positioned where you click.
- Set the first label using the
Counter option on the
Text toolbar.
- Select the
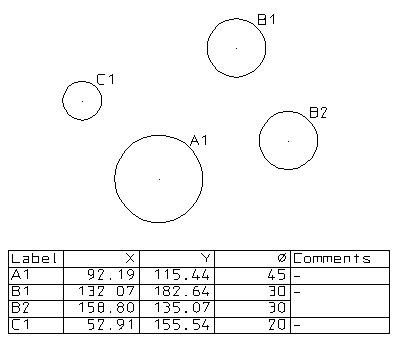
Append a current schedule option to append the schedule to an existing one. The appended schedule does not contain a top row with headings. It relies on the existing schedule for the top row.
Make sure you click the bottom left corner of an existing schedule to add the new rows.
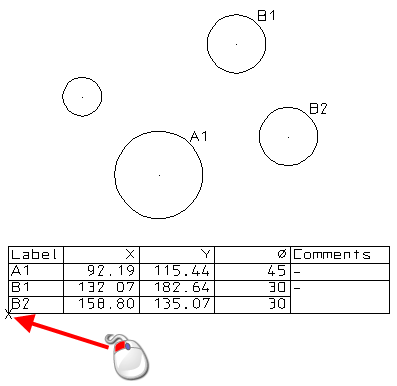
The rows are appended to the schedule as shown below:
- Select the Build schedule from current selection option to use the objects from the current selection. Otherwise, the objects are selected from everything in the graphics window.
- Click
OK to create the Schedule on screen and close the dialog, or click
Save to save the schedule as an .html, .csv or .txt file:
- The .html file can be viewed and printed in a browser.
- The .csv file can be read into spreadsheet program such as Excel.
- The .txt file can be read by another program such as a word processor.