To create a study type for use with Generative Design in Revit, create a Dynamo graph that addresses your unique design challenges.
Each study type in the Create Study dialog starts as a Dynamo graph. The Dynamo author creates the logic required to define and explore a particular design challenge. After refining and testing the graph, the author uses it to create a study type for Generative Design in Revit. The study type can then be used in Generative Design to run multiple studies on Revit models, iterating the studies to explore design alternatives until the optimal solution is determined.
Creating a study type is typically performed by someone who is familiar with Dynamo for Revit.
To create a study type
- Use
Dynamo for Revit to create and test the graph.
- The graph must follow specific rules for use with Generative Design in Revit. See About Creating a Dynamo Graph for Generative Design.
- Use the sample study types as learning resources. Open the graphs in Dynamo to understand how they're constructed and how they work.
- If desired, you can use a sample study type as a starting point. Open it in
Dynamo and use File
 Save As to save the graph with a new name and in a new location.
- When you're finished testing the graph and are ready to create a study type, in
Dynamo, click Extensions Show Graph Properties and Show Graph Status.
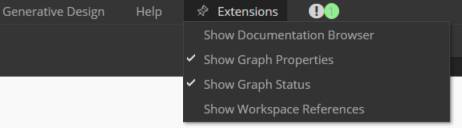
The Graph Properties and Graph Status display in a pane on the right side of the Dynamo window.
- In the Graph Status pane, select Generative Design in the Graph Type drop-down.
- If the Graph Status pane displays "Run graph to finalize validation," click Run in the bottom left corner of the window.
This allows Dynamo to validate the graph before creating or updating the study type.
- If the Graph Status pane lists
any issues, resolve them before proceeding.
For example, you may need to set nodes as inputs or outputs, or fix name conflicts. See Troubleshoot: Errors for Generative Design in Dynamo and Generative Design Primer: Setting up a Graph.
Click the Node Issues and Graph Issues sections of the Graph Status pane for details. Click links in the issue descriptions to go to the relevant section of the graph. Make required changes, and re-run the graph.
- When all issues are resolved, do the following in the Properties pane:
- Description: Enter text to describe the purpose or use case for the study type. This information appears in the Create Study dialog.
- Image: Add an image (PNG or JPEG) for the study type, such as a thumbnail from a sample outcome. Click in the field to navigate to the desired image, or drag and drop an image. On the Create Study dialog, the image is resized and cropped to a square to fit in the card for the study type.
Note: Use PNG files or medium- to low-resolution JPEG files. High-resolution JPEG files can cause issues.
- Author Name: Add the graph author's name.
- Learn more URL: Add a documentation link. This can be accessed from the study type's
 icon in the Create Study dialog.
- Custom Properties: Add custom properties by clicking the + icon. Rename the custom property by clicking the pencil icon. Custom properties do not appear in the Create Study dialog.
- Save the graph. The graph (DYN file) is updated with the changes. A Dependencies folder is also created in the same location as the DYN file.
- Share the study type with team members.
If other team members want to use the new study type, select the Include File Dependencies option in the Generative Design menu and send them the resulting DYN file and its Dependencies folder, or copy the files to a mapped network drive that team members can access.
Note: You can share study types with team members and export data from the study as a CSV file. This data can include generated outcomes, filtered outcomes, discarded outcomes, and their thumbnail images. See Export Outcomes.
Team members can then copy the files to a local folder or access them from the mapped network drive.
When you or team members open the Create Study dialog and select the folder from the drop-down list, the new study type displays in the dialog.