Automatic Meshing of CAD Models
Autodesk® CFD performs a comprehensive topological interrogation of the analysis geometry and determines the mesh size and distribution on every edge, surface, and volume in the model. Geometric curvature, gradients, and proximity to neighboring geometry are all considered when assigning element sizes and mesh distributions.
- Greatly simplified set-up of analysis models resulting in less time spent assigning mesh sizes.
- More efficient mesh distributions--the mesh is fine where required, and coarse where it can be.
- Improved solution accuracy due to better mesh quality and mesh transitions.
- Improved solution robustness--good mesh transitions lead to a well-posed mathematical model.
It does not matter which selection mode (volume, surface, or edge) is active when this button is clicked.
This process is fast, but can take a few minutes for models that contain more than 3000 edges.
Mesh Task
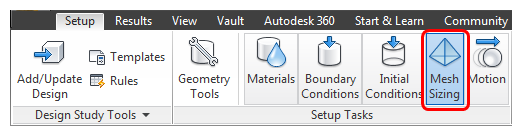
To access the meshing tools, click Setup (tab) > Setup Tasks (panel) > Mesh Sizing:
You can use these tools to help you define, modify, and preview the mesh.
To Apply Automatic Mesh Sizing
There are several ways to apply Automatic Sizing:
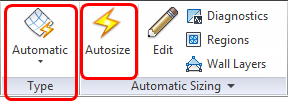
- In the context panel, verify that the Type is set to Automatic. Click Autosize.
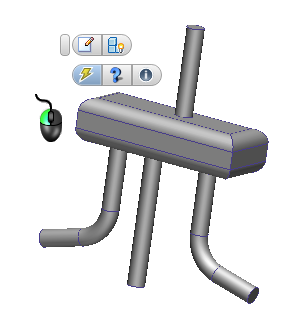
- Left click on or near the model, and click the Automatic icon on the context toolbar:
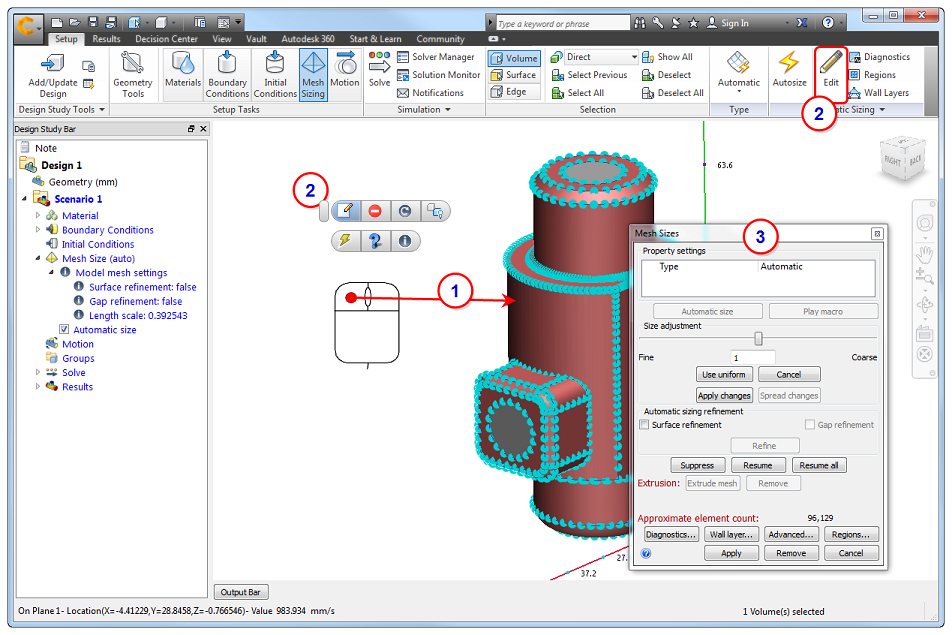
- Right click in the Graphics window or on the Mesh Size branch of the Design Study bar, and click Edit.... Click Automatic size on the Mesh Sizes quick edit dialog.
To Access Meshing Tools
Use the Mesh Tools to customize the mesh distribution. All tools are accessible from the Mesh Sizes quick edit dialog. To simplify the workflow, many are also available on the context tool bar and on the context panel.
Context tool bar
Left click on or near the model:
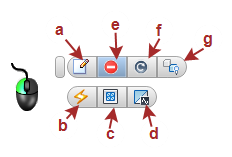
- Open the Mesh Sizes quick edit dialog.
- Invoke automatic mesh sizing.
- Create mesh refinement regions. (To focus the mesh in critical locations.)
- Check the model with Diagnostics. (To remove potentially problematic features.)
- Suppress a selected part. (To remove less important parts, and decrease the analysis time.)
- Resume a selected part.
Context panel in the Ribbon
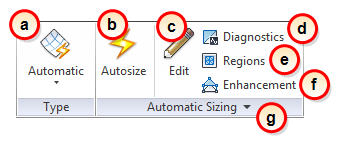
- Toggle between Automatic mesh sizing and Manual mesh sizing.
- Invoke automatic mesh sizing.
- Open the Mesh Sizes quick edit dialog.
- Check the model with Diagnostics. (To remove potentially problematic features.)
- Create mesh refinement regions. (To focus the mesh in critical locations.)
- Modify or disable Mesh Enhancement .
- (In the expansion panel of the context panel.) Customize the mesh distribution by modifying Advanced meshing controls.
To modify the mesh directly on the model
In some cases, the mesh distribution needs to be modified:
- Select the part.
- Open the Mesh Sizes quick edit dialog.
- Make the appropriate refinements or invoke Automatic Refinement.
The mesh settings under the Mesh Size branch of the Design Study bar describe the history of the mesh definition. You can review and modify this history to change the mesh definition. To learn more, click here.
Example of Automatic Mesh Sizing
The following topics contain additional information that can help you to use Automatic Mesh Sizing effectively: