Perform a Forma wind simulation for detailed analysis of wind conditions across a site.
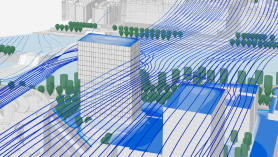
Learn about Forma wind analysis and the difference between wind simulation and wind estimate.
Before performing a wind simulation, prepare the model to access Forma tools.
To perform a wind simulation
- Prepare your model with real-world context.
For accurate results, a wind simulation takes into account the real-world contextual data, such as terrain and surrounding buildings, that may impact site conditions for your project. Use either or both of the following methods:
- Order contextual data, including terrain and buildings, for the region surrounding the project. After these data sets are acquired, you can leave them as reference data, or convert them to Revit elements.
- Use Revit tools and workflows to create the terrain and surrounding buildings. Use Toposolid tools to build the terrain. Use conceptual masses to represent surrounding buildings.
In either case, note the following:
- The terrain in the analysis model is the union of all terrains in the scenario and toposolids modeled in Revit.
- The terrain must not have voids nor a total difference in elevation exceeding 200 meters (about 656 feet) across the whole terrain.
- Click Analyze tab > Forma Analyses panel >
 (Wind Simulation).
As an alternative, you can click Analyses & History and, for Run analysis, click Wind > Simulation.
- Set up analysis parameters.
In the Forma Analyses | Setup window, do the following:
- Click Place circle, and click in the canvas to place a circle around the project. This circle defines the area to be included in the analysis. Use the slider to adjust the radius of the analysis circle.
- Under Models, select the models to include in the analysis.
Include terrain and building models to ensure that real-world conditions are reflected in the analysis results.
Note: The geometry displayed in the setup window is based on the current version of the scenario. To include your latest changes, you can Sync with Central (for a workshared model) or save to the cloud (for a non-workshared model), and wait for the scenario to update. - Click Run analysis.
Leave the setup window open while the analysis data is prepared. When the analysis begins, you can close the setup window.
- To check its status, click Analyze tab > Forma Analyses panel >
 (Analyses & History).
The analysis is listed under Analysis history > Wind simulation. If the analysis is not yet complete, the listing displays in gray text with "Running" after it.
- When the panel indicates that the analysis is complete, click View result.
The analysis results display in a window.
- Explore the analysis results.
- Click Direction, and click a section of the wind rose for information about wind patterns from that direction. For Streamlines, click the toggle to display wind streams.
- Click Comfort to explore areas where wind patterns may cause discomfort to pedestrians. For Comfort scale, choose the desired wind comfort criteria to use in the display.