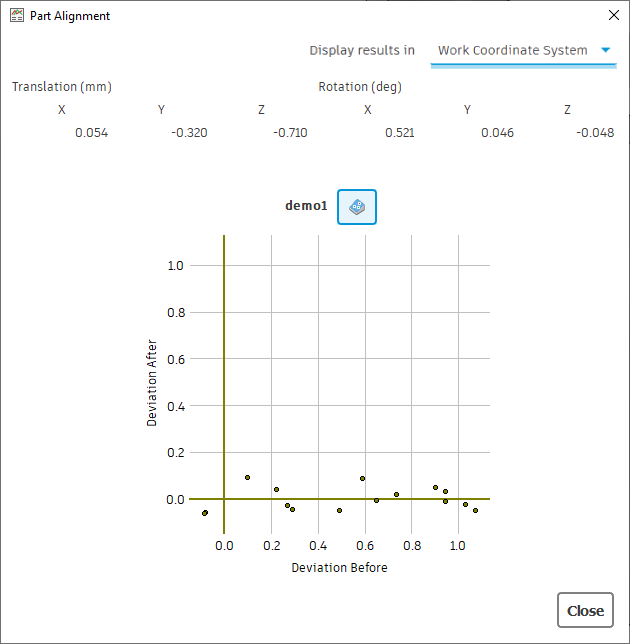
Show the transformation used by a part alignment
This feature is part of an extension. Extensions are a flexible way to access additional capabilities in Fusion. Learn more.
By importing inspection results, Fusion calculates the part alignment to work out how best to adjust the part so that it is in alignment. Analyze the transformation that Fusion has used to calculate the part alignment and the impact the transformation has on the deviation of the inspection results.
Click Get Results > Show Part Alignment Information
 .
.The Part Alignment dialog opens and shows:
The translation along X, Y, and Z, and the rotation about X, Y, and Z used to calculate the part alignment.
Tip: Use the Display Results In list to display the axes based on the model's orientation or based on the work coordinate system (WCS) defined in the setup.A graph showing the deviation of individual probed points. The horizontal axis represents the deviation from the surface inspection and the vertical axis represents the deviation after the part alignment has been applied.

(Optional) To display detailed measurements before and after the part alignment has been applied, click
 to open the Inspection Results window.