Activity 6: Create obstacle geometry to maintain the range of motion
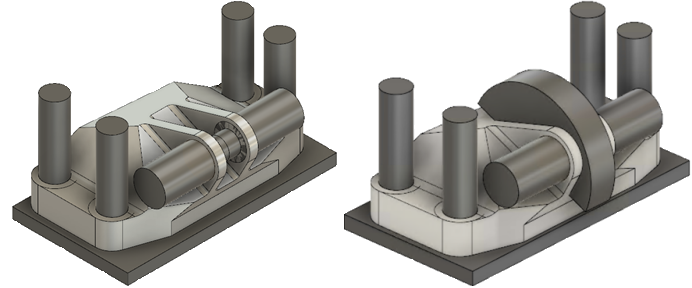
In this activity, you create a cylinder on the inside face of the bracket, to ensure that whatever geometry is connected to this bracket can go through its range of motion about the center pin. During this exercise, it is important not to over-constrain or add unnecessary obstacle geometry
Prerequisites
- Activity 5 is complete.
Steps
Create cylindrical geometry, 97mm in diameter, between the two inside faces of the center pin holes.
- On the Edit Model Solid tab, click Create > Cylinder
 .
. - Click on the inside face of the rear bracket.
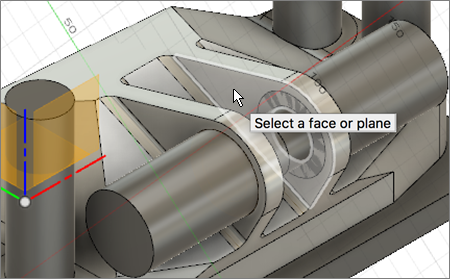
- Switch to the side view by clicking Left on the ViewCube.
- Hover over the model until you see the blue line auto-projection of the edge of the bottom of the channel.
- Slowly move your cursor up the model until you see the blue triangle marking the midpoint of the line, and click on it.
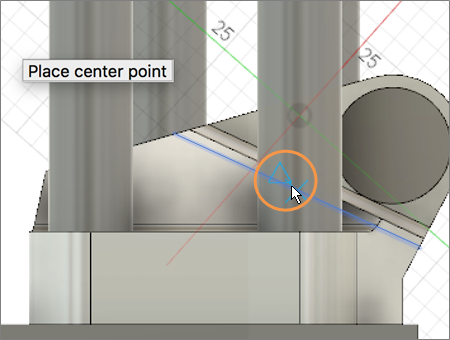
- Move the cursor out until you reach 97mm diameter, or type 97 to set the diameter accurately, then press Enter on your keyboard.
- Click Home View to return the model to its original orientation.
- Click on the blue arrow, select New Body as the Operation in the Cylinder dialog, then click on the inside face of the near bracket.
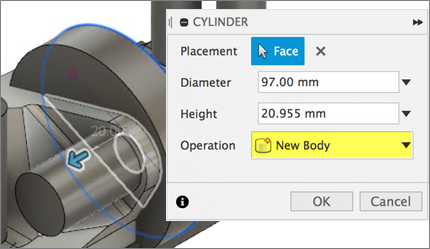
- Click OK to close the Cylinder dialog.
Note: Body16 is visible in the Browser.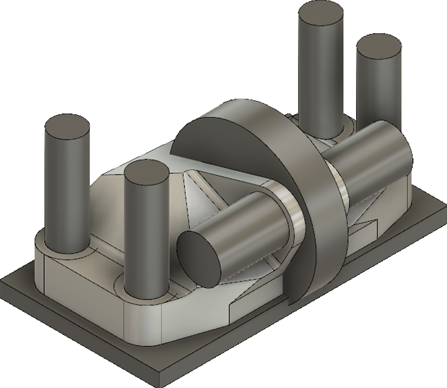
Note: The cylinder over-constrains the model where it extends into the model geometry. The part of the cylinder that extends into the model geometry should be removed.
- On the Edit Model Solid tab, click Create > Cylinder
Split the cylinder into two parts at the bottom face of the bracket channel.
- On the Edit Model Solid tab, click Modify > Split Body
 .
. - Click on Body16, then click the Visible icon
 to hide it.
 - In the Split Body dialog, click Select associated with Splitting Tool, then click the bottom face of the bracket channel.
- Click OK to close the Split Body dialog.
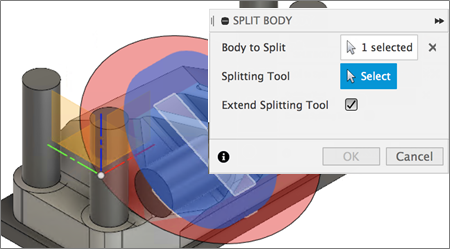
Note: Body17 is visible in the Browser.
- On the Edit Model Solid tab, click Modify > Split Body
Remove the bottom half of the cylinder, to leave only the geometry to act as obstacle geometry.
- Show Body16 and Body17 by clicking the Hidden icon
 .
. - Right click on Body16, and select Remove to remove it from the Browser.
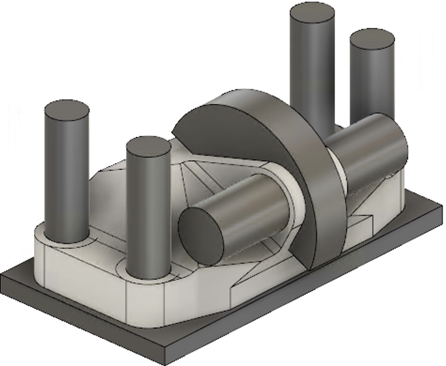
- Show Body16 and Body17 by clicking the Hidden icon
Now that you have created the obstacle and preserve geometry, return to Tutorial 1 to recall how to assign geometry to the body types.
Activity 6 summary
In this activity, you created a cylinder to act as obstacle geometry, then split it and deleted the bottom half to remove unnecessary geometry that would over-constrain the solution.
You accomplished these tasks using the following tools:
- Create Cylinder
- Split Body