Activity 4: Explore outcomes
In this activity, you review outcomes in terms of manufacturing methods using the suite of exploration tools.
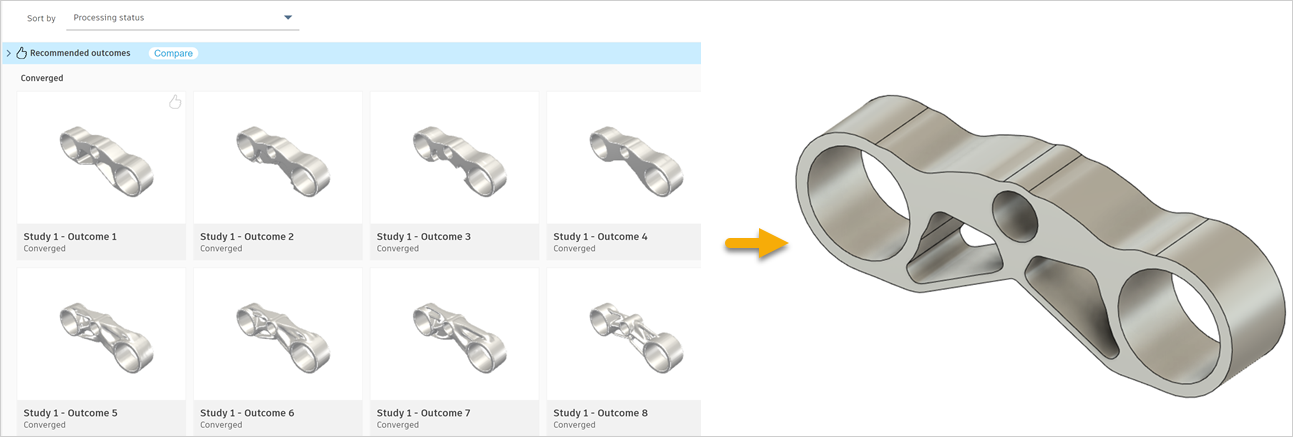
The outcomes in the Thumbnail View (left) and the design created from an outcome (right).
Prerequisites
- Activity 3 is complete.
- Outcomes for a study are generated.
- The Thumbnail View is open.
Note: The Thumbnail View opens automatically when you enter the Explore contextual environment. - You can use the predefined sample files from the Data Panel: Generative Design Samples.
Steps
Use the Thumbnail View and Outcome View to explore outcomes in terms of manufacturing methods.
Note: The Outcome View enables you to examine and explore an outcome in detail. You can access it in all main views.- To sort the outcomes from the lightest to the heaviest in the Thumbnail View, from the Sort by list, select Mass.

- To display only the outcomes that satisfy the values in the reduced range, go to the Objective ranges section and drag the right endpoint of the Mass range bar to about 2.0.
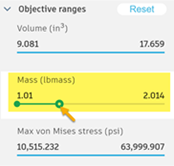
- To sort the outcomes by manufacturing method, from the Sort by list, select Manufacturing method.
Note: You can view the different shapes generated for each production method - To view only the outcomes for 2.5 axis milling, in the Outcome filters pane, mouse over the 2.5 axis milling method, and click the Isolate button.
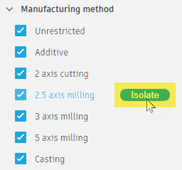
- To view only the outcomes for the selected material, in the Outcome filters pane, mouse over the Titanium 6Al-4V material, and click the Isolate button.
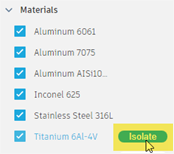
- To open an outcome in the Outcome View, click the first outcome thumbnail.
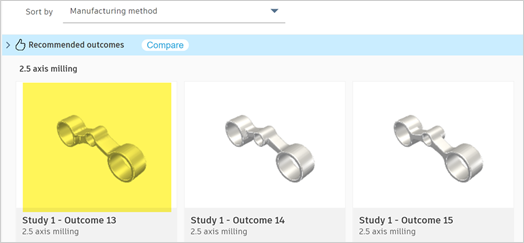
- To examine details of the outcome, in the Outcome View toolbar, use the navigational tools such as orbit, pan, and zoom.
- To display the distribution of stress on the surface of the outcome, on the Explore tab, click Display panel > Stress View
 .
.
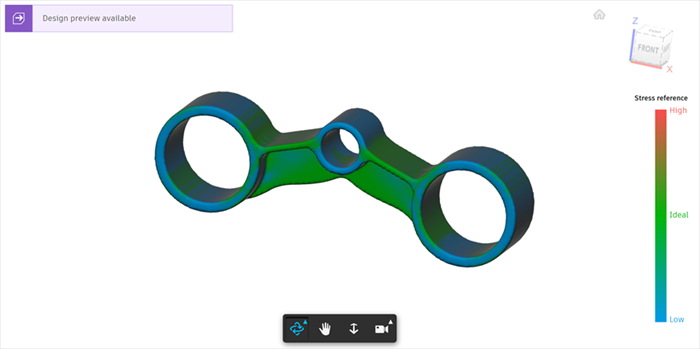
- To label the outcome, on the Outcome View tab, click Tag > Add Label
 .
. - In the Labels dialog, click Create a new label, and enter Easy to Manufacture.

Note: This outcome suits our manufacturing needs, so we label it to find it easily later. In the next steps, we add another outcome to the label. In this way, we can display and compare them easily using the Labels filter. - Press checkmark
 and click Done to apply the label to the iteration.
 - To return to the Thumbnail View, on the Outcome View tab, click Finish Outcome View > Finish Outcome View
 .
. - To view the created label, in the Outcome filters pane, go to the Labels section.

Tip: To rename or delete a label, mouse over a label name and click .
.
- To sort the outcomes from the lightest to the heaviest in the Thumbnail View, from the Sort by list, select Mass.
Use the Properties View to view recommended outcomes in order from most recommended to least.
- To enable the Properties view, on the Explore tab, click Display panel > Properties View
 .
.
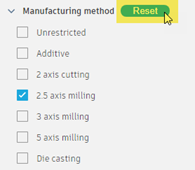
Note that the outcomes in the view are sorted by manufacturing method. The sort order and filters persist from the Thumbnail View. - To remove the filters and view the outcomes for all manufacturing methods and materials, in the Outcome filters pane, go to the Manufacturing method section and click the Reset button. Next, go to the Materials section and click the Reset button.
- To sort the outcomes by recommendation, from the Sort by list, select Recommendation.
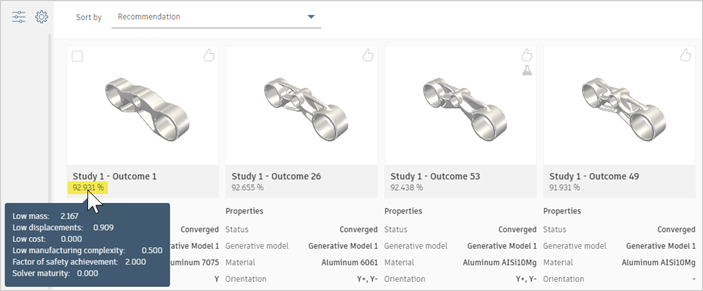
Note: The recommendation engine suggests recommended outcomes based on the specified criteria. The four recommended outcomes are marked with the icon.
icon.
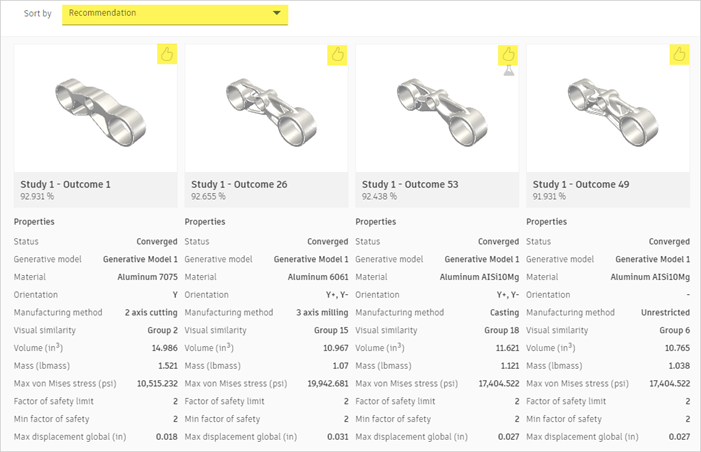
- To see the detailed percentage ranking, place the mouse cursor over the percentage number located under the thumbnail of the first recommended outcome.
- To enable the Properties view, on the Explore tab, click Display panel > Properties View
Use the Scatter Plot view to analyze the outcome distribution in terms of the maximum von Mises stress, mass, and manufacturing method.
- To activate the Scatter Plot View, on the Explore tab, click Display panel > Scatter Plot View
 .
. - To remove the mass filter and view outcomes for the whole range, in the Outcome filters pane, in the Objective ranges section, click the Reset button.
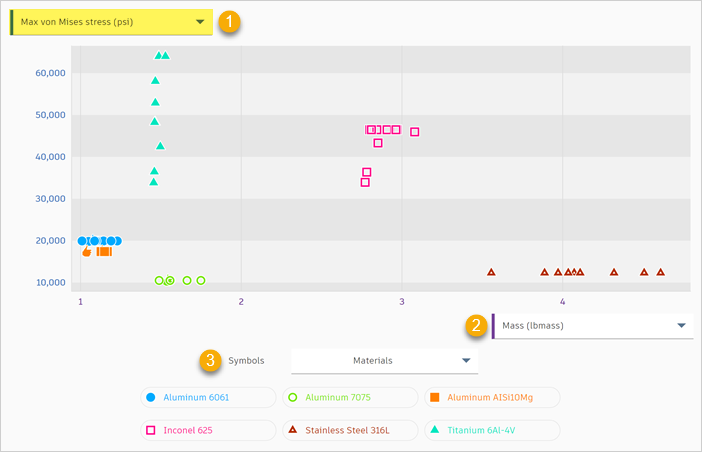
- To view the performance of outcomes in terms of the maximum von Mises stress (1), mass (2), and material (3), expand the Vertical axis properties list (1) and select Max von Mises stress.
- To view the performance of outcomes in terms of the maximum von Mises stress (1), mass (2), and manufacturing method (3), expand the Symbols list (3) and select Manufacturing method.
Note: By default, the Materials option is selected from the Symbols list and colors/shapes of markers are mapped to outcome materials.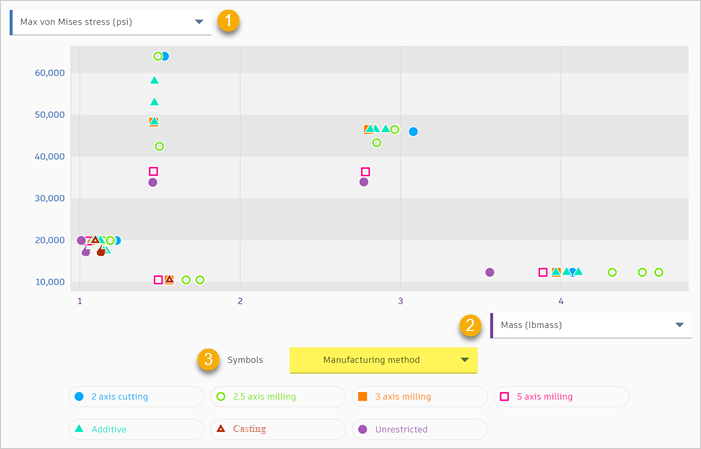
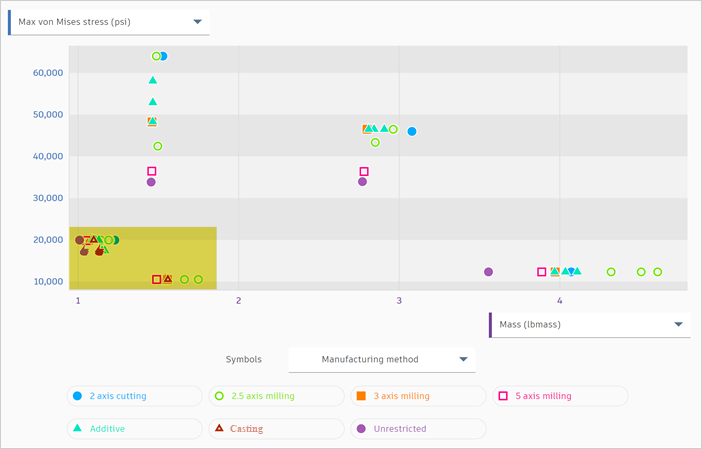
- In the scatter plot, click and drag to zoom in to the area as shown:
- To activate the Scatter Plot View, on the Explore tab, click Display panel > Scatter Plot View
Compare the performance of the outcomes in terms of manufacturing methods in the Comparison View.
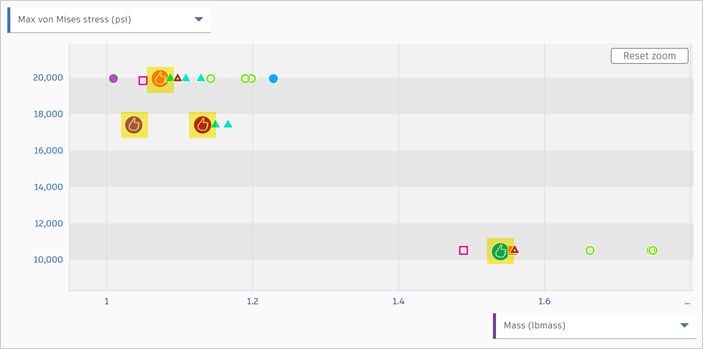
- In the scatter plot, press Shift and click the thumb markers to select multiple outcomes, as shown.
- To open the Comparison View, on the Multiple selection card click the
 Compare button.
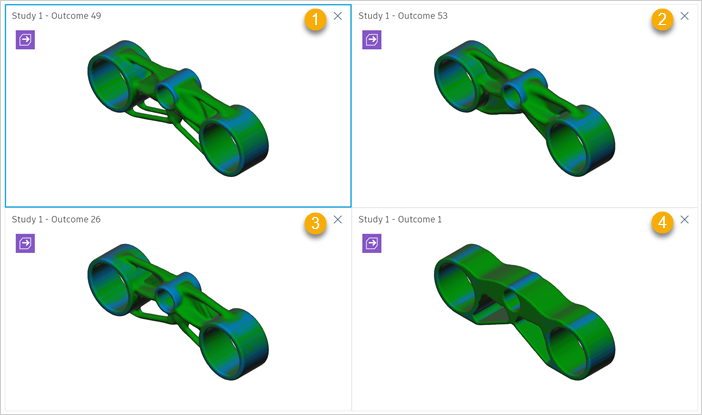
 - To compare the outcomes from different manufacturing methods (unrestricted-1, casting-2, 3 axis milling-3, and 2 axis cutting-4), on the Outcome View tab, click Display panel > Stress View
 .
.
- To remove an outcome from the Comparison View, in the top right corner of the Study 1 - Outcome 49, Study 1 - Outcome 53, and Study 1 - Outcome 26 views, click the
 button.
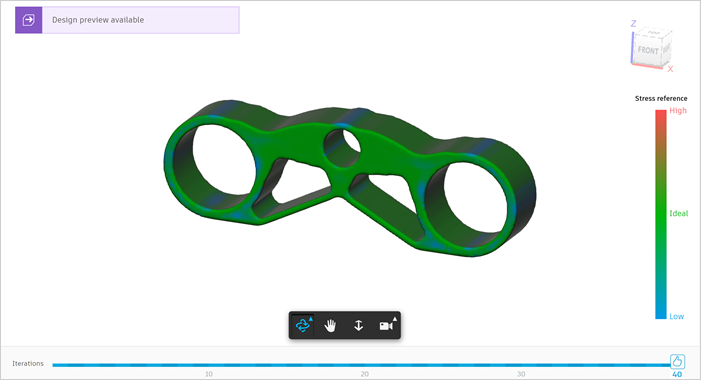
- To label the outcome, on the Outcome View tab, click Tag > Add Label
 .
. - In the Labels dialog, select Easy to Manufacture and click Done.
- To return to the Scatter Plot View, on the Explore tab, click Finish Outcome View > Finish Outcome View
 .
.
- In the scatter plot, press Shift and click the thumb markers to select multiple outcomes, as shown.
View only the outcomes from the Easy to Manufacture label.
- In the Outcome filters pane, mouse over the Easy to Manufacture label, and click the Isolate button.

- In the top-right corner of the scatter plot, click Reset zoom.
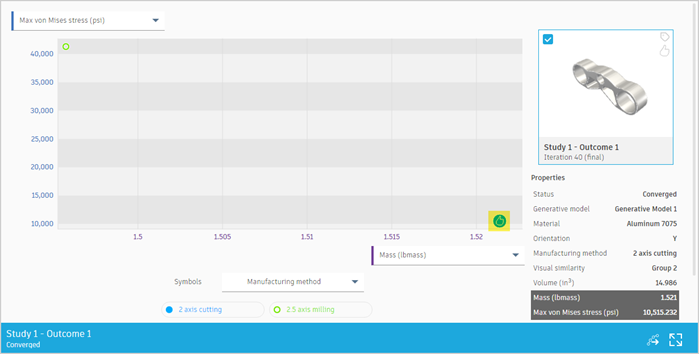
- To view the thumbnail and properties of the selected outcome go to the Properties pane on the right of the scatter plot. Mass and Max von Misses stress properties are highlighted, because they display on the scatter plot axes.
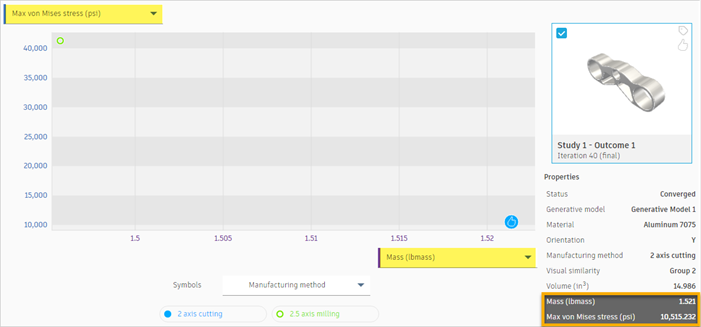
Note: Both outcomes meet our manufacturing requirements. The Outcome 1 for 2 axis cutting has significantly lower stresses and it's recommended, so we will finally choose this one to create a design from it.
- In the Outcome filters pane, mouse over the Easy to Manufacture label, and click the Isolate button.
Select a single outcome in the Scatter Plot View and then create a design from it.
Note: You can use the predefined sample file from the Data Panel: Generative Design Samples > Outcomes > Outcome1_Motorcycle Triple Clamp.- In the Scatter Plot, click Study 1 - Outcome 1.
- To open the Outcome View, on the Outcome card, click
 .
. - On the Outcome View tab, click Create > Design from Outcome
 .
.
In the upper-left corner of the Outcome View, an indicator shows that the design is being prepared.
This takes some time. - In the Job Status dialog, click Close.
- When the new design is ready, in the upper-left corner of the Outcome View, click the indicator.

- In the Design ready dialog, click Open design.
Tip: Alternatively, you can open the design from the Job Status dialog. In the upper-right corner of the Fusion window, click the Job Status icon , expand the Create Design job, and then click Open Design.
The design opens in a new Untitled tab. You can save the design under a new name or create a new generative study. You can also export the resulting geometry for use in other CAD applications.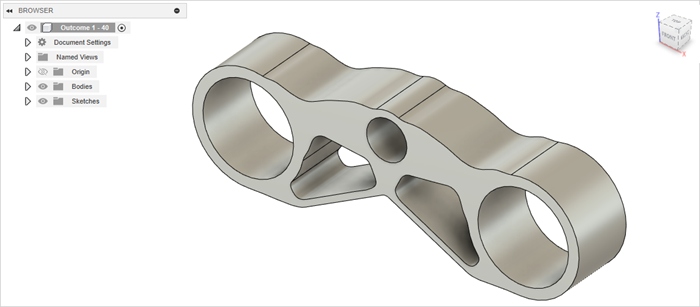
- To return to the Motorcycle Triple Clamp model, in the Document Tab Bar, click the Motorcycle Triple Clamp Tutorial tab.
- To finish the review outcomes, click Finish Explore
 .
.
- In the Scatter Plot, click Study 1 - Outcome 1.
Activity 4 summary
In this activity, you reviewed outcomes in terms of manufacturing methods using the suite of exploration tools.
Additional tips
| Quick Tip: Reviewing Cost Estimates from Generative | Quick Tip: Tagging and Filtering for Organization in Generative Design |