Basic UI elements
Jump to Mobile or Windows 10
When you first open SketchBook Pro, you will see the default UI. For all versions of the app, there will be a canvas and toolbar. The rest of the interface will be slightly different depending on the platform and version you're using. See the sections below to familiarize yourself with the interface and how it works.
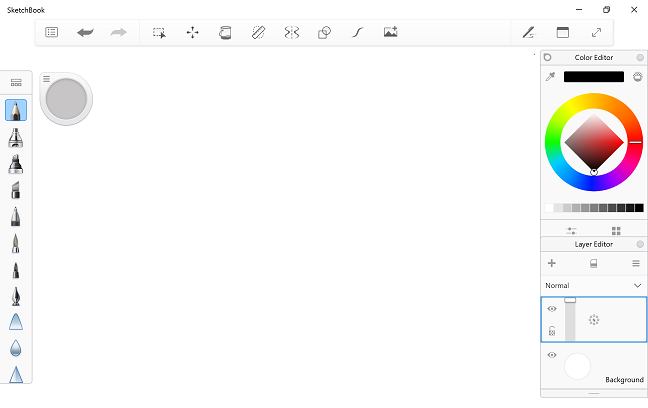
Basic UI elements in SketchBook Pro Desktop
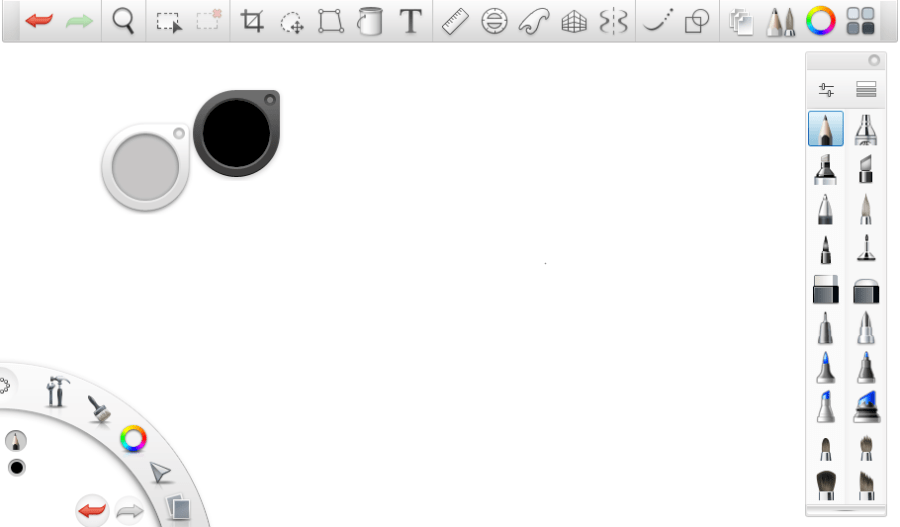
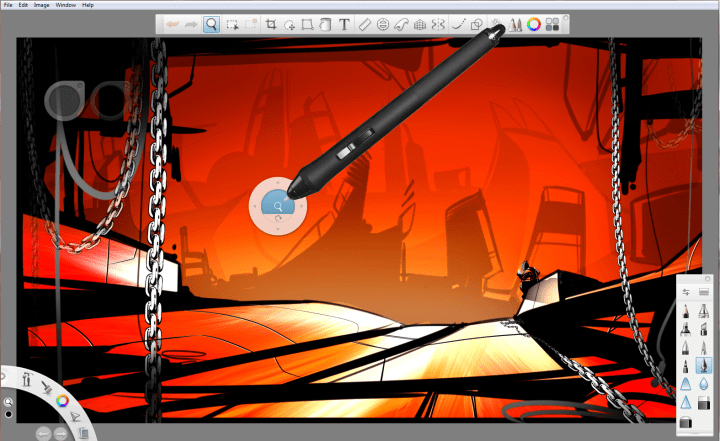
Get started with an introduction to the interface and the most basic interactions. When you open SketchBook Pro, by default, you'll see the canvas, lagoon, toolbar, brush and color pucks, and Brush Palette.
Use hotkey shortcuts and marking menus to access tools and functions quickly. To change your view and navigate around your canvas, hold down the Enter key.
Lagoon tool summary
The Lagoon is the round UI element. By default, it is found in the bottom left corner, though you can change its location. It is a hub for many useful tools in SketchBook Pro. It is driven by gestural movements, just like the Layer Editor. To view the tools in a lagoon marking menu, tap an icon to expose the tools in that category. With your stylus (or right mouse button) down, drag to the tool you want to select. When it’s highlighted, lift your stylus (or release your right mouse button).
Here are the default settings for each category:

The version of SketchBook Pro you're running will determine which tools appear in which marking menu.
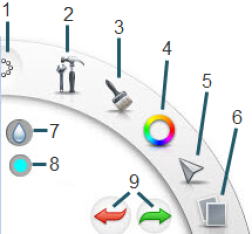
- Interface controls
- View controls, canvas, transform tools, rulers, layers, & vertical & horizontal symmetry
- Brushes & palette
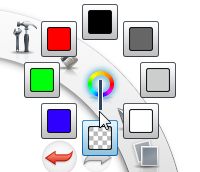
- Colors & Transparent Color
- Selection, editing, & layer transform tools
- Open, Save, New, Next & Previous Image
- Shows current tool
- Shows current color
- Undo/Redo
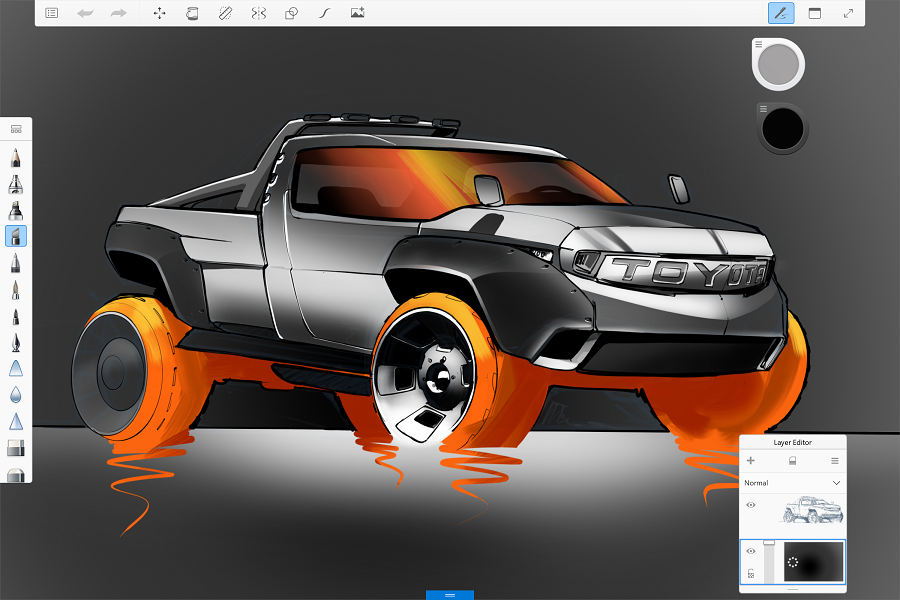
Basic UI elements in SketchBook Pro Mobile
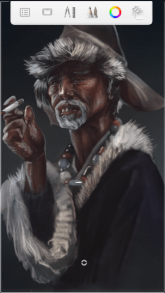
To get the most out of SketchBook Pro, you should become familiar with its basic UI, such as the canvas, toolbar, double puck, and marking menu and corner tools.
You have the canvas, toolbar, double puck, and the marking menu. Once your UI is hidden, you can access all the tools, using the Rapid UI mode.
Marking menu on iPad
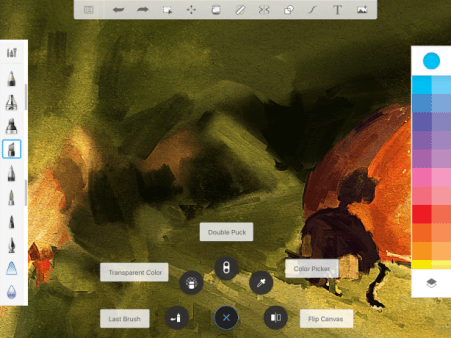
You will see the toolbar, a full brush palette, which includes advanced brushes and the customizable Brush Library, and colors, which accesses the Color Editor, along with the Layer Editor with blend modes, and transparent color.
Marking menu on handheld devices
You will see a toolbar and the marking menu.
Marking menu
Use ![]() (the marking menu) to access an assortment of tools, as well as the corner tools without going to the toolbar. If you are working with the interface hidden, the marking menu provides access to a host of tools without unhiding your interface.
(the marking menu) to access an assortment of tools, as well as the corner tools without going to the toolbar. If you are working with the interface hidden, the marking menu provides access to a host of tools without unhiding your interface.
Within ![]() (the marking menu) are tools for switching between the current and last brush, flipping the canvas, selecting a color from your screen, accessing the Double Puck, and Transparent Color.
(the marking menu) are tools for switching between the current and last brush, flipping the canvas, selecting a color from your screen, accessing the Double Puck, and Transparent Color.
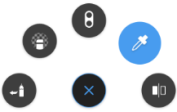
To access these tools even quicker, from ![]() , flick toward the tool’s position.
, flick toward the tool’s position.
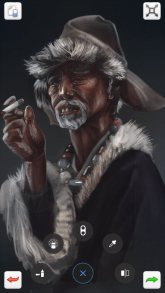
Corner tools
Access a corner tool by double-tapping a corner of the screen.
Tap ![]() , the Corner tools are visible.
, the Corner tools are visible.
The default corner quick tool mappings are:
 (Clear Layer) Top left
 (Fit To View) Top right
 (Undo) Bottom left
 (Redo) Bottom right
If you want to customize your corner tools, see Customizing the corner tools.
Basic UI elements in SketchBook Pro Windows 10
To get the most out of SketchBook Pro, you should become familiar with its basic UI, such as the canvas, toolbar, Brush Puck, and Brush Palette.
Accessing the UI
To access SketchBook ProExtras, Brush Library, Brush Editor, Color Editor, Layer Editor, or reset the app to its default layout, select  UI Toggle.
Getting your pucks back
If the pucks aren't displayed and you'd like to get them back, do the following:
- For the Brush Puck, select UI Toggle > Brush Editor. At the top of Brush Properties, tap
 to switch to the Brush Puck.
 - For the Color Puck, select UI Toggle > Color Editor. At the top of the Color Editor, tap to switch to the Color Puck.
Using Pen Mode
When drawing on your tablet or touchscreen, have you had issues with random marks appearing on your canvas? These are due to the device thinking contact made with the side of your hand or finger was intentional. Turning on Pen Mode will eliminate this.
In the toolbar, when you tap  to enter this mode, it turns off your ability to draw with your finger.
This also eliminates the issue of unwanted strokes appearing. However, you can still use gestures to pan and zoom.
To return to the mode where you can drawing with your finger, tap to exit Pen Mode.