PartMaker/SwissCAM, PartMaker/Turn-Mill, and PartMaker/Turn enable you to define non-rectangular cutting areas (for example, areas of unmachined stock) using stock profile boundaries. Trimming the toolpath to this cutting area reduces air-cutting, which, in turn, reduces machining time.
To use a stock profile to define the cutting limits for a Turning profile group and trim the toolpath to this area:
- Click
 in the Face window toolbar to display the Profile Group Parameters dialog.
 - Specify settings for the toolpath. To use a stock profile to define cutting limits, you must:
- Select Turning from the Strategy drop-down list. Cutting limits are not available for other toolpath strategies.
- Select the Roughing check box in the Operations area of the dialog. Stock profiles are applicable only to roughing operations.
- Select Open from the Profile Shape drop-down list. Stock profiles must be open on one side.
- Select To Stock Profile from the Toolpath Trimming drop-down list to specify that you want PartMaker to use the stock profile to set the cutting limits for the toolpath. PartMaker also updates the Cutting Limits Defined By drop-down list to select Stock Profile Boundaries to reflect your selection.
- Complete the remaining settings on the Profile Group Parameters dialog, then click Apply to create the profile group.
- Click Close to close the dialog.
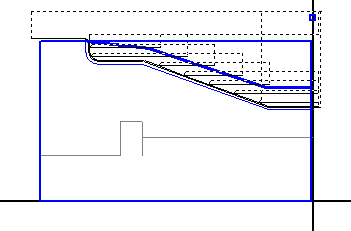
- You can now create two profiles for the group: the part profile and the stock profile. By default, PartMaker uses the first profile you create as the part profile, and the second profile as the stock profile. For example:
- Click
 to create a profile for the part profile, then click
  and define the profile on a contiguous piece of geometry:
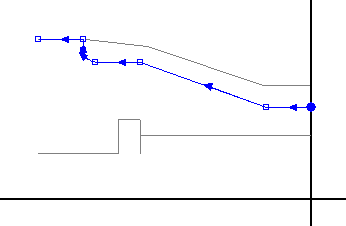
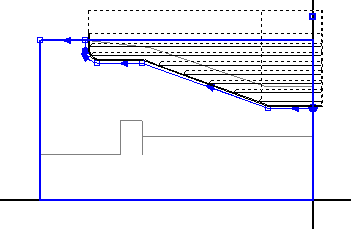
- Click to create profile for the stock profile, then click and define the profile on a contiguous piece of geometry:
The stock profile must not intersect with the part profile.
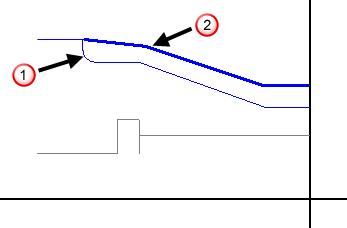
PartMaker displays both profiles in the profile group color and uses a:
- thin line for the part profile (see
 )
) - thicker line for the stock profile (see
 )
)
To change whether a profile represents a part profile or stock profile, double-click a profile line to display the Profile Properties dialog and change the profile type.
- Click
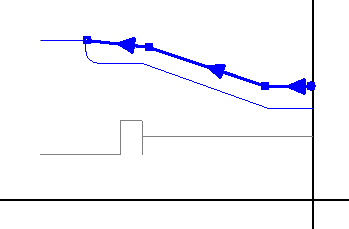
- To verify the toolpath for the profile group, select the profile group in the Job Explorer and select Part Features > Verify Work Group Tool Path. PartMaker verifies the toolpath. The following example compares the toolpaths created when a stock profile defines the cutting limits and when a part profile defines the cutting limits:
Cutting limits defined by the part profile:
Cutting limits defined by the stock profile: