
The
Op List
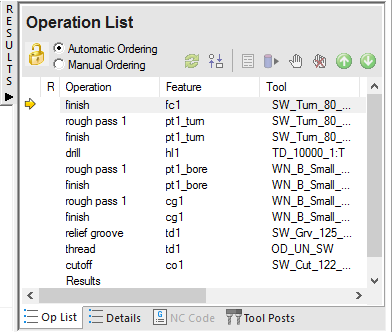
tab in the
Results window shows all of the operations needed to machine the features. A yellow warning
 sign next to an operation indicates a potential problem with that operation. In this case, if you see any warnings ignore them.
You can control the automatic ordering of operations by using either rules or operation templates. The 2.5D Milling tutorial looks at using rules.
This section changes the automatic ordering by modifying the Turn Operation template.
To modify the template
- Select the Automatic Ordering option on the Op List tab. This ensures the automatic ordering rules are applied to the operations.
- Change the automatic ordering to group together the operations which use the same tool.
- Click the
Ordering options
 button.
- In the Automatic Ordering Options dialog, select Use template.
- Click Edit template.
- Click the
Ordering options
- In the
Feature Order dialog:
- Select Rough OD Turn.
- Click
 until
Rough OD Turn
is below
Finish ID Turn.
until
Rough OD Turn
is below
Finish ID Turn.
- Click OK to close the Feature Order dialog.
- Click OK to close the Automatic Ordering Options dialog.
- Simulate the part.
- Click Home tab > Simulation panel > Sim mode > 3D to change the simulation type.
- Click
Play
 on the Simulation toolbar to start the simulation.
Notice that the OD roughing and finishing now happen after the hole is drilled.
- Click
Stop
 to end the simulation.