
About Drawing Options
Use the Mask Setup menu to access mask drawing options.
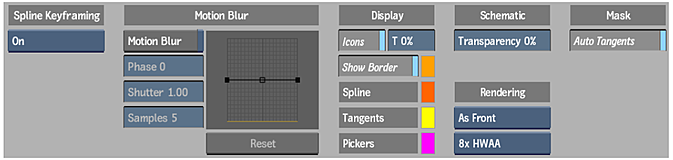
Spline Keyframing box
Determines under what conditions keys are set, and for which parameters, when you are animating a garbage mask spline. See Animating Masks Using Spline Keyframing.
Motion Blur settings
Controls motion blur applied to garbage masks that can be used to match the movement of objects in a clip. See Applying Motion Blur to Garbage Masks.
Icons button
Globally displays or hides the garbage mask splines and axes.
Transparency field
Sets the transparency for the garbage mask splines and axes.
Show Border button
Displays the Softness Offset wireframe border, defined in the Shape menu.wireframe:in garbage masks
Show Border colour pot
Sets the colour for the Softness Offset wireframe.
Spline colour pot
Sets the colour for the wireframe of the garbage mask.
Tangents colour pot
Sets the colour of the garbage mask tangents and vertices.
Pickers Display colour pot
Sets the colour of the Tracer's pickers. This element is only available when accessing the Garbage Mask Setup menu from the GMask node.
Schematic Display Transparency field
Sets the transparency of the nodes in the garbage mask schematic.
Rendering box
Select the rendering method.
Hardware Anti-aliasing Sample box
Select a hardware anti-aliasing sampling level to accelerate edge anti-aliasing with no performance penalty. The graphics hardware automatically renders the image at full speed with approximately the equivalent of up to 32 samples of anti-aliasing (depending on your graphics card and project graphic bit depth). Hardware anti-aliasing also gives anti-aliasing during normal interaction instead of only while rendering.
Auto Tangents button
Positions a tangent for each vertex set to create a smooth curve between the vertices. When Auto Tangents is disabled, the tangents are positioned under the vertex, resulting in straight lines between vertices. When you draw freehand segments in a mask with Auto Tangents off, vertices are added with broken tangents, allowing the mask to follow your cursor movement.