
Using the Markers view
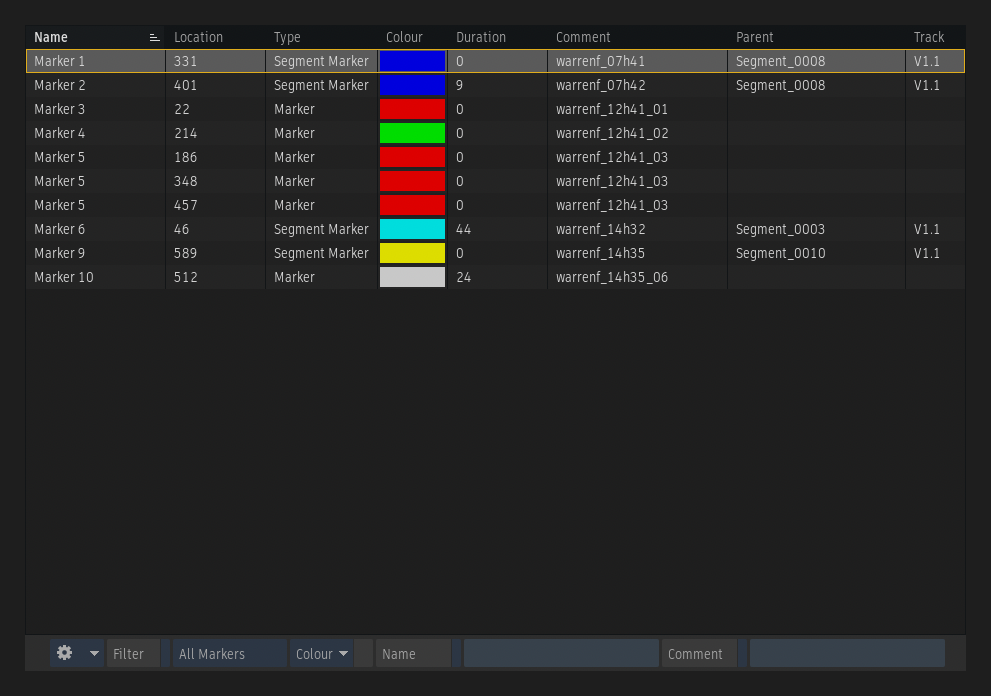
The Markers view displays all of the Markers and Segment Markers set on the clip currently displayed in the Player, in a table. It can be accessed from the Player Options drop-down button or by using the Toggle Markers Panel keyboard shortcut (assigned to Ctrl+5 by default in the Flame keyboard shortcuts profile).
Columns
From the Markers view, you can organize your markers, by naming them, assigning them a colour and a comment. The following information is displayed in the Markers view:
- Name: Displays the marker's name.
- Location: Displays the record frame (in frames or timecode) on which the marker is set.
- Duration: Displays the duration of the marker
- Type: Displays whether the marker is a marker or a segment marker.
- Colour: Displays the marker's colour.
- Comment: Displays the content of the marker's comment.
- Parent: Displays the name of the segment on which a segment marker is located. This applies only to Segment markers.
- Track: Displays the track on which a segment marker is located. This applies only to segment markers.
Customize the Display
The table can be customized, by choosing which columns are displayed or hidden. Only the Name column is mandatory and cannot be hidden. The columns can also be re-ordered as needed.
To select the columns to show:
- Open the context menu of the Table by right-clicking its header.
- Select or deselect a column in the context menu.
To re-order the columns:
- Grab a column by clicking its header
- Drag the column to a new location.
Apply a Filter to the List
Below the table are the Filter options, which enable you to only display certain markers, based on the filtering criteria.

- Filter: Enables the filtering within the table.
- Type: Select whether to the display the Segment Markers, Markers, or All Markers.
- Colour: Enables the display of just the Markers of a selected colour. The drop-down menu’s content is dynamically updated and only displays the colours used in the selected clip.
- Name: Enables the display of Markers of a particular name. The * character can be used as a wildcard.
- Comment: Enables the display of Markers containing a particular comment. The * character can be used as a wildcard.
Sort Columns Content
The content of any column can be sorted.
To sort the content of a column:
- Select the column
- Click the sorting icon to apply an ascending sort, descending sort, or to disable the sorting.
Modify Attributes
These attributes can be modified from the Markers view.
| Attributes | Modify by: |
|---|---|
| Name | Clicking on the name of a selected marker. |
Location  |
Dragging in the cell or by clicking on it to open the calculator. |
| Colour | Clicking on the colour of a selected marker to open the Colour Picker. |
| Duration | Dragging in the cell or by clicking on it to open the calculator. |
| Comment | Clicking on the comment of a selected marker. |
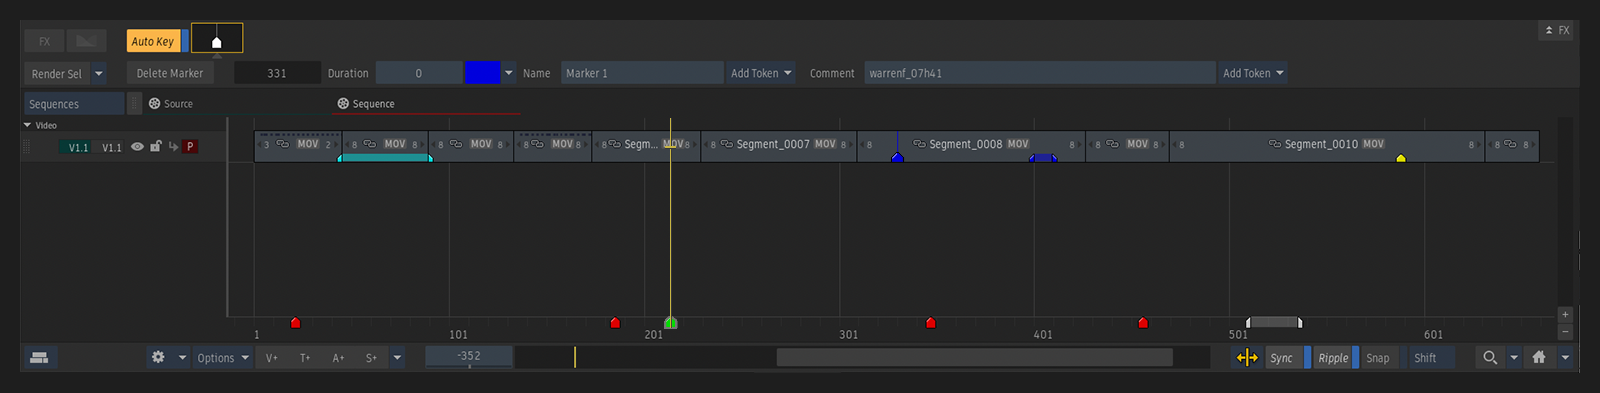
Navigate in the Clip
You can jump to a marker by double-clicking it inside the list. The Player dynamically updates to display the frame corresponding to the selected marker and the Timeline positioner parks itself on the selected marker/frame. This can also be achieved by using the Jump to Marker option in the gear and context menus.
Gear and Context Menus
The following operations can be performed on selected markers using the gear and context menus.
Export Markers... / Import Markers...
Use the Export Markers... option to export the content of the Markers list in an XML or CSV file. Use the Import Markers... option to import the content of an XML or CSV file into the Markers list.
For more information, see Export and Import Markers.
Jump to Marker
Make the clip positioner jump to the frame corresponding to the selected marker,
Select Segments
Use the Select Segments associated to Selected Markers and Select Segments associated to All Markers options to select Timeline segments associated to Markers. When these options are applied:
- To a Segment Marker, the corresponding timeline segment is selected.
- To a Marker, the timeline segments from the bottom video track of the primary version that are covered by the Marker are selected.
Set Duration to Segment Length
Change the duration to the one of a segment.
- Markers: The duration is set to the duration of the segment on the bottom track of the primary video version.
- Segment Markers: The duration is set to the duration of the timeline segment.
Lock / Unlock Location
The location of a Marker can be locked using the Lock Location option available in the Marker's context menu. This option is useful to ensure that a Marker is not moved by mistake while scrubbing the Timeline.
The lock only affects the location of the Marker. All other attributes can be modified and operations such as delete can still be performed.
To unlock a locked Marker, select the Unlock Location entry available in the same places as the Lock Location option.
Select All / Deselect
Use Select All to select all Markers in the list. Use Deselect to deselect the selected markers.
Delete All / Delete Selected
Use Delete All to delete all Markers in the list. Use Delete Selected to delete the selected markers.
Copy / Paste
Paste Markers to another frame on the clip or onto another clip using the Copy and Paste Markers options.
Burning-in Marker Information to Clips
You can display the content of Markers over images using the Player's Metadata Overlay, or burn it in the image using the Burn-in Metadata Timeline FX.
This is achieved by adding the Marker layer to the Information list of the Burn-in Metadata tool.
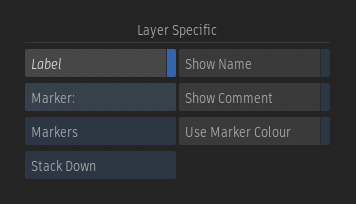
Once "Marker" is selected, you can do the following:
- Select whether to burn-in the content of the Markers or Segments Markers. You cannot burn-in both at the same time, on the same layer.
- Enable the Show Name and Show Comment buttons to burn-in the Marker's Name, Comment, or both.
- Enable the Use Marker Colour button to burn-in the metadata in using the colour of each marker in the clip.
You can display more than one marker at once in a Burn-in Metadata layer. Lines are automatically added to the Marker layer when multiple Markers or Segment Markers are available at the same time. It is possible to control whether the layers are added towards the top or the bottom using the Stack Up and Stack Down options.