
Project-Based Colour Settings
Colour management is configured on a per-project basis and consists of the following:
- An OCIO source config file
- Project-specific overrides to the OCIO config file
- Application-specific colour management settings
- Workstation-specific colour management settings
Once the colour settings for a project have been configured, they may be used when creating new projects using the "Copy from Another Project" option in the OCIO Config menu of the Create New Project dialog box.
The OpenColorIO Config File
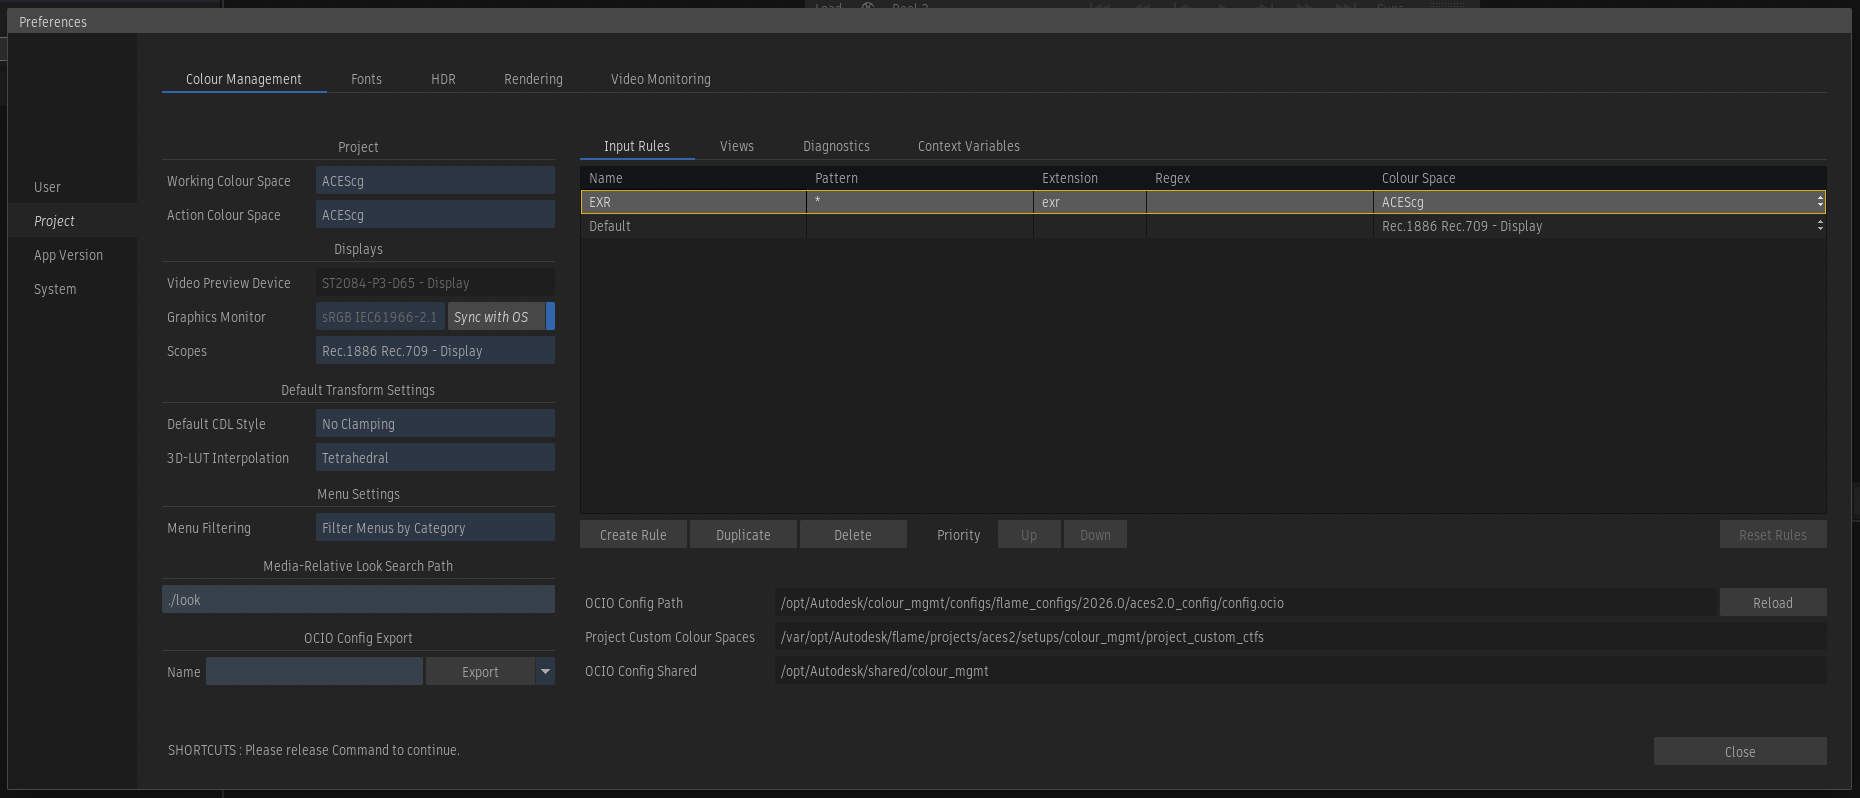
The OCIO config file is specified when you create a project. You may check which config is used for an existing project by looking at the OCIO Config Path in the Colour Management Preferences. This is read only, to change it you must go into the Project Management tool. See: Selecting an OCIO Config.
Project-Specific Config Overrides
The application allows you to make adjustments to the OCIO configuration and these are stored as a seprate set of overrides rather than modifying the source config. These are stored under the project in the directory: <project_home>/setups/colour_mgmt.
This directory contains:
- A config.ocio soft link to the source OCIO config file. In the case of projects that have been migrated from earlier versions of the application, this will be an actual config file rather than a link.
- A merge.ociom file that describes the config merge process.
- A project_custom_config.ocio file which is an OCIO config file fragment (an incomplete config file) that stores the overrides.
- A project_custom_ctfs directory that stores any user colour spaces or user view transforms that you create.
- A settings.cfg file that contains several application-specific preferences.
- A transforms directory where you may store any other colour transforms or LUTs that you want to keep with project so that they are archived with it.
The settings.cfg file is where the following items from the Colour Management Preferences are stored:
- 3DLutInterpolation: The default 3D-LUT Interpolation (tetrahedral or trilinear) which is used for any LUT or colour transform files you load that do not specify an interpolation.
- CDLStyle: The default CDL Style (No Clamping or ASC v1.2) for any CDL or colour transform files you load that do not specify a style.
- ColourSpaceCategoryFiltering: This controls whether the list of colour spaces shown in menus is filtered by attributes such as category and encoding.
- LockedPolicy: This controls whether the colour related preferences and settings are locked or editable via the application's user interface.
- MediaRelativeLookSearchPath: The Media Relative Look Search Path controls where the application searches for look transforms when using the Look tool. See Automatic Looks in Timeline FX.
The default values of these settings may be configured for new projects by editing the file: /opt/Autodesk/cfg/default_colour_mgmt_settings.cfg.
This file may be moved to a different path by editing the default_colour_mgmt_settings entry in the file: /opt/Autodesk/cfg/<flame_version>/sysconfig.cfg.
The settings.cfg file is saved alongside any exported configs to facilitate their use when creating new projects.
OCIO Config Merge Process
The application needs to augment the OCIO config in two ways:
- It allows users to make edits to the config from the user interface rather than requiring the expertise of editing the OCIO config file directly.
- It requires a minimal set of "core" colour spaces to be present in order to enable various features, such as the ability to import camera raw footage.
This happens by merging two configs into the config specified by the user. This is done only to the in-memory version of the config, not the one on disk. To see the result of the merge process, you may export the config from the Colour Management Preferences.
Merging the Core Colour Spaces
The application merges this config into the user's source, or base, config: /opt/Autodesk/colour_mgmt/configs/flame_internal_use/flame_core_config/config.ocio.
Each colour space is compared to the colour spaces already present in the base config. If a colour space has the same name, the one from the base config is used. If a colour space is recognized as a duplicate (even if it has a different name, or a different reference space), rather than adding the colour space, its name is added as an alias to the existing colour space. The goal is that there should only be one version of each colour space, with the one from the user's source config taking precedence.
Any colour spaces that are not already present and must be added show up in a "Flame" sub-menu.
Merging the Project Overrides
If the user has not made edits in the Colour Management Preferences, the project_custom_config.ocio is just a minimal config outline that will have no effect. Once edits are made, sections of the config will start being populated. For example, edits to the Input Rules will populate the file_rules section. Any sections that have been populated will override the corresponding sections of the source config.
Use of OCIO Config Roles
An OCIO config may contain a set of "roles" that are hints to applications about which colour spaces should be used for various purposes. For example, the "scene_linear" role is used to specify the scene-linear colour space to be used for compositing. The following roles are used in Flame Family products:
- scene_linear: This is used for the default project working space.
- rendering: This is used as the default Action working space. This is also the default colour space used to convert Substance generated textures, as well as textures brought in via Action's Import node.
- aces_interchange: This is used by the config merge process and when adding user colour spaces or view transforms.
- cie_xyz_d65_interchange: This is used by the config merge process and when adding user colour spaces or view transforms.
Exporting a Config
You may export the OCIO config used by the application from the Colour Management Preferences Export menu. The resulting OCIO config contains the project-specific config overrides including user colour spaces, the custom input and viewing rules, and the colour spaces from the Flame core config.
The default location when exporting a config is: /opt/Autodesk/shared/colour_mgmt.
The shared directory may be moved to a different path by editing the shared_folders entry in the file: /opt/Autodesk/cfg/<flame_version>/sysconfig.cfg.
When a config is exported, some modifications are made to the search_path which OCIO uses to locate external files. Symbolic links are created for some paths in the exported directory and these are converted to relative paths in the config.ocio file.
Exporting a Config as an OCIOZ archive is one of the menu options. This is essentially a zip file of the config and its external files, such as colour transforms or LUTs. Applications generally allow using an OCIOZ in place of a regular config.
Locking the Colour Settings
You have the option of exporting a colour config as locked. When you do so, elements from the Colour Management Preferences won't be editable from the application's user interface.
To export a configuration as locked, select the "Export as Locked" option using the drop-down menu to the right of the Export button.
To edit a locked colour config you can either:
- Edit the files in a Shell / Terminal.
- Set the
DL_UNLOCK_CM_POLICYenvironment variable before you start the application.
A project's config may be locked or unlocked by editing the settings.cfg file under the project's setups/colour_mgmt directory and setting the LockedPolicy to true or false.
Note that even if a config is locked, it does not prevent changing to a different OCIO config in the Manage Project dialog box.
