
Transcode Format Settings
![]()
(a) Fit Method option box (b) Selector
Camera button
Enable to load the original RED media values as set by the RED camera. When the RED media is initially imported, this button is automatically enabled. When you change one of the transcode options, this button is automatically disabled to show that these settings are no longer the original RED camera settings.
RSX/RMD button
Enable to load the values from the latest version of the RSX/RMD file. When a clip is opened in RED ALERT!™, an RSX/RMD file is saved alongside the R3D file, using the same filename. It contains the additional metadata added to the R3D file within RED ALERT!.
Once you change one of the Lustre transcode options, this button is automatically disabled to show that these settings are no longer the original RSX file settings.
Scene button/Shot button
Enable Scene or Shot to transcode either the entire scene or the shot that is selected in the Storyboard.
Heads & Tails button
Enable to make sure the heads and tails from the RED media are kept when it is transcoded.
Handles button and Handles field
Enable the Handles button when you want to transcode fewer heads and tails than what is currently showing in the footage. Enter a value in the Handles field to determine how many heads and tails to transcode. This option can only be used if the Heads & Tails option is enabled.
Transcode button
When the format, colour, and output settings have been established, click this button to send the job to the Backburner Manager and transcode the RED media to a DPX file.
Resize button
When enabled, the resize settings (i.e., the W and H fields) are implemented when the RED media is transcoded.
W/H field
Enter the desired resize setting. Note that a resize setting that is not directly proportional to the size of the original media takes longer to process.
Fit Method option box
To use a different aspect ratio during a resize, select one of the following fit method options to be applied to the exported clip.
| Select: | To: |
|---|---|
| Fill | Fit the source, width, and height into the destination frame. If the source and destination frames do not have the same aspect ratio, the image can become distorted. This is the default option. |
| Crop Edges | Fit one edge of the source into the destination frame without stretching or squashing the frame. Excess parts of the source frame after resizing are cropped. If the source, after the one edge is resized, is wider than the destination, its overhanging left and right edges are cropped. If the source is taller than the destination, the upper and lower edges are cropped. |
| Letterbox | Fit the source to the destination frame without squashing or stretching it, and without cropping the source. If the source is wider than the destination, black bars fill the top and bottom of the destination frame. If the source is narrower than the destination, black bars fill the right and left sides of the frame. If the source is narrower than the destination, black bars fill the right and left sides of the frame. In all cases, the entire source frame is contained within the destination frame. |
| Centre/Crop | Fit the source image, centred, over the destination frame. If the source is larger than the destination, it is cropped. If the source is smaller than the destination, it is surrounded by a black border. |
Filter option box
Select the filter option to determine the quality of the interpolated resize result.
| Select: | To get: |
|---|---|
| Bicubic | Very good results for resizing soft-looking images. Use to sharpen the image. This is the default option. |
| Mitchell | Best results when resizing a clip to a higher resolution. |
| Triangle | Moderate results with little processing overhead. |
| Impulse | Quick, low-quality results. |
| Lanczos | Best results when resizing a clip containing a variety of patterns and elements to a lower resolution. It is the most complex, with the longest processing time. |
| Shannon | Excellent results when resizing a clip to a lower resolution. Very similar to Lanczos, but results are a little softer. |
| Quadratic | Good results for resizing simple images with straight edges. Similar to Gaussian, but with more blurring. Use to soften the image. |
| Gaussian | Excellent results when resizing a clip with no patterns and a lot of straight edges to a lower resolution. Useful for softening some detail. |
ProRes Full Range Media
QuickTime media files encoded with Apple ProRes 4444 generated from cameras and field recorders are Legal Range. But we have started to see Apple ProRes 4444 generated by color grading softwares but with Full Range media. You can specify whether the clip is Legal or Full Range with the YUV Headroom option:
Image / Transcode / Format Settings / YUV Decoding and select Include YUV Headroom for Full Range.
YUV Headroom is a Preprocessing option that can be changed after import, from Image / Transcode / Format Settings / YUV Decoding.
YUV Decoding
The YUV Decoding box allows you to select the YUV colour space used by the clip to import. Because Lustre works in the RGB colour space, it needs to translate YUV information into RGB. This setting ensures that the right decoder is used for this. The Auto setting selects the colour decoder based on the resolution of the clip. Options are:
- Auto
- Rec601
- Rec709
- Rec2020
The Auto options uses Rec601 for standard definition clips and Rec709 for everything else. Specifying the wrong colour space results in colours that are off.
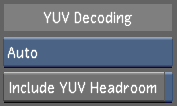
Include YUV Headroom
Enable to include YUV headroom on import for QuickTime and MXF files.
Scale to Full HD
Enable to scale MXF P2 & XDCAM HD narrow content to Full HD resolution on import.
Debayering Hires/Proxy option box
Select the level of quality required from the debayering algorithm. Higher resolutions take more time to process. Select one of the following options for the full or proxy footage:
- Full
- Half Premium
- Half Good
- Quarter
- Eighth
Bit Depth option box
Select the required bit depth. Your options are:
- 12 bit
- 16 bit fp
Detail option box
Select the level of detail extraction required. Your options are:
- Low
- Medium
- High
OLPF Compensation option box
Select the level of Optical Low Pass Filter compensation to use. The OLPF is a type of sharpening used to compensate for the optical anti-aliasing filter, which can induce softening of the image during recording.
Noise Reduction option box
Select the level of noise reduction applied to the debayered shot.
HDRx Settings
Select the HDRx Exposure options.
Exposure option box
Select the exposure options of your HDRx media.
| Select: | To: |
|---|---|
| Primary Exposure | Select the main exposure of the R3D file |
| Highlight Exposure | Select the second exposure of the R3D file. |
| Blend Exposure | Blend the values between the two exposures to create a single image for grading. This option uses both video tracks of their R3D file. Playback performance may be altered. |
| Magic Motion | The new HDRx merging option provided by RED. This blending algorithm is used to composite tracks A and X of an HDRx clip. |
| High Dynamic Range | Convert the two exposures into a 16-bit half-float image. When this option is selected, the Debayering / Bit Depth option is automatically set to 16-bit fp and the Gamma Curve setting is set to Scene Linear (16bit fp). |
| RMD | Define the blending options from the RMD. If there is no RMD, the application defaults to using the A track. |
Blend slider
Set a value to blend the two exposures of a RED HDRx clip.With HDRx Settings set to Blend Exposures, this field behaves like the blend in REDCINE-X. The blend operation is a blend of the two exposures: -1 shows only the Highlight (X frame), 1 only the Primary (A Frame), and 0 a 50-50 mix. With HDRx Settings set to High Dynamic Range, Blend also attenuates the artefacts created by scene motions. Set to 1 unless you are troubleshooting motion artefacts.
Exposure Offset slider
Set how much greater the Primary exposure was compared to the Highlight exposure, in units of stops. Only available when HDRx Settings box is set to High Dynamic Range. The Exposure Offset should be set to match the setting on the camera for how many stops separate the Primary and Highlight tracks. This is typically 2 or 3 stops. Enter the same value used to record the footage or you will get bad results.
Highlight Threshold slider
Set the threshold when pixels from the Highlight exposure are used instead of the over-exposed pixels from the Primary exposure. Only available when HDRx Settings box is set to High Dynamic Range. Set Highlight Threshold last because import options such as ISO or FLUT lighten or darken the image. Too high and you get clipping (often including a magenta-coloured cast), too low and the midtones and shadows have noise leaking in from the Highlight track.
Offset From File button
Enable to apply the exposure offset embedded in the file's metadata rather than setting a value manually.
Selector
Select the parameters within the respective list to copy the settings from one shot to another. See Copying Parameters with the Selector.