
- Select the basic Sculpt tool from the Sculpt Tools tab.
- Click-drag the cursor across the surface of the sphere for one short stroke.
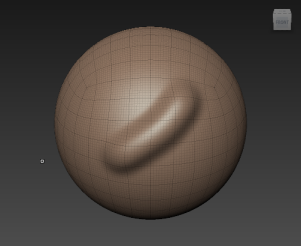
Your sculpt stroke moves the affected vertices on the model slightly outwards on the model, creating a ridge.
Note: You can press Ctrl + Z to undo a sculpt stroke immediately. - Press the Ctrl key and perform another sculpt stroke on the sphere.
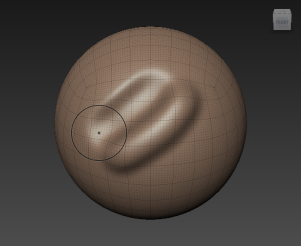
This time the affected vertices are moved inwards in relation to the polygonal mesh, creating a trough.
- Experiment with the size and strength of the sculpt brush using the following keyboard shortcuts:
Tool Property
Keyboard shortcut:
Action/Results
Size B + drag A circle surrounding the cursor changes size depending on the direction you drag, indicating the region of influence of the tool. Strength M + drag A vertical line above the cursor changes length depending on the direction you drag, indicating the change in tool strength. Note: You can also adjust the Size and Strength of a selected tool using the Properties window.
For more information, see Sculpting overview.
 Previous lesson
Increase the resolution of a model
Previous lesson
Increase the resolution of a model
|
Next lesson
Sculpt using layers and stencils

|