
To specify advanced creation options when creating a surface using the Fill-in option, click Advanced on the Smart Surfacer dialog to display the Fill-in Surface Options dialog.
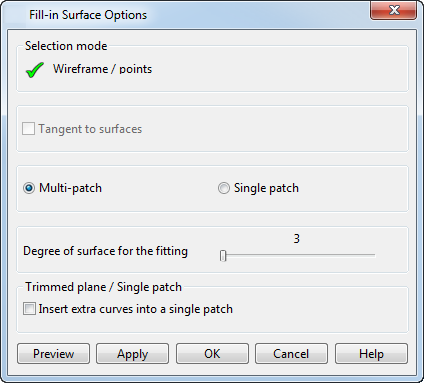
Use the options on the dialog as follows:
Selection mode
- Wireframe/points — Select the wireframe or point objects to define your surface
- Tangent to surfaces — This option is available when one of the selected wireframe objects is a composite curve with dependencies on an underlying surface:
- For a non-planar composite curve with dependencies, the fill-in surface is tangent continuous by default.
Deselect the Tangent to surfaces option on the Fill-in Surface options dialog to produce a fill-in surface that is non-tangent continuous.
- For a planar composite curve with dependencies, the fill-in surface will be non-tangent continuous by default.
Select the Tangent to surfaces option on the Fill-in Surface options dialog to produce a fill-in surface that is tangent continuous.
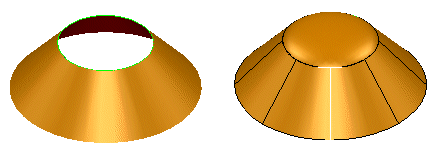
The area is filled with multiple surfaces if a single surface would be naturally creased.
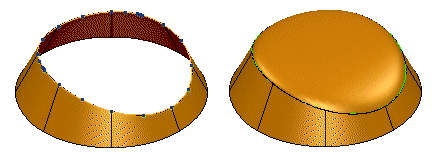
In the example below, we will add a fill in surface.
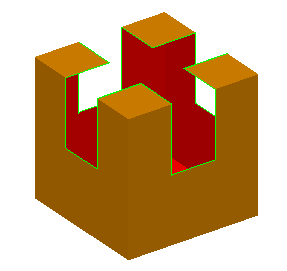
The result is shown below.

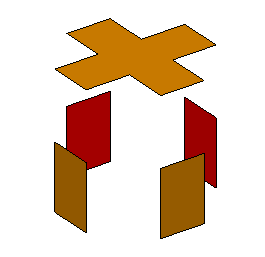
The command creates the following surfaces.
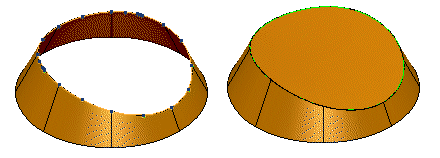
This only works when the area to be filled can be divided into a central continuous region
 with neighbouring continuous regions
 .
.
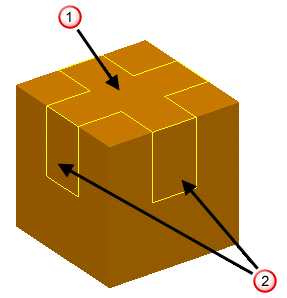
It includes the case where the central region has only one neighbouring region.
- For a non-planar composite curve with dependencies, the fill-in surface is tangent continuous by default.
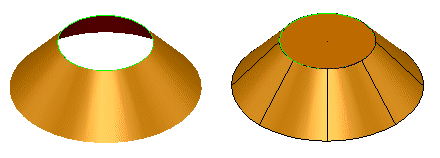
- Multi-patch / Single patch — Creates a single or multiple patch surface. A single patch surface
 is made of only two laterals and two longitudinals, whereas a multiple patch surface
 can have many laterals and longitudinals.
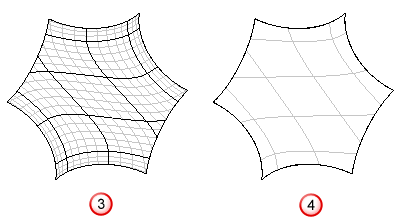 Note: The Single patch option is generally better for internal smoothness and the Multi-patch option for tangent continuous fill-ins. The Multi-patch option is usually quicker and fits the wireframe more accurately than the Single patch option.
 - Degree of surface for the fitting — Change the degree of the new surface. The value depends on your selected objects and what you want the resulting surface to look like. For high values, the surface:
- is flexible;
- fits the selected objects more accurately;
- may have ripples.
For low values, the surface:
- is more rigid;
- flatter;
- may not fit the selected objects accurately.
- Insert extra curves into a single patch — If the surface is a trimmed plane or a single patch, inserts a lateral and a longitudinal at the mid-points of the bounding curves.
Note: You must select the Draw continuous interior laterals on NURBS option on the Surface page of the Options dialog to see the interior laterals and longitudinals on a NURB surface.
- Preview — Displays the surface created using the current settings in the dialog. You may continue to change the settings in the dialog until you are satisfied with the previewed surface.
- Apply — Saves the surface. The dialog remains on the screen for you to select more objects and continue creating surfaces.