
Use this view to manage inserted images and their color maps.
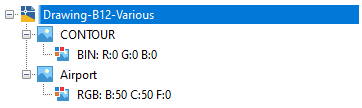
As shown in the following figure, the tree view displays two object types:
![]() Image insertion
Image insertion
![]() Color map
Color map
If you add two or more insertions of the same image, digits are appended to the image name, such as View:1, View:2.
Right-click on the drawing to insert another image or refresh the display. Insert opens the Insert Image dialog box.
Right-click on an image insertion to see a menu with the following options:
- Properties. Shows the AutoCAD properties of the insertion.
-
Edit Color Map. Opens the dialog box for editing the color map for this insertion, such as: Select Color for a bitonal image, Image Adjust for a grayscale or color image.
Oyher options include: Palette Assignment Color Map dialog box for a DEM image or Band Assignment Color Map dialog box for a multispectral image.
- Zoom To. Zooms your display to show the image at full extents.
- Hide/Show. A toggle control that hides or shows the image.
- Erase. Erases the insertion and its color map.
- Write. For eligible image types, displays a sub-menu where you can save or export the image.
- Move Forward, Move Back, Bring To Front, Send To Back. Moves the image within the display order if the drawing contains multiple images. You can also do this directly in the tree by clicking an image name and dragging it up or down the tree.
- Refresh - rebuilds the tree to show any recent changes.
Right-click on a color map to edit it or refresh the display.
Item View
This secondary pane displays metadata for the object selected in the tree view. For some objects, you see a simple properties table. When you select a drawing, you see a multi-column table with an entry for each inserted image. You can change the displayed columns and their positions in this table. For more information, see Modifying the Item View Layout.